Tomatoes are among the most satisfying plants to grow at home. With their bright red color, juicy texture, and refreshing flavor, nothing compares to the taste of a freshly picked homegrown tomato. But what if you don’t have a large garden, big pots, or an open terrace? Can you still grow tomatoes successfully?
The answer is a big, juicy YES!
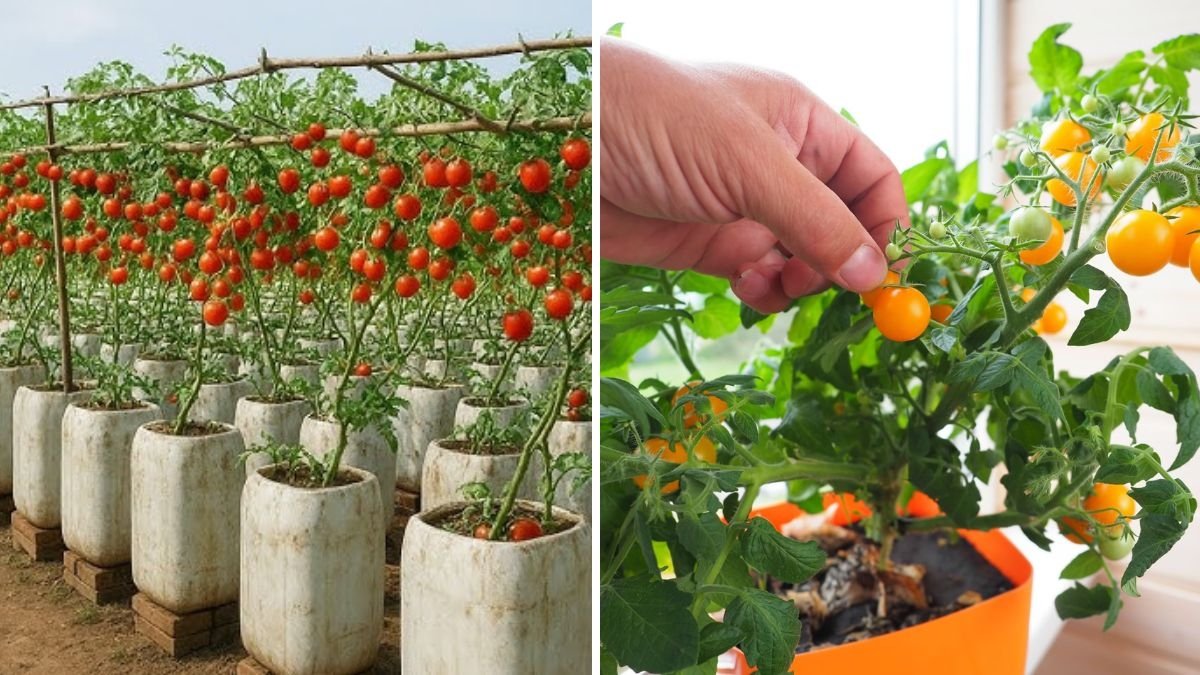
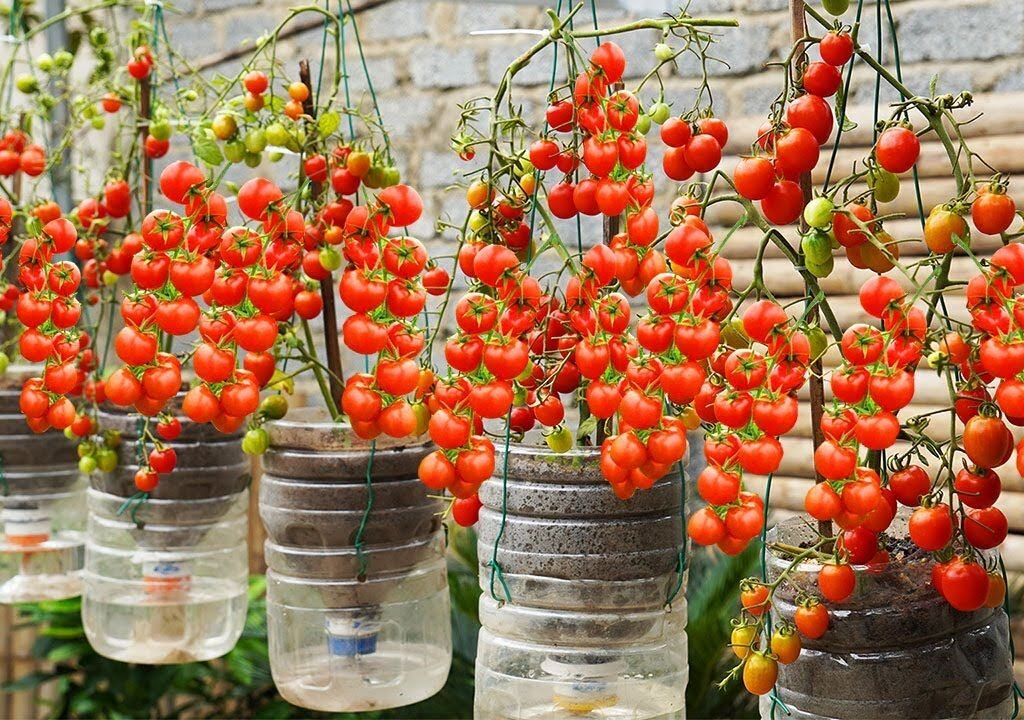
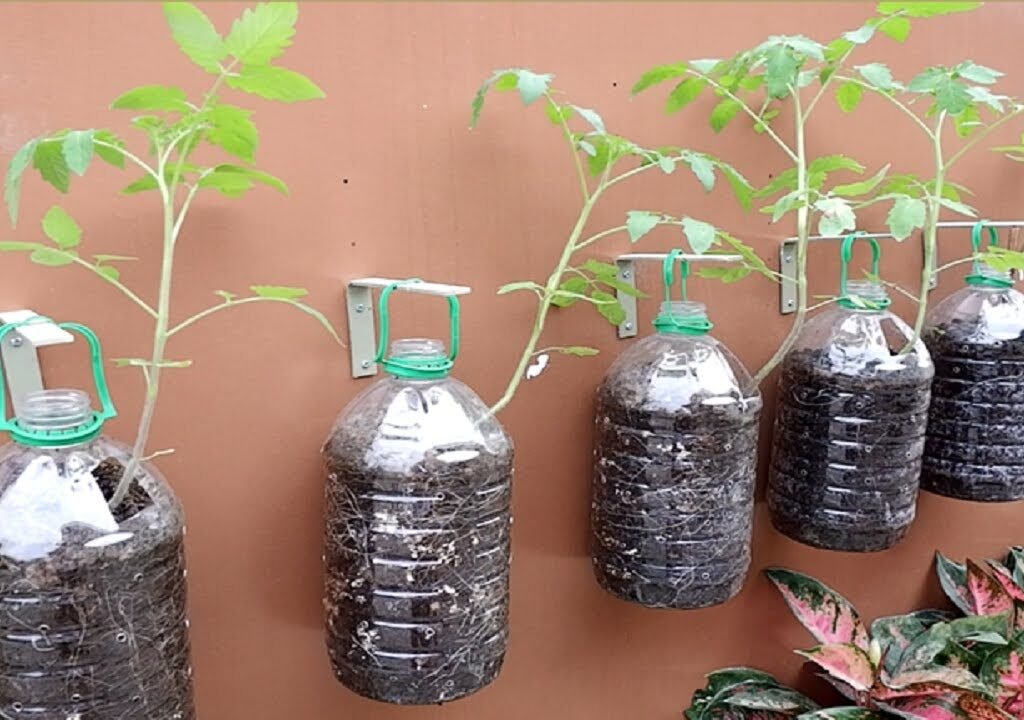
With the clever “Garden in a Bottle” method, you can grow healthy, productive tomato plants in the smallest spaces—even in small balconies, window corners, or kitchen shelves. This technique is perfect for urban gardeners and anyone who loves the idea of growing food in creative, space-saving ways.
In this complete guide, you’ll learn how to grow tomatoes inside plastic bottles, glass bottles, or any compact container. We’ll cover setup, soil, watering, sunlight, fertilizing, and how to keep your tiny tomato garden thriving with minimal effort.
What Is “Garden in a Bottle”?
The concept is simple:
You grow a tomato plant inside a bottle—either vertically or horizontally—creating a micro-garden that requires almost no space. This method works wonderfully because tomatoes adapt well to containers and respond beautifully when their roots have good moisture and nutrients.
Benefits of Growing Tomatoes in a Bottle
- Requires almost zero space
- Very low cost
- Great for balconies, windows, small apartments
- Easy to maintain
- Fun and educational for kids
- Perfect recycling idea
- Produces real, edible tomatoes—cherry, mini, or even regular varieties
If you’re someone who always thought gardening needs space, this method will change your mind completely!
Best Tomato Varieties for Bottle Gardening
While many types of tomatoes can grow in bottles, some varieties perform much better.
Recommended Varieties:
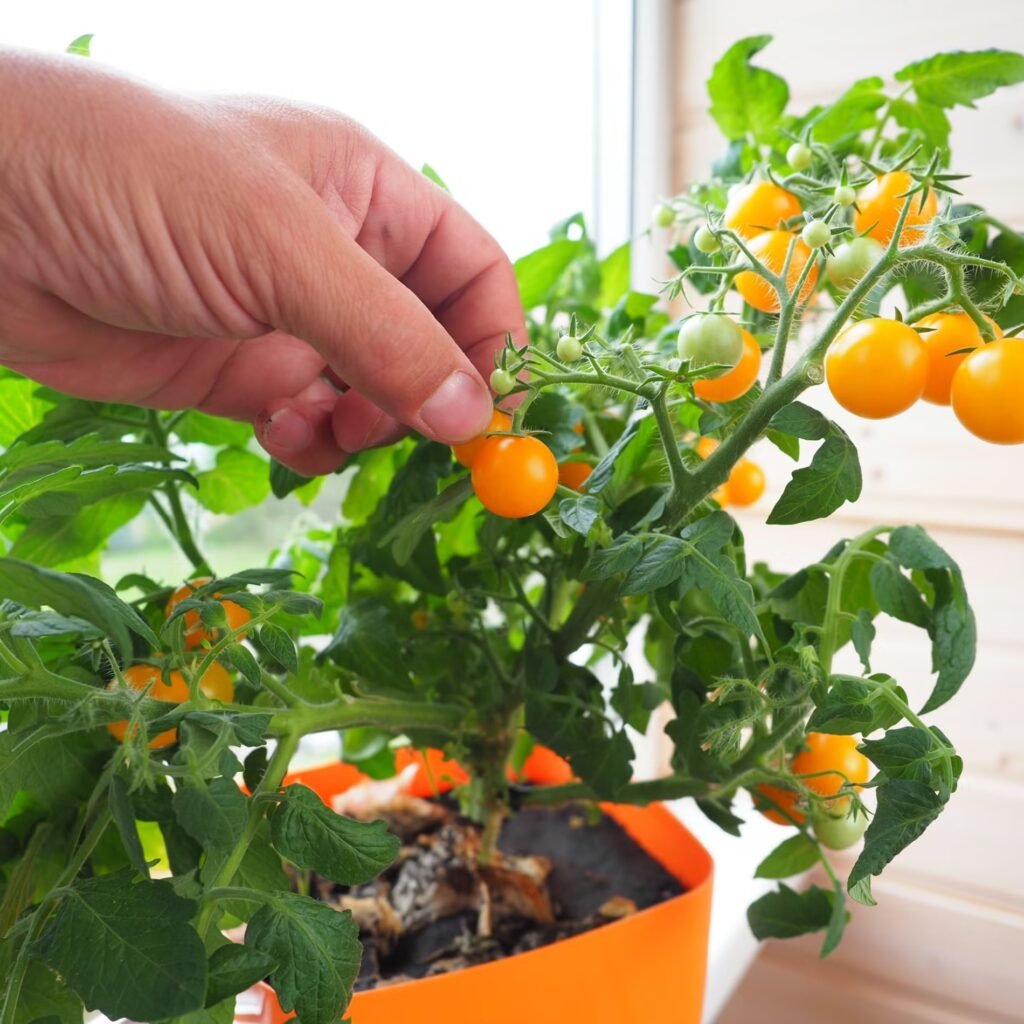
- Cherry tomatoes (best for small spaces)
- Miniature tomatoes
- Dwarf or micro-dwarf varieties
- Grape tomatoes
- Pear tomatoes
These produce small, sweet fruits and require less root space.
Avoid large, heavy varieties like big beef or roma unless using a bigger bottle or container.
Choosing the Right Bottle
You can use any of these:
1. Plastic Bottles (1–5 liters)
- Lightweight
- Easy to cut
- Easy to hang or mount
2. Glass Bottles (wide-mouth)
- Look classy
- Great for decorative indoor setups
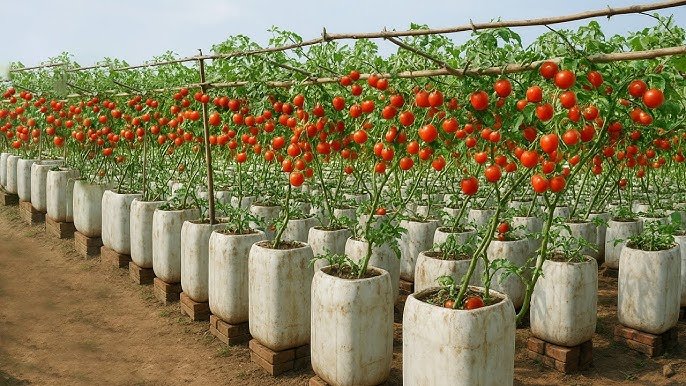
3. Large Water Cans (10–20 liters)
- Ideal for growing bigger tomato types
- More soil, more yield
Vertical vs. Horizontal Gardening
- Vertical Bottles save space and look neat
- Horizontal Bottles offer more soil area and better root spread
Both work well—choose based on your available space and style preference.
Preparing the Bottle for Planting
Step 1: Clean the Bottle
Remove labels and rinse thoroughly.
Dirty bottles can carry fungi or bacteria.
Step 2: Create Drainage Holes
Use a hot knife, screwdriver, or drill to make:
- 4–6 holes at the bottom
- 2–3 holes on the sides for airflow
Drainage is critical—tomatoes hate standing water.
Step 3: Add a Layer of Stones
A 1-inch layer of:
- Gravel
- Pebbles
- Broken clay pieces
This improves drainage and prevents root rot.
Soil Mixture for Bottle Tomatoes
Tomatoes grow best in light, airy, nutrient-rich soil.
Perfect Soil Mix:
- 40% garden soil
- 30% compost or cow dung
- 20% cocopeat
- 10% sand or perlite
Add:
- 2 tablespoons neem cake (prevents pests)
- 1 teaspoon bone meal or rock phosphate (for fruiting)
Avoid heavy clay soil—it suffocates roots inside a bottle.
Planting Tomatoes in a Bottle
You can start with seeds or seedlings.

Planting Seeds
- Make small holes in the soil (1 cm deep).
- Drop 2–3 seeds per bottle.
- Cover lightly with soil.
- Mist gently with water.
- Keep in a warm, sunny spot.
Seedlings emerge within 5–10 days.
Once they are 3 inches tall, keep the healthiest one and remove the rest (called thinning).
Planting Seedlings
If you prefer faster results:
- Buy a healthy seedling (4–6 inches tall).
- Make a hole in the center of the bottle.
- Place the seedling and press the soil gently around it.
Tomatoes adapt to bottle environments easily.
Sunlight Requirements
Tomatoes need at least 6 hours of direct sunlight.
The more sun they get, the:
- faster they grow
- more flowers they produce
- tastier the tomatoes become
If your space is indoors, place bottles near:
- windows
- balconies
- terraces
- sunlit kitchen shelves
Artificial grow lights also work for indoor tomato gardens.
Watering Your Bottle Tomato Garden
Watering is the most important part of bottle gardening.
Watering Tips:
- Water when the top 1 inch of soil feels dry
- Use a spray bottle or watering can
- Avoid overwatering—bottles trap moisture
- Morning watering is best
Tomatoes prefer consistent moisture but never soggy roots.

Self-Watering Bottle Hack
Create a wick system:
- Fill bottom half with water
- Insert cloth strip (wick) through the cap
- Fill top half with soil
- Plant your tomato
This keeps soil moist without daily watering.
Feeding (Fertilizing) Tomato Plants
Tomatoes are heavy feeders—they love nutrients.
Every 15–20 Days Add:
- Compost
- Liquid compost tea
- Banana peel water (adds potassium)
- Seaweed extract (boosts flowering)
During Flowering & Fruiting:
- Add 1 tablespoon wood ash
- Add 1 teaspoon bone meal
These help produce bigger, juicier tomatoes.
Avoid too much nitrogen—it causes leafy growth but fewer tomatoes.
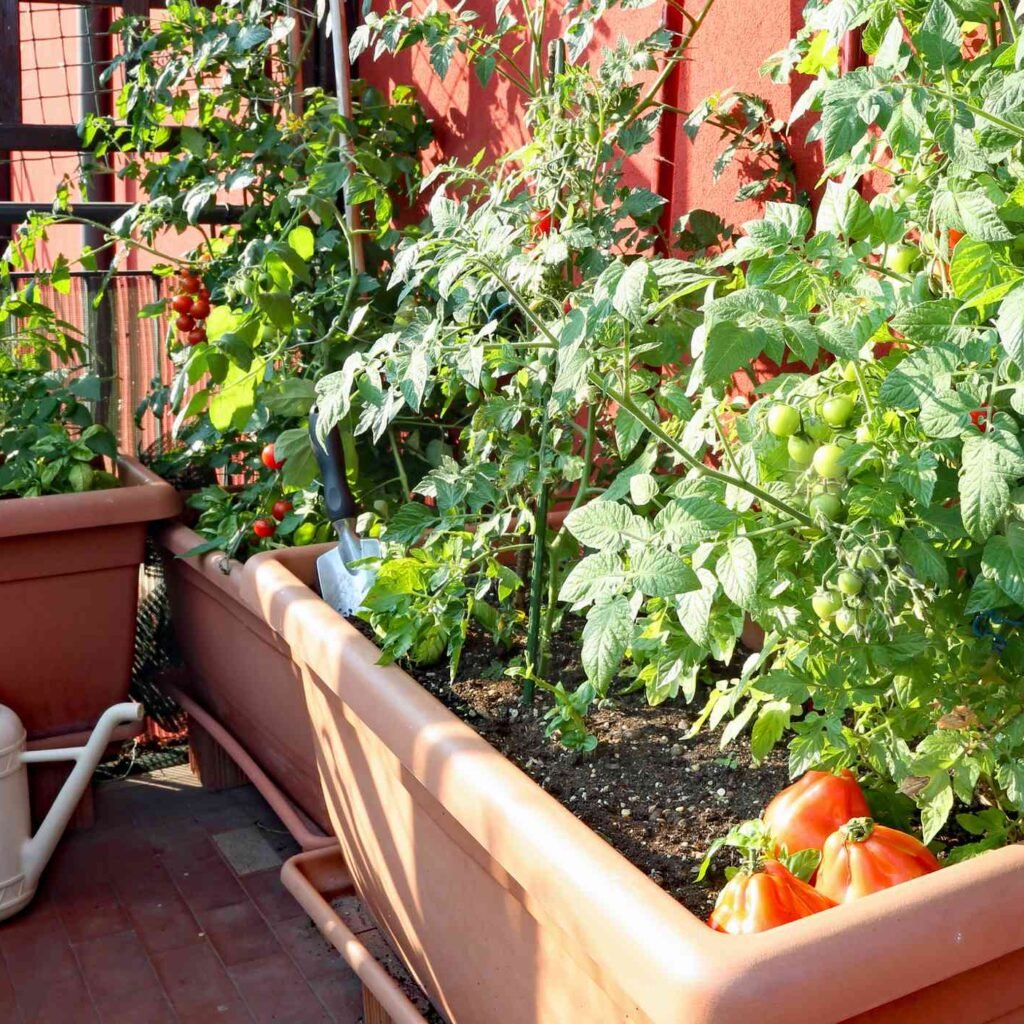
Supporting Your Tomato Plant
As tomatoes grow taller, they need support.
Use:
- A bamboo stick
- Plastic rod
- Thin PVC pipe
- Twine tied to a balcony railing
Gently tie the plant as it grows.
This prevents stem breakage and increases yield.
Pests and How to Manage Them
Tomatoes in bottles face fewer pests, but some still appear:

Common Pests:
- Aphids
- Whiteflies
- Worms
- Mealybugs
Natural Remedies:
- Neem oil spray
- Soap water spray
- Garlic + chili homemade spray
- Keep leaves dry to prevent fungus
Bottle gardens stay cleaner than open soil gardens, reducing pest problems naturally.
Flowering and Fruiting Stage
When the plant reaches 12–15 inches, flowers begin to appear.
To increase fruiting:
- Give more sunlight
- Add potash-rich fertilizers
- Gently shake the plant to help pollination
- Keep soil slightly moist
Flowers turn into tiny green tomatoes, which grow and ripen over 20–35 days depending on variety.
Harvesting Your Bottle Tomatoes
You can start harvesting when tomatoes:
- turn bright red (or yellow if using yellow varieties)
- feel slightly soft
- come off easily when twisted
Cherry tomatoes mature fastest—sometimes within 55–70 days.
Do not let them over-ripen on the plant, as this slows new fruit production.
Advantages of Growing Tomatoes in a Bottle
1. Perfect for Urban Living
No garden? No problem. Bottles fit anywhere.
2. Extremely Low Cost
Uses recycled materials and simple tools.
3. Water Efficient
Bottles help retain moisture.

4. Easy to Move Around
Shift to sunlight or indoors during rain.
5. Eco-Friendly
Reduces plastic waste and promotes green living.
6. Fun for Kids and Beginners
Great beginner gardening project.
Bottle vs Pot Tomato Growing (Quick Comparison)
| Feature | Bottle | Pot |
|---|---|---|
| Space | Very small | Medium |
| Cost | Almost free | Moderate |
| Soil Amount | Limited | More soil |
| Fruit Size | Smaller | Larger |
| Watering | Frequent | Less frequent |
| Maintenance | Easy | Moderate |
Both methods work well—choose based on your needs.
Final Thoughts
“Garden in a Bottle” is one of the most creative and practical ways to grow tomatoes in small spaces. Whether you’re a beginner or an experienced gardener, this method lets you enjoy fresh, juicy tomatoes without needing a garden, terrace, or large pots.
With the right soil mix, good sunlight, consistent watering, and a little love, your bottle garden will reward you with a surprising amount of delicious homegrown tomatoes.
So don’t wait—grab an empty bottle, fill it with soil, plant a tomato, and start your mini-garden today. Even the smallest space can produce big results!
Leave A Comment