6 Balcony Gardening Mistakes to Avoid

6 Balcony Gardening Mistakes to Avoid

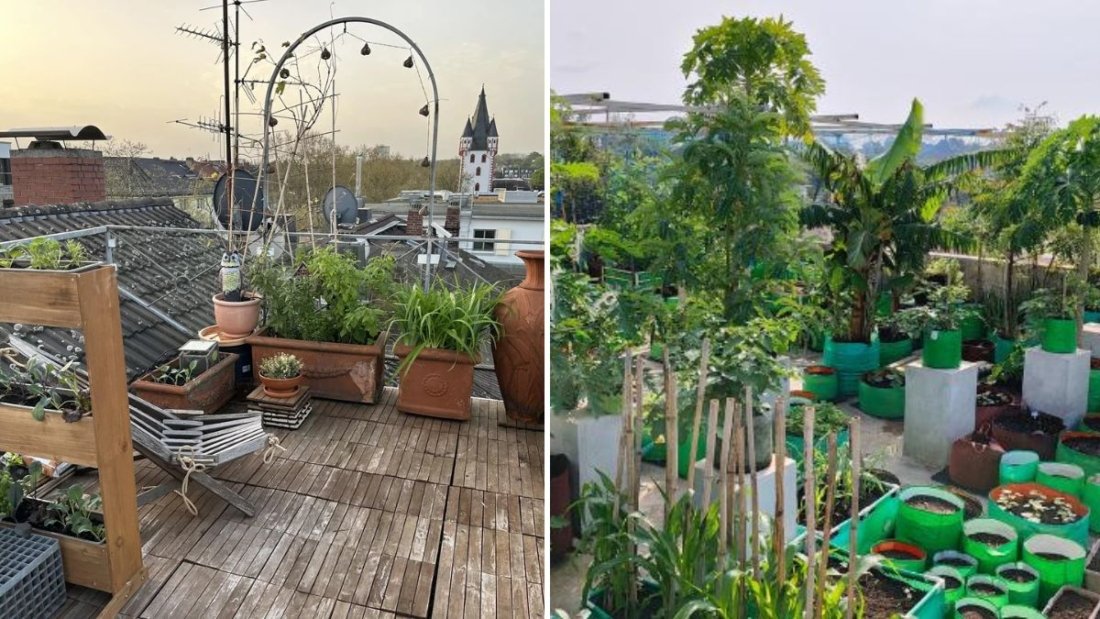
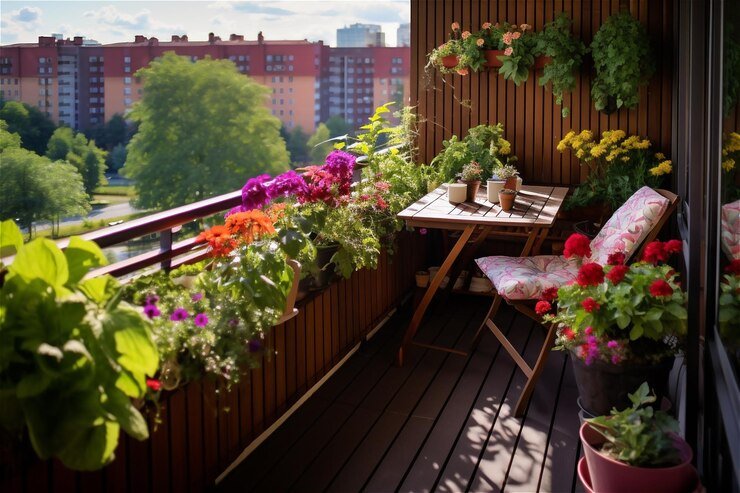
Balcony gardening is one of the most rewarding ways to bring nature into compact city homes. Whether you’re growing herbs, flowers, or vegetables, your balcony can easily turn into a green sanctuary with the right planning and care. However, many beginners make simple mistakes that prevent their plants from thriving — mistakes that can be avoided with just a little guidance.

In this comprehensive 1200-word guide, you’ll learn 6 common balcony gardening mistakes and how to avoid them so your garden stays healthy, vibrant, and productive all year long.


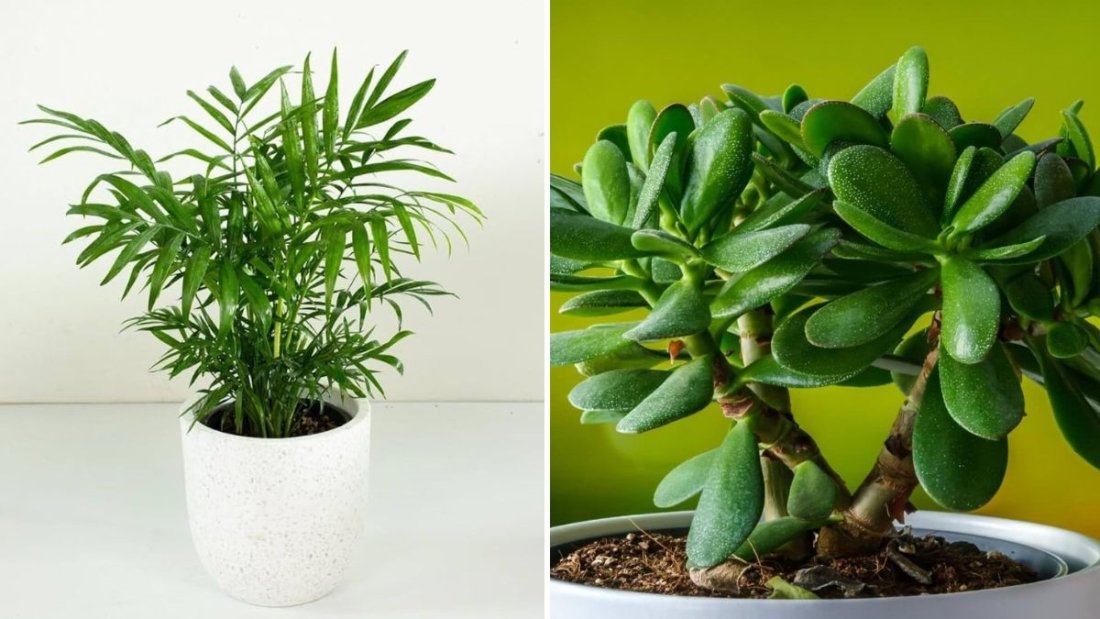
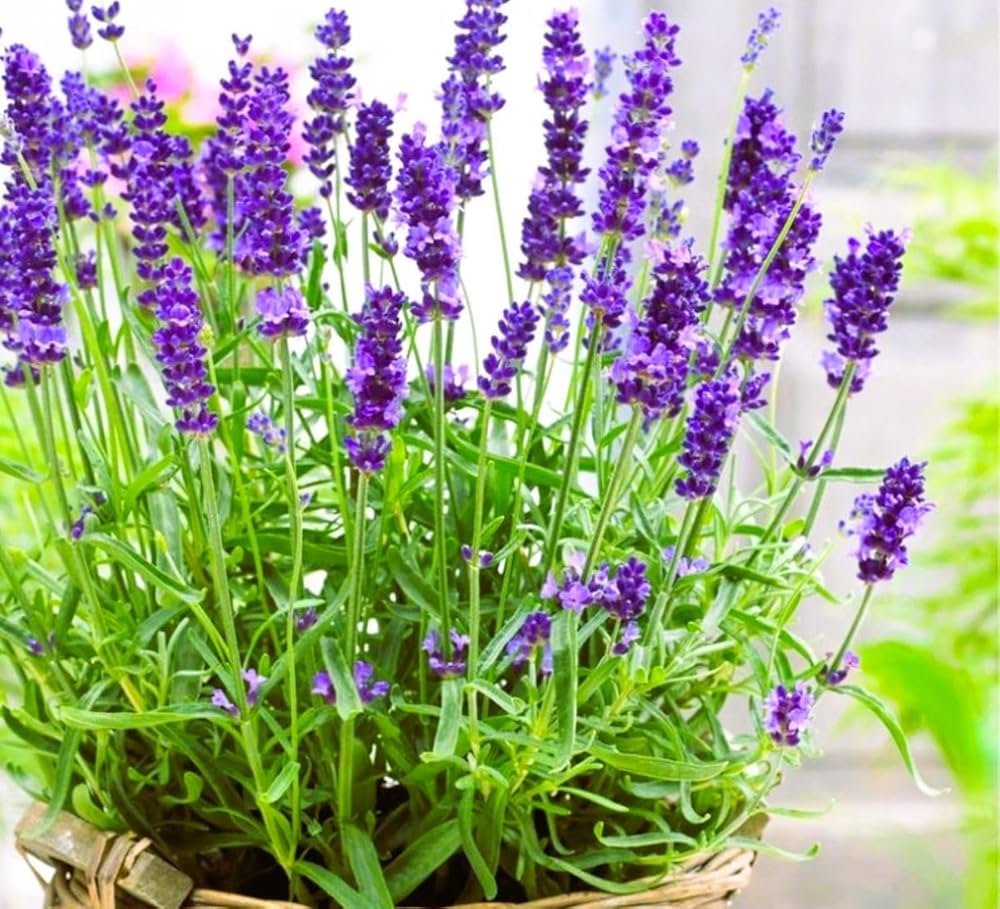
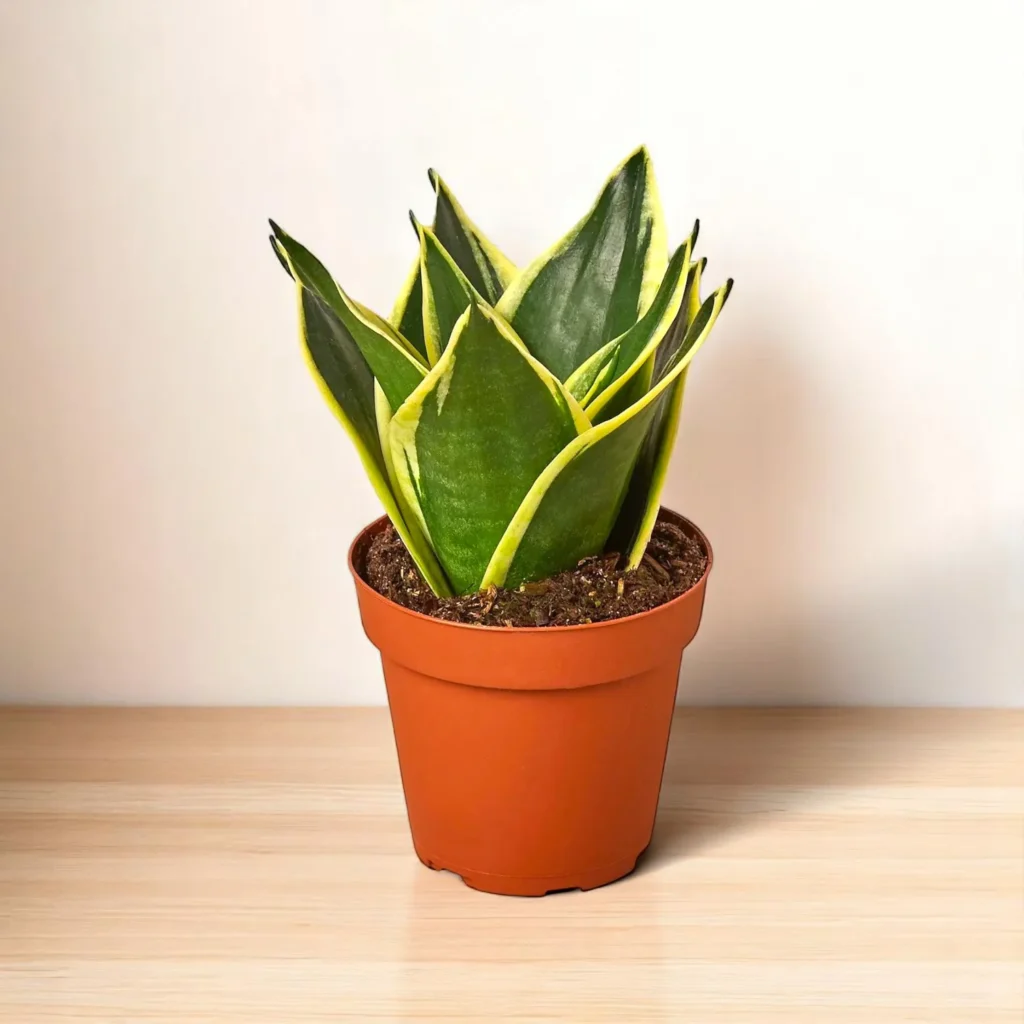
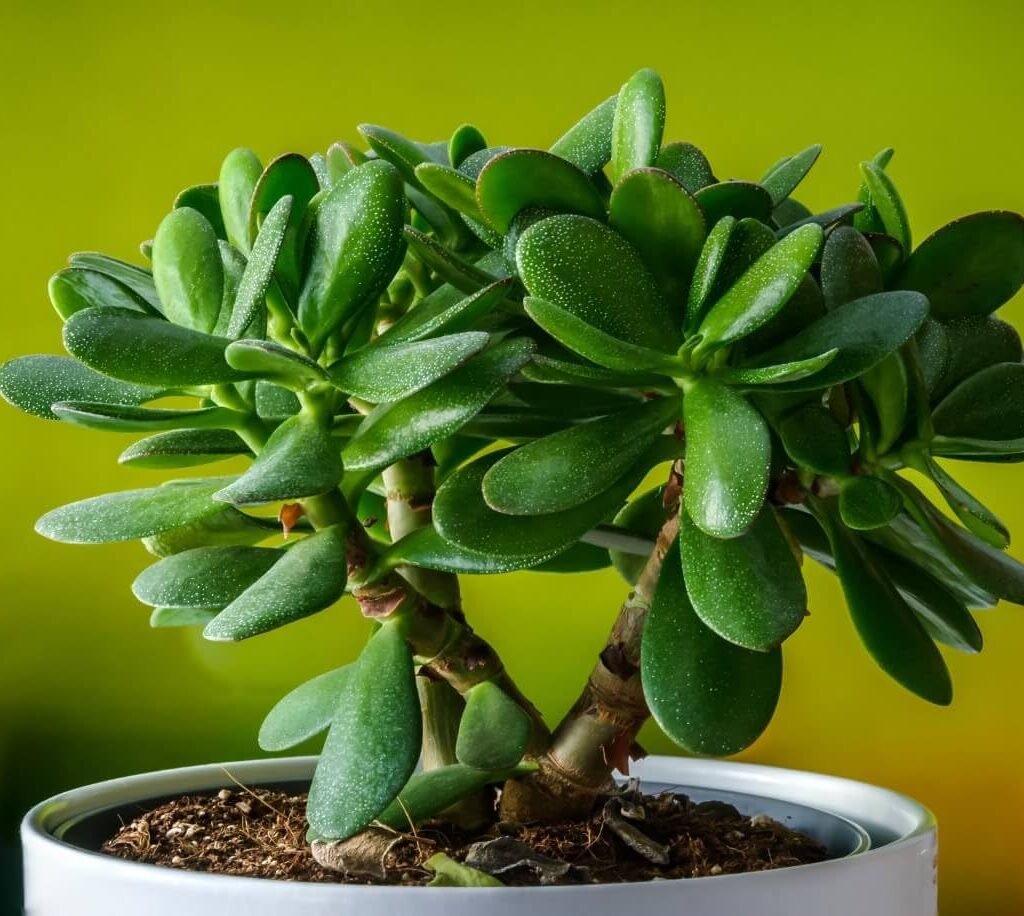
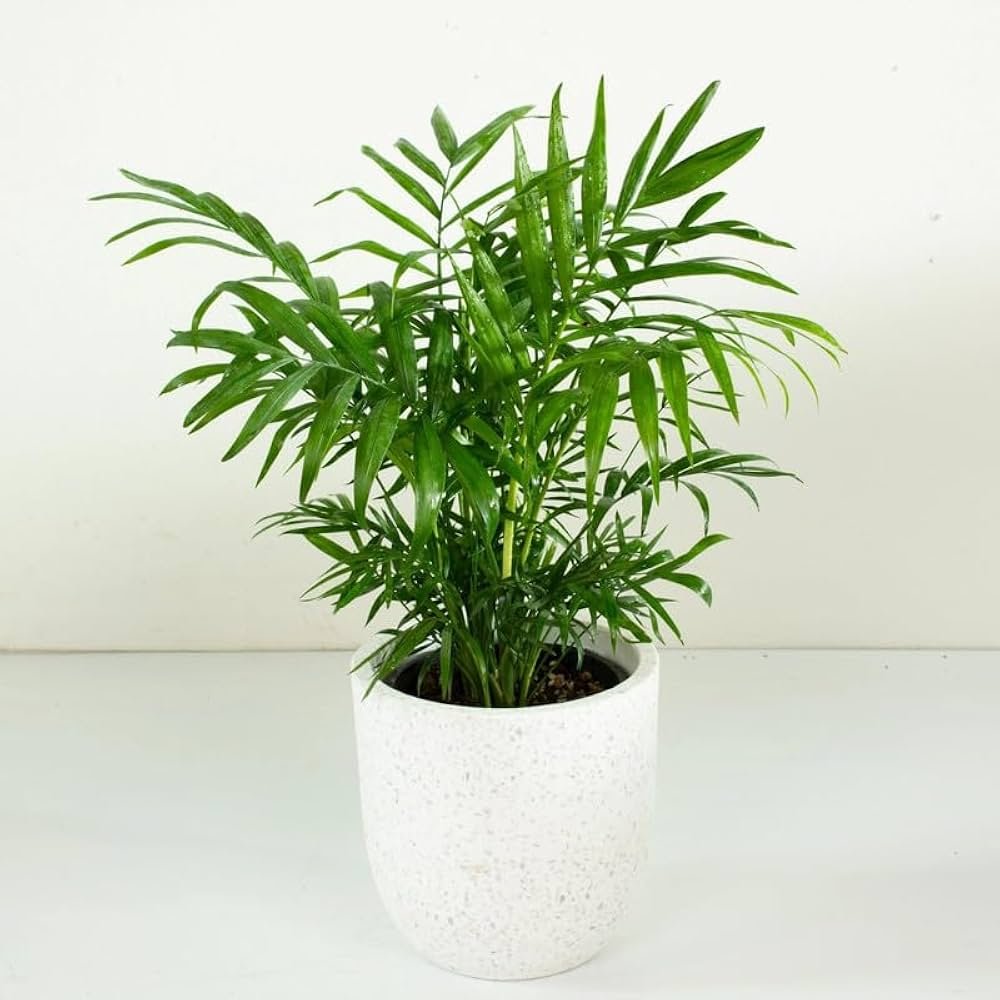
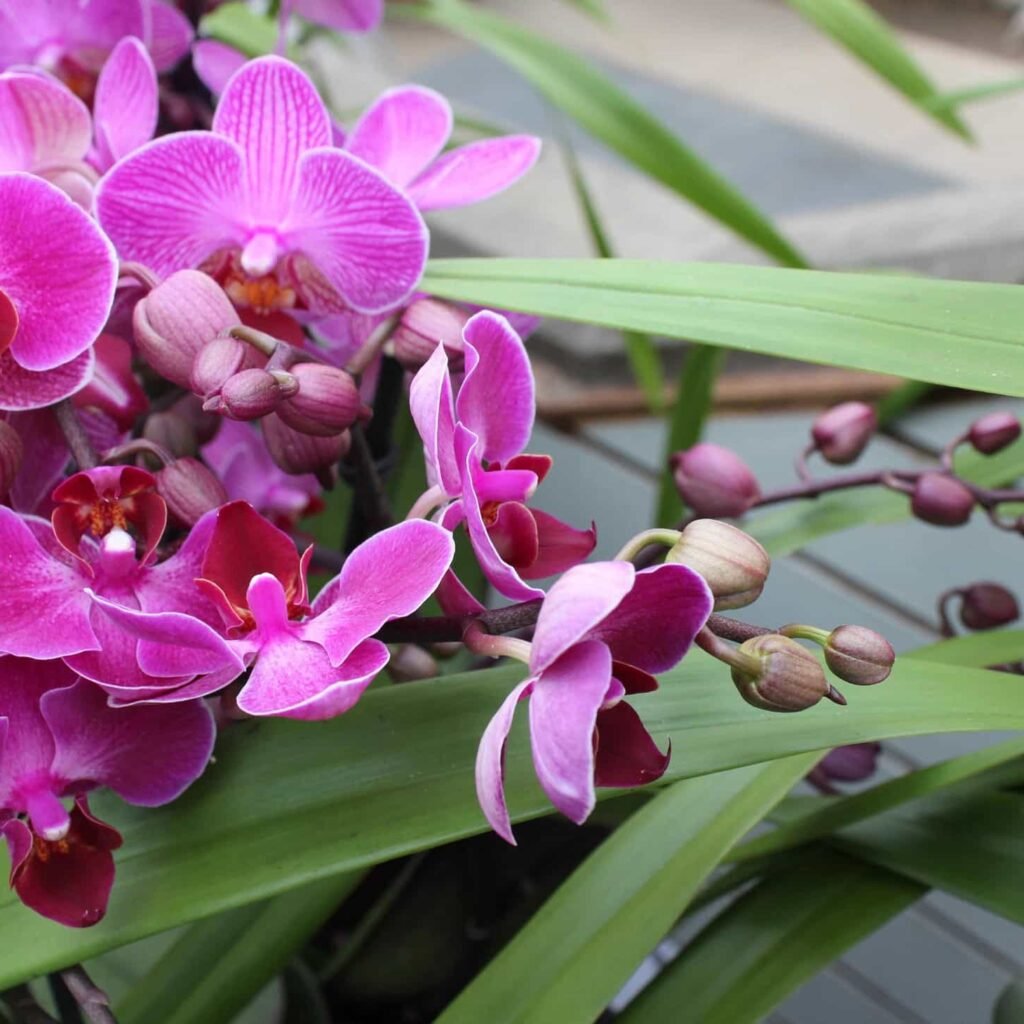
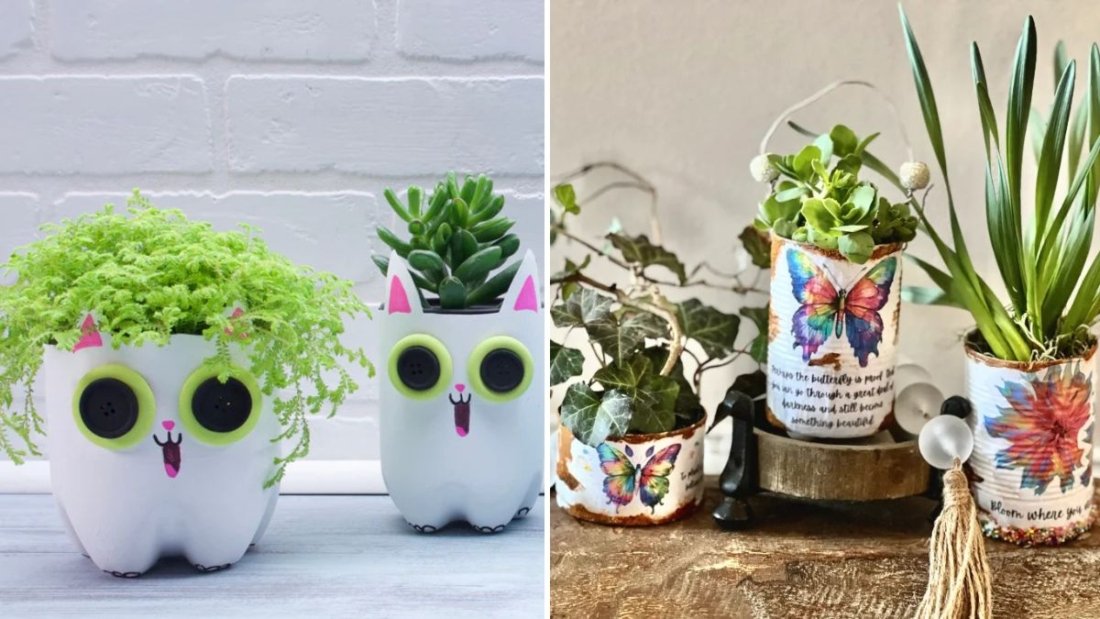
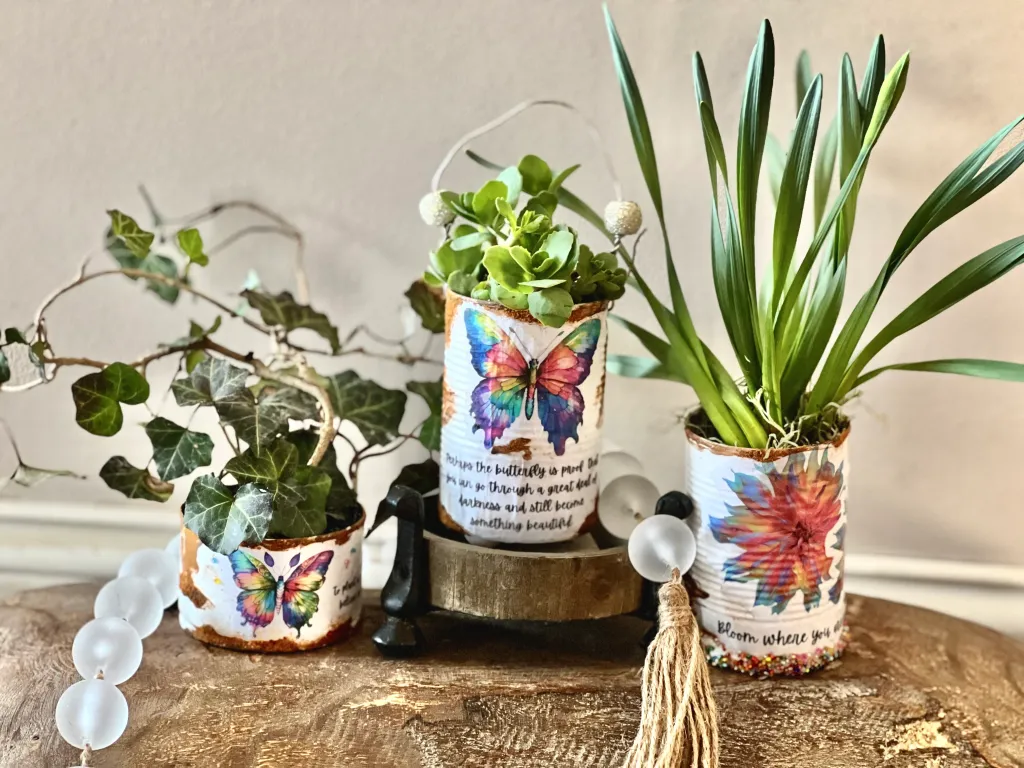
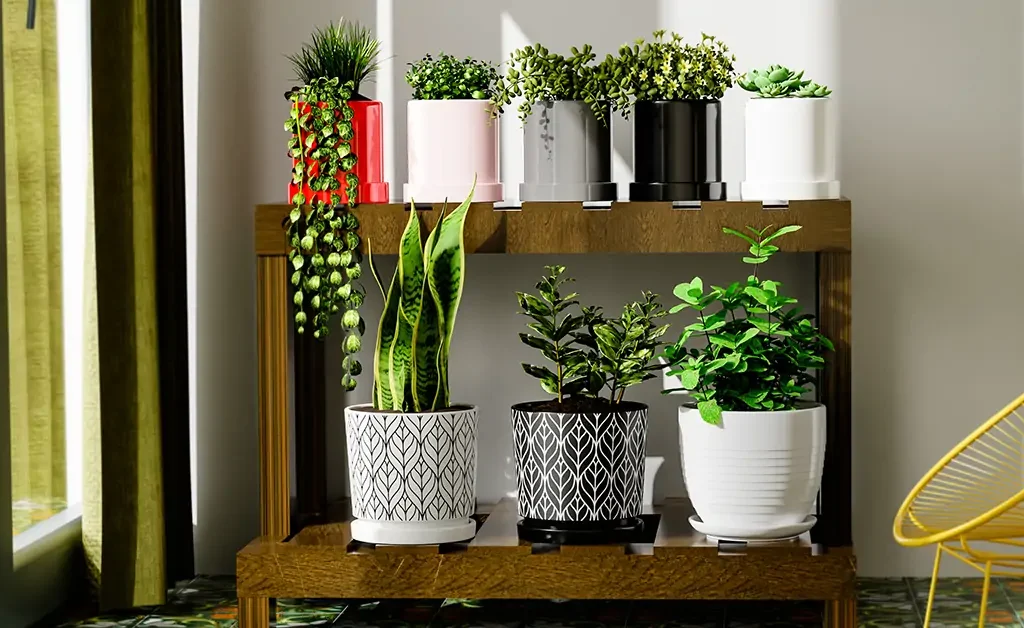
1. Choosing the Wrong Plants for Your Balcony Conditions

One of the biggest mistakes new gardeners make is picking plants simply because they look beautiful — without considering whether they can actually survive on the balcony.

Why This Matters

Your balcony has its own microclimate. Sun exposure, wind, temperature, and humidity all affect how well certain plants grow.

How to Avoid This Mistake

  1. Assess sunlight levels.
    • Full sun: 6+ hours of direct sunlight → ideal for tomatoes, basil, chilli, lavender.
    • Partial sun: 3–5 hours → mint, spinach, lettuces, begonias.
    • Shade: less than 3 hours → ferns, snake plants, peace lilies.
  2. Understand wind exposure.
    High-rise balconies are often windy. Tough, flexible plants like succulents, rosemary, and grasses handle wind well.
  3. Check temperature differences.
    Balconies can become extremely hot in summer and cold in winter. Choose hardy plants if your climate fluctuates.

Smart Tip

Before shopping, observe your balcony for a full day to note where sunlight moves. This alone can save many plant casualties!


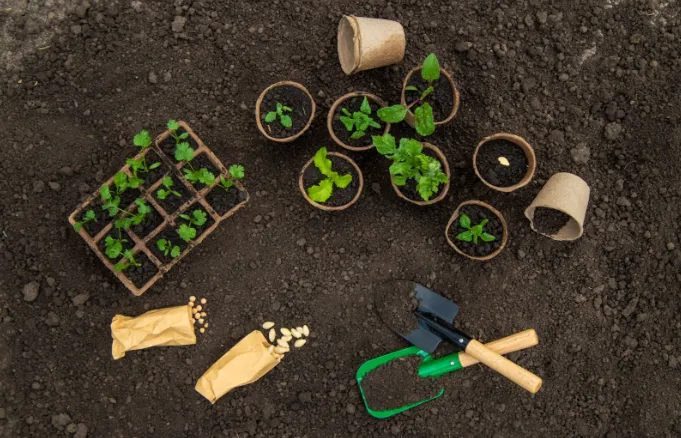
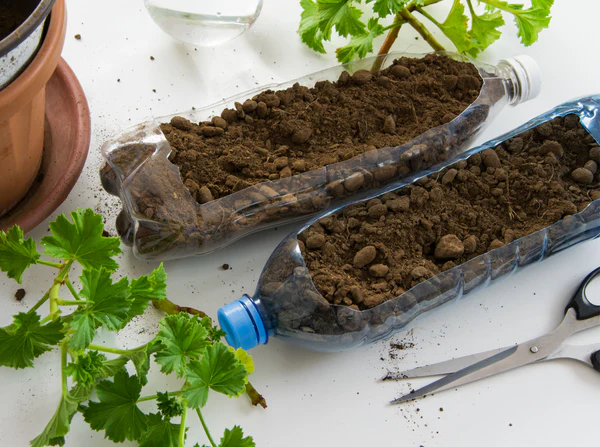
2. Using Poor-Quality Soil or Regular Garden Soil

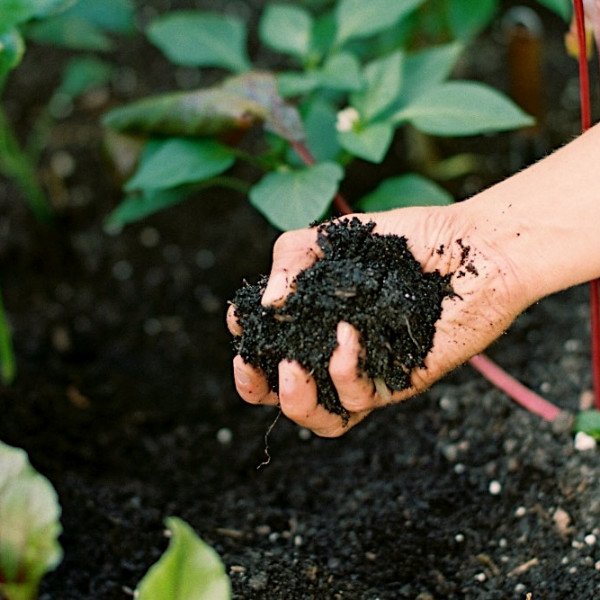
Another common mistake is filling balcony containers with cheap soil or, worse, digging up soil from the ground.

Why This Matters

Balcony plants rely entirely on the soil you provide. Poor soil:

  • becomes compacted,
  • drains badly,
  • blocks oxygen,
  • and prevents root growth.

How to Avoid This Mistake

  1. Always use high-quality potting mix.
    Potting mix is light, airy, and formulated for containers.
  2. Avoid garden soil.
    It is heavy, dense, and often carries pests.
  3. Add organic material.
    Compost or cocopeat improves texture and nutrient content.
  4. Use perlite or sand for better drainage.
    Essential for succulents and Mediterranean herbs like rosemary.

Smart Tip

Refreshing the top 2–3 inches of soil every few months boosts plant growth and prevents nutrient depletion.


3. Overwatering or Underwatering Your Plants

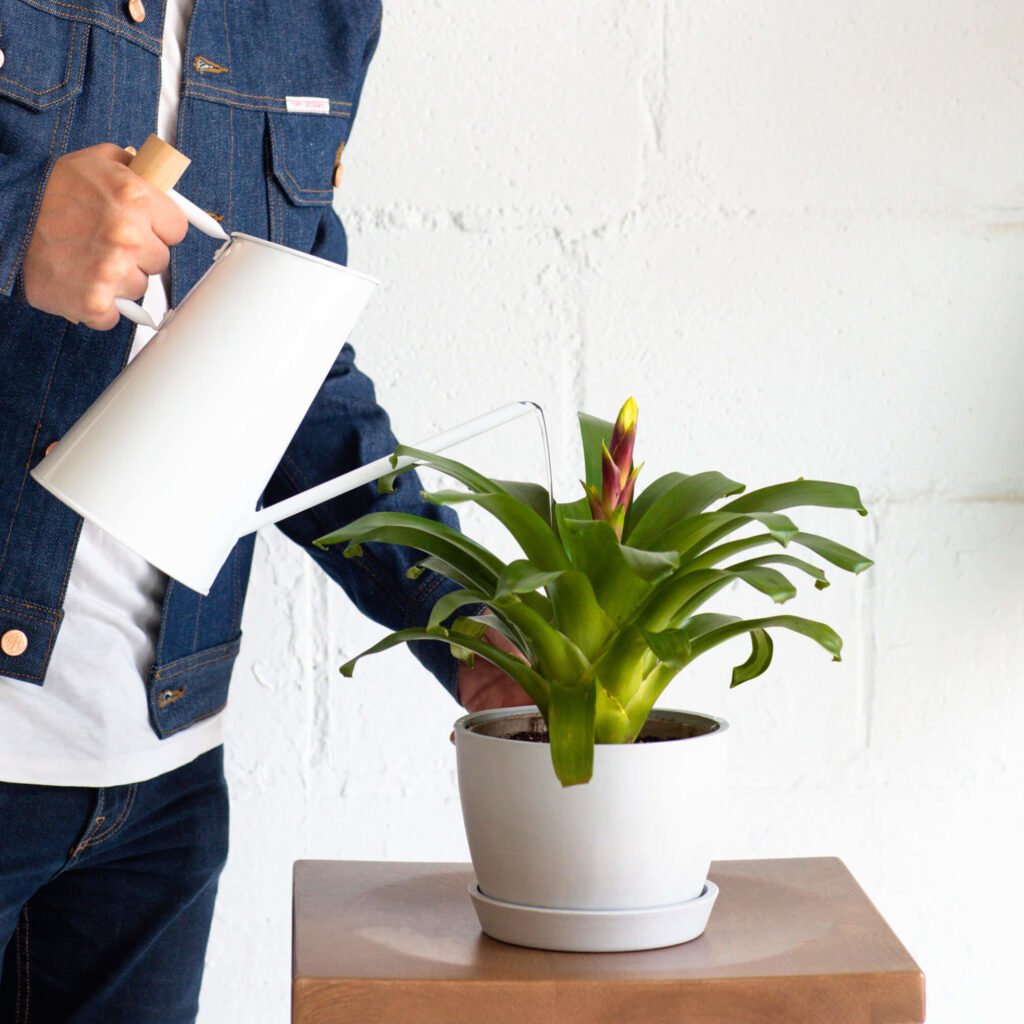
Balcony gardeners often struggle with watering — and both extremes are harmful.

Why This Matters

  • Overwatering suffocates roots and causes rot.
  • Underwatering stresses plants, stunts growth, and leads to wilting.

How to Avoid This Mistake

  1. Know your plant’s water needs.
    Herbs like rosemary and thyme prefer dry soil. Mint and basil prefer consistently moist soil.
  2. Check moisture before watering.
    Insert your finger 1–2 inches into the soil. If it’s dry, water. If it’s moist, wait.
  3. Use pots with drainage holes.
    Never skip this — stagnant water is a plant’s enemy.
  4. Water deeply, not lightly.
    Deep watering encourages strong root growth.
  5. Adjust watering seasonally.
    • Summer: More frequent watering
    • Monsoon: Minimal
    • Winter: Moderate

Smart Tip

Use self-watering pots or DIY bottle drippers if you’re busy or travel frequently.


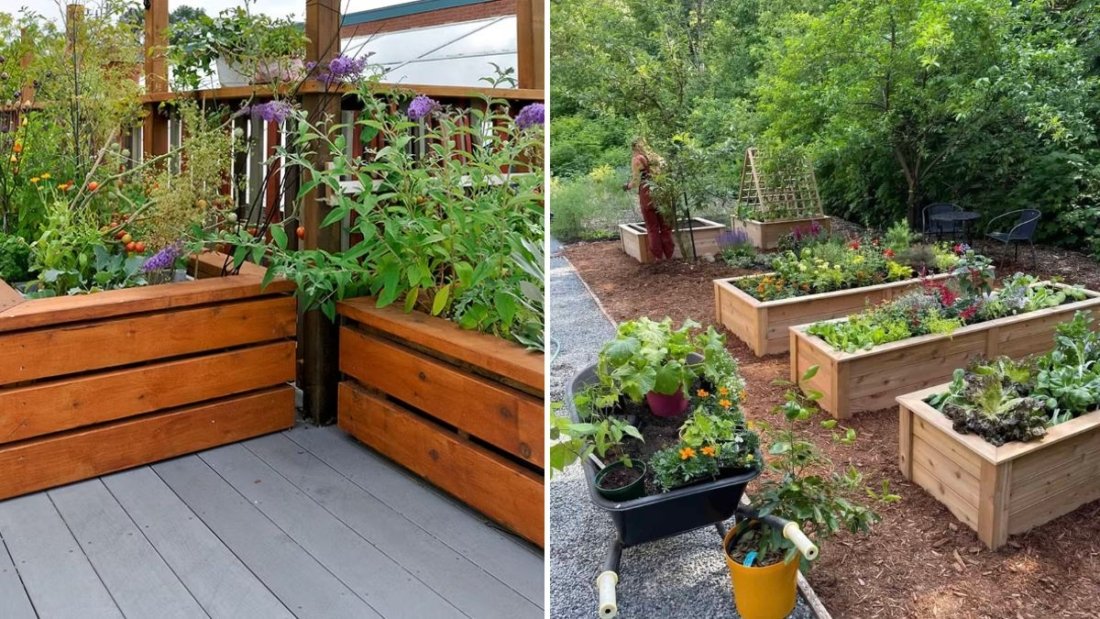
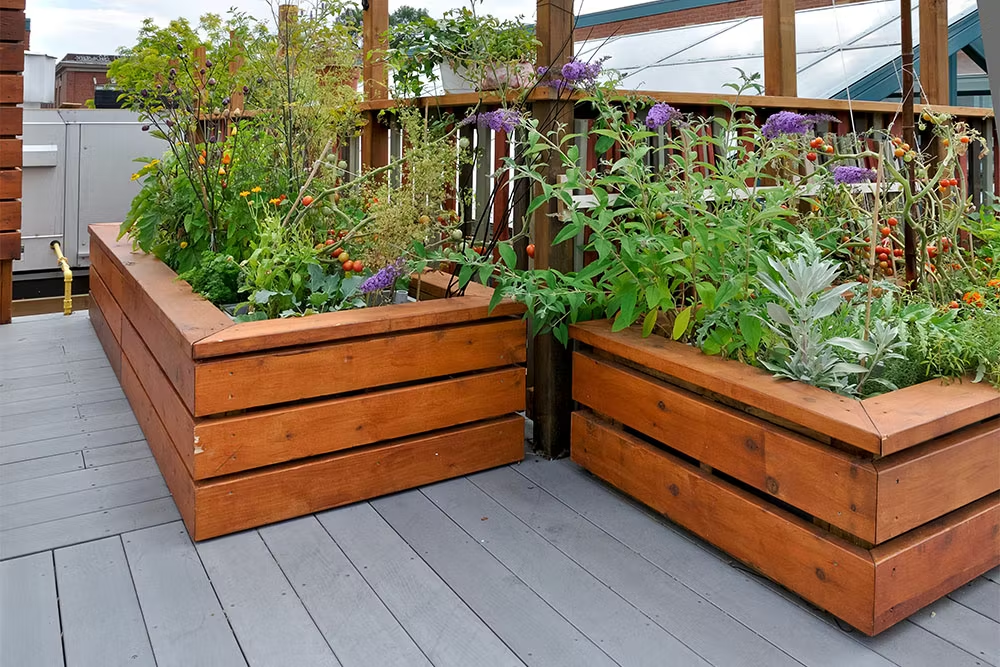
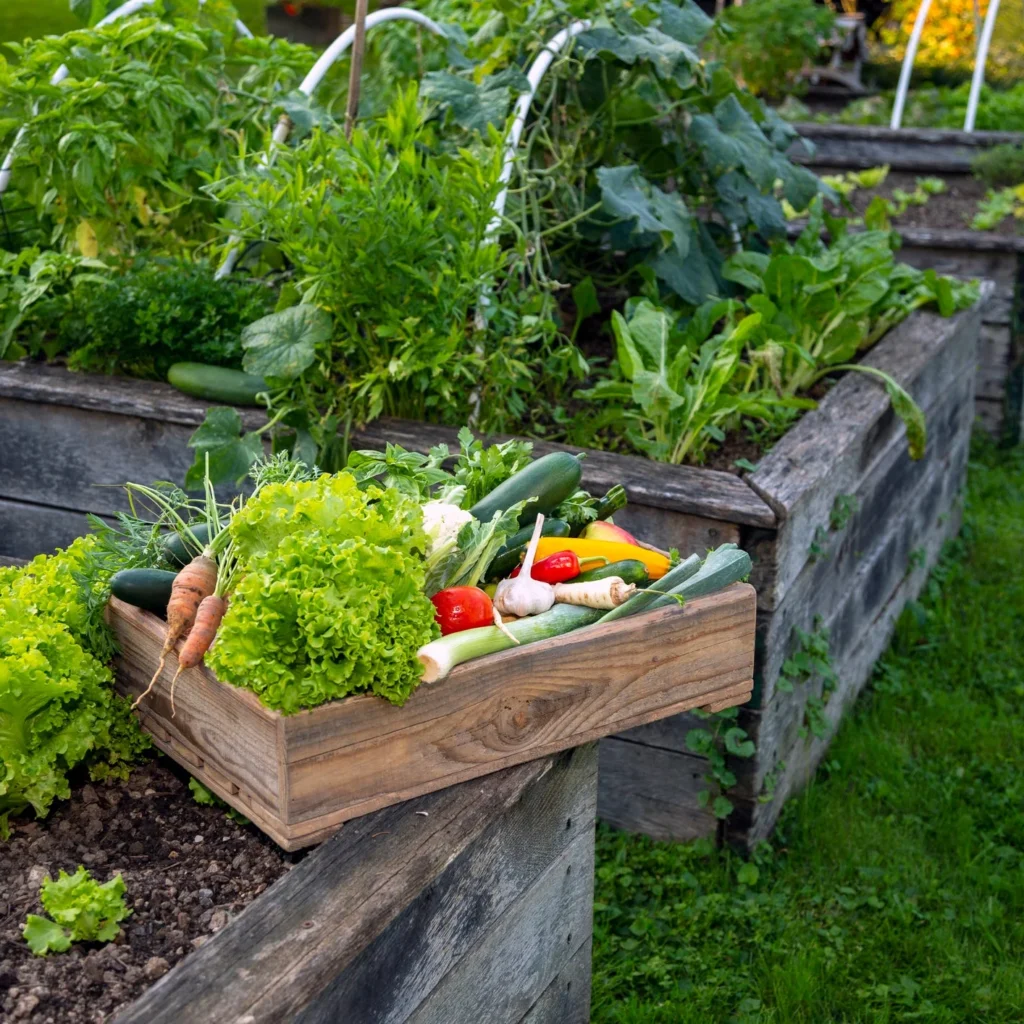
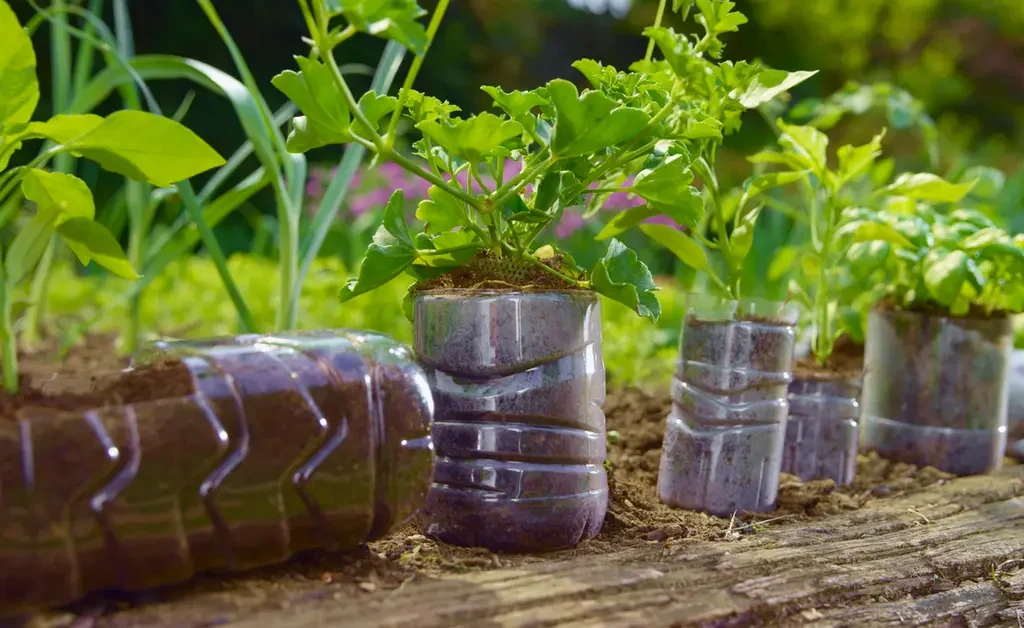
4. Ignoring the Importance of Pot Size

Many balcony gardeners unknowingly restrict their plants by using pots that are too small.

Why This Matters

Small containers:

  • limit root expansion,
  • dry quickly,
  • reduce nutrient availability,
  • and lead to stunted or unhealthy plants.

How to Avoid This Mistake

  1. Choose pots based on plant size.
    • Tomatoes, chillies, and climbers → 12–18 inch deep pots.
    • Herbs like mint and oregano → 8–10 inch pots.
    • Flowers and succulents → shallow containers (depending on varieties).
  2. Repot annually.
    Plants outgrow pots over time. Move to a larger container when you see:
    • roots circling the pot,
    • water draining too quickly,
    • or slowed growth.
  3. Avoid going too big.
    Oversized pots hold too much water for small plants and cause rot.

Smart Tip

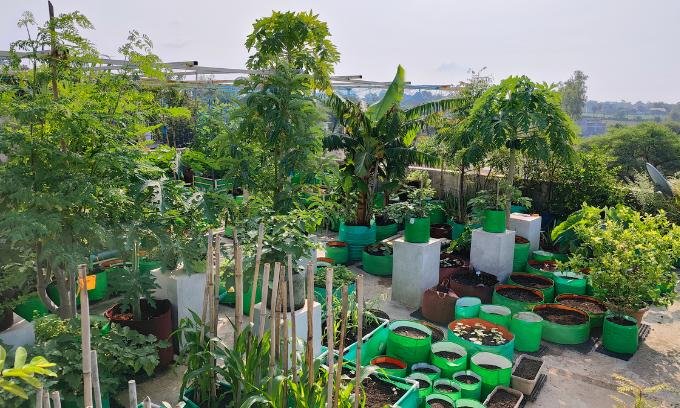
Fabric grow bags are affordable, breathable, and ideal for urban balconies.


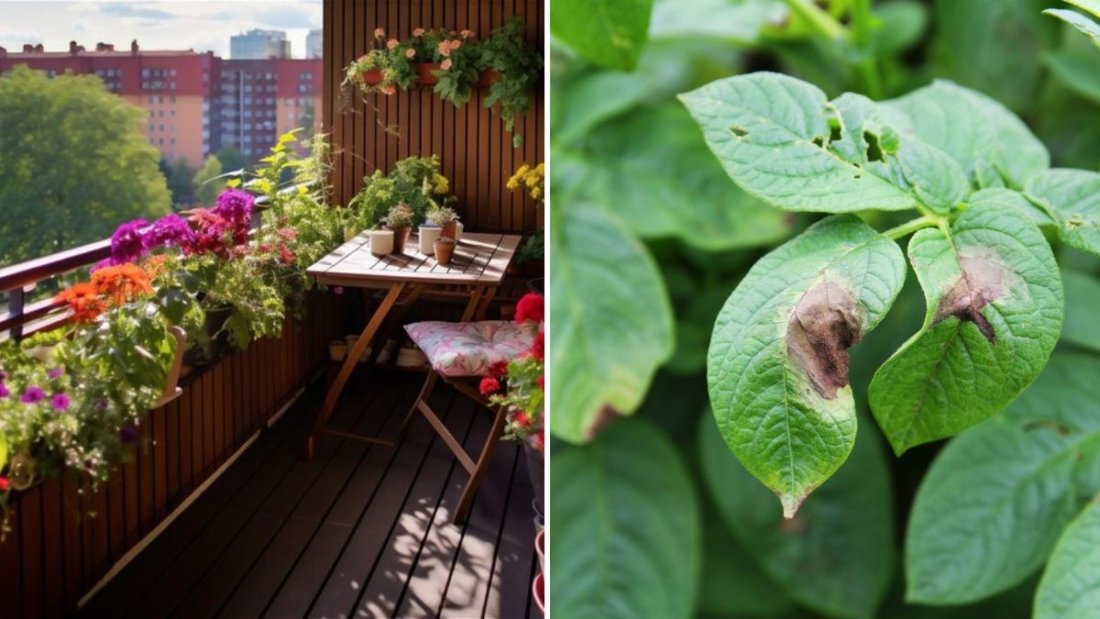
5. Neglecting Pests and Diseases Until It’s Too Late

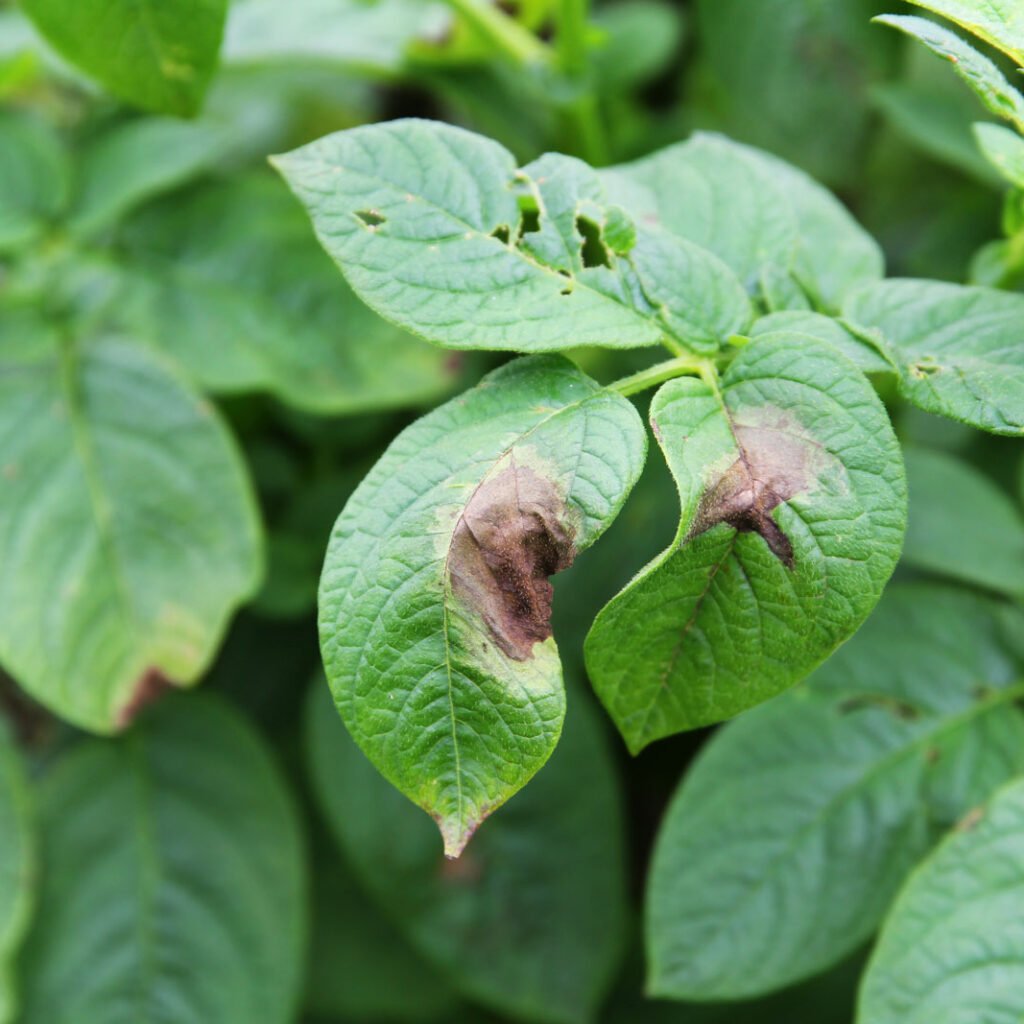
Many gardeners assume that balconies are pest-free, only to discover aphids, mealybugs, or fungus after major damage has been done.

Why This Matters

Common balcony pests spread rapidly and weaken plants by sucking out nutrients.

How to Avoid This Mistake

  1. Inspect your plants weekly.
    Look under leaves and stems for:
    • white cottony clusters (mealybugs),
    • tiny green/black insects (aphids),
    • holes in leaves (caterpillars),
    • powdery white patches (fungus).
  2. Act early.
    • Spray neem oil diluted in water.
    • Remove infested leaves.
    • Wipe pests with cotton dipped in alcohol.
  3. Keep air circulation strong.
    Crowded plants with poor ventilation attract disease.
  4. Avoid overwatering — a major cause of fungal infections.

Smart Tip

Quarantine new plants for a week before placing them with others.


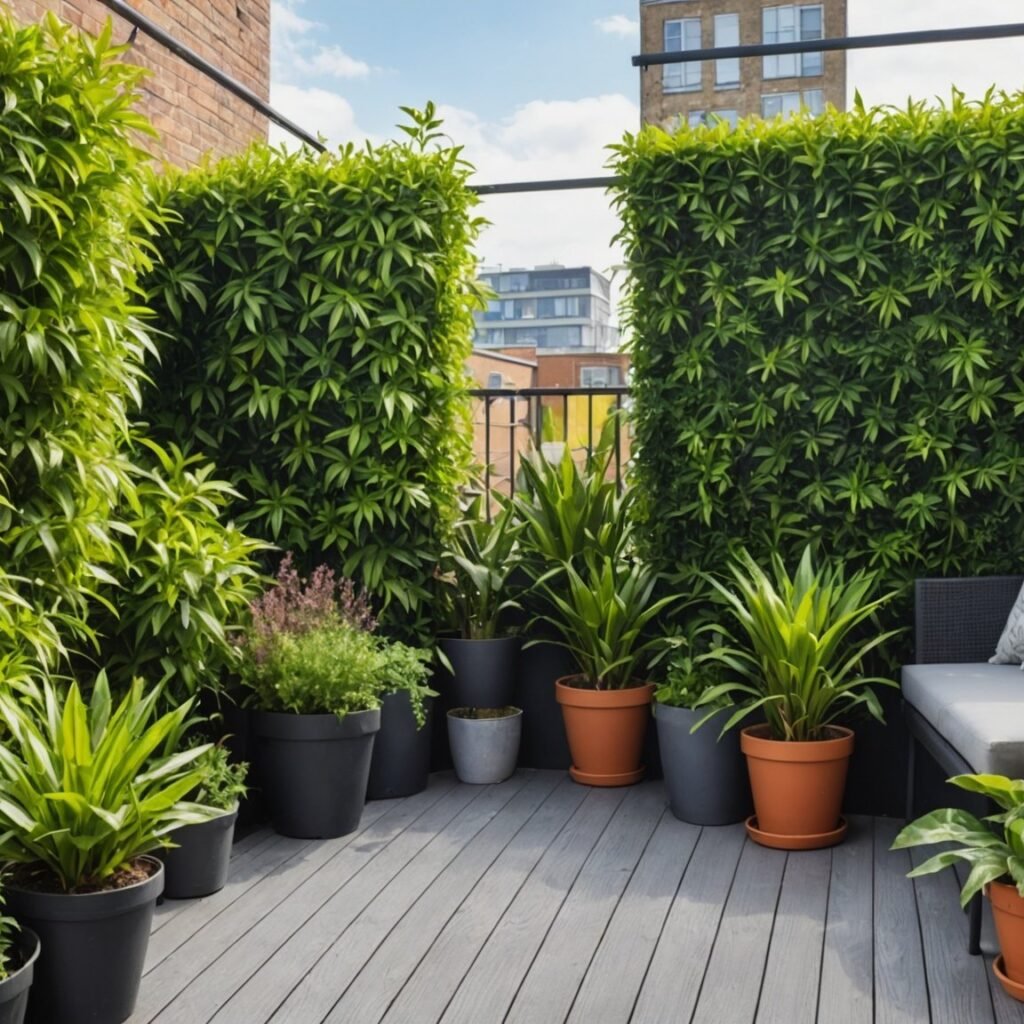
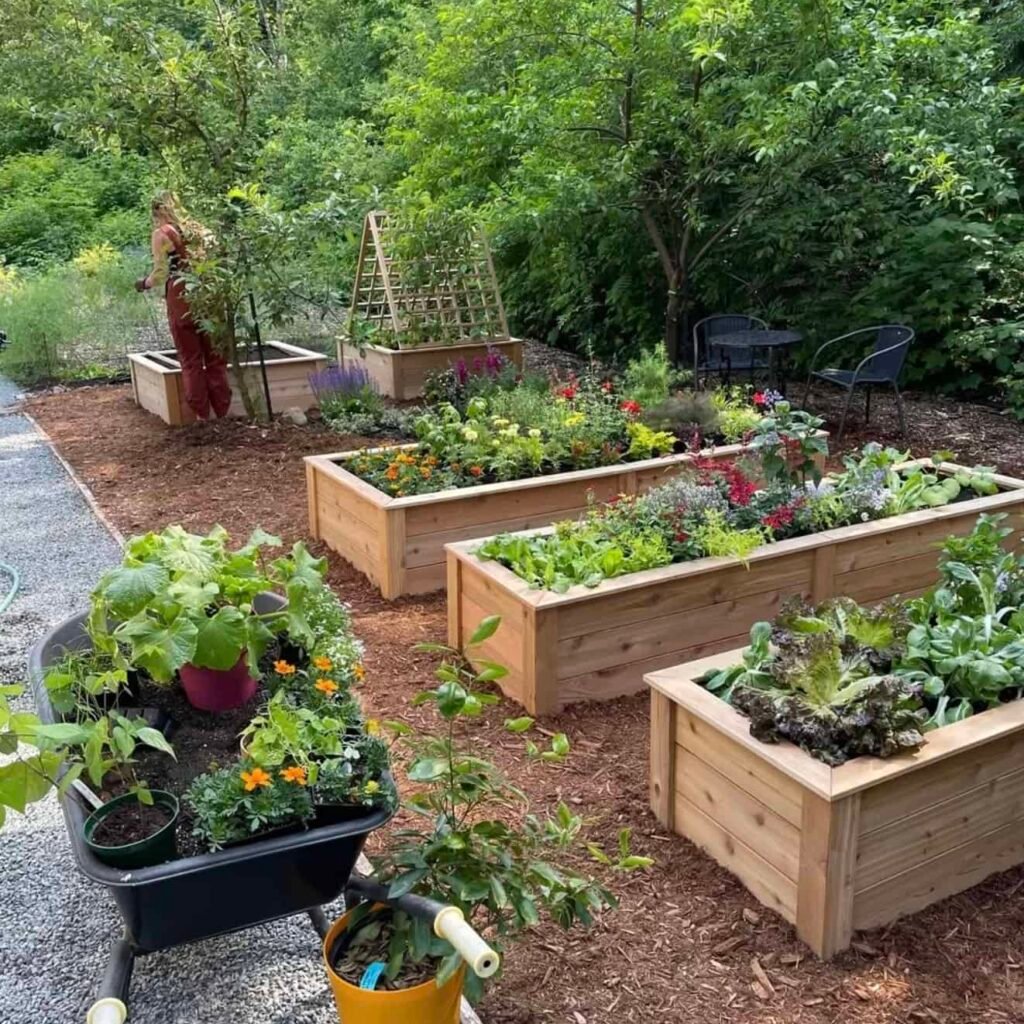
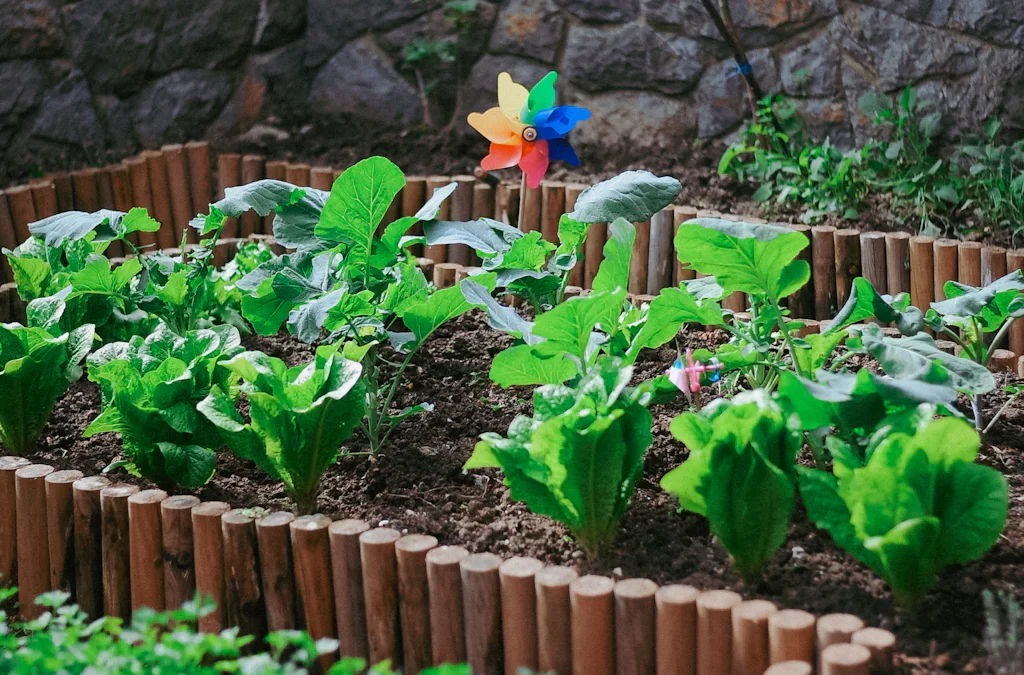
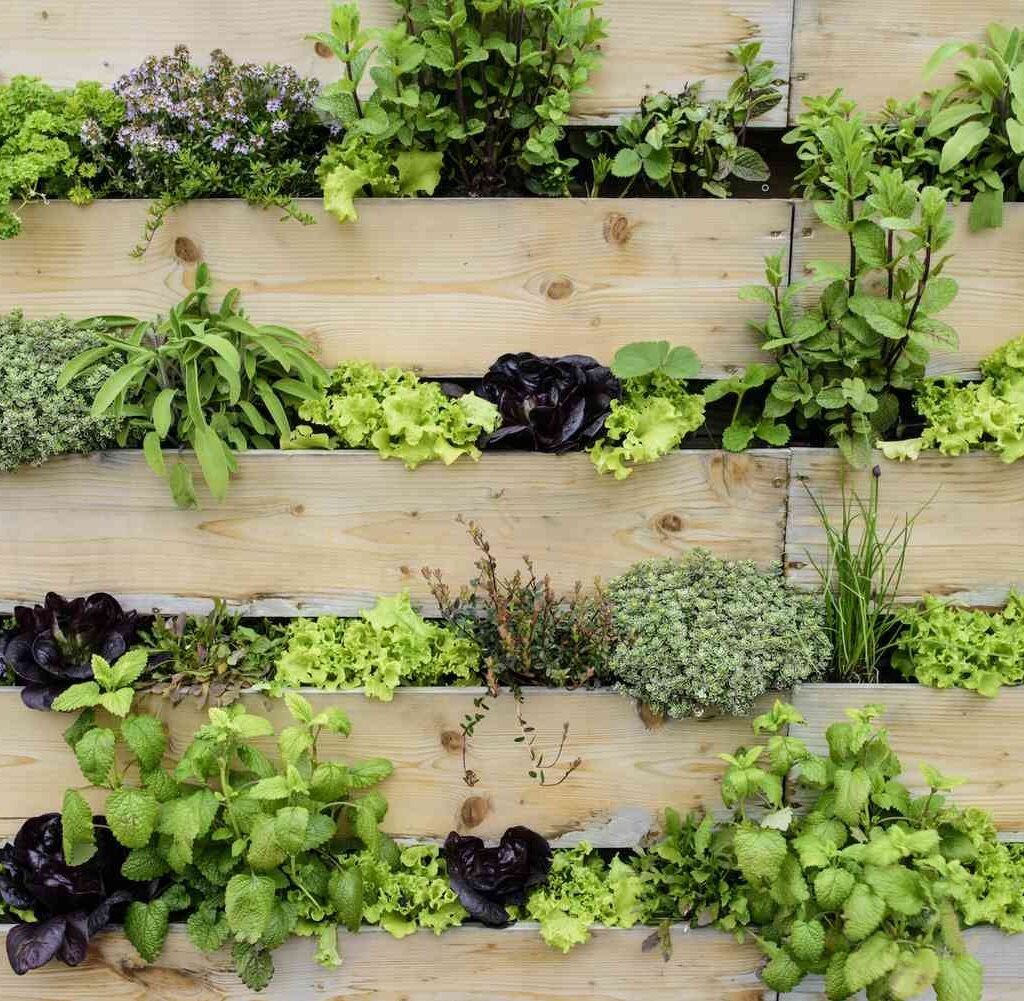
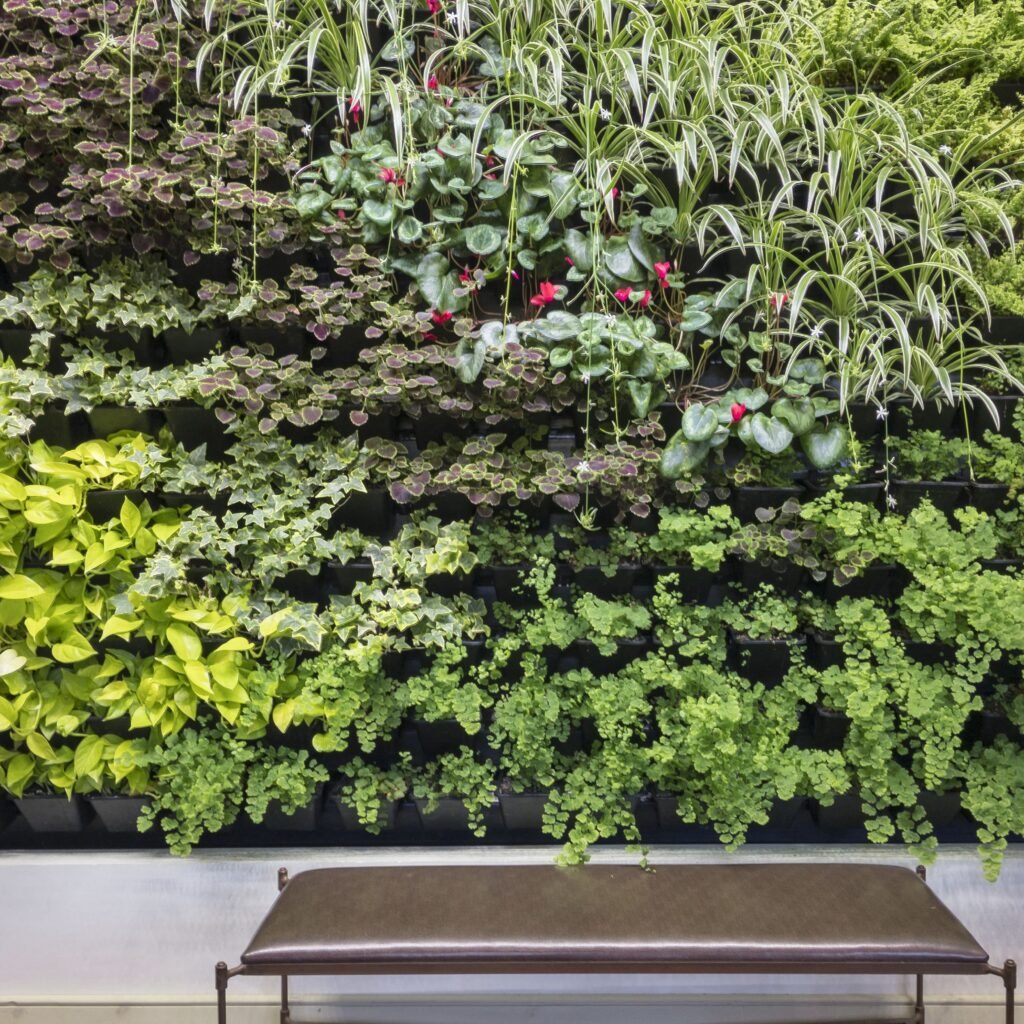
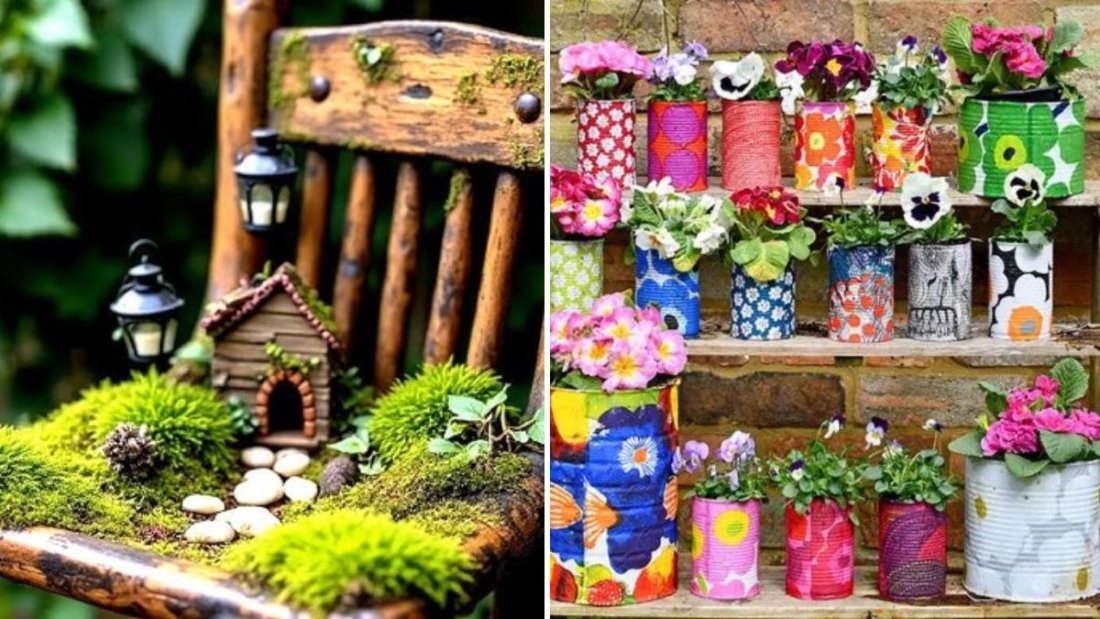
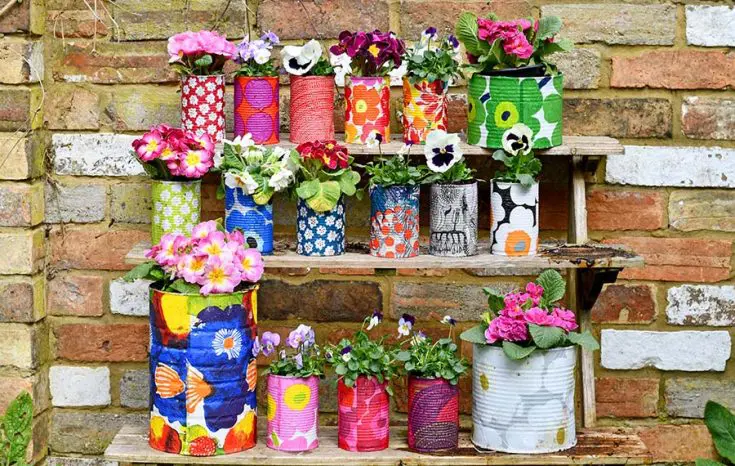
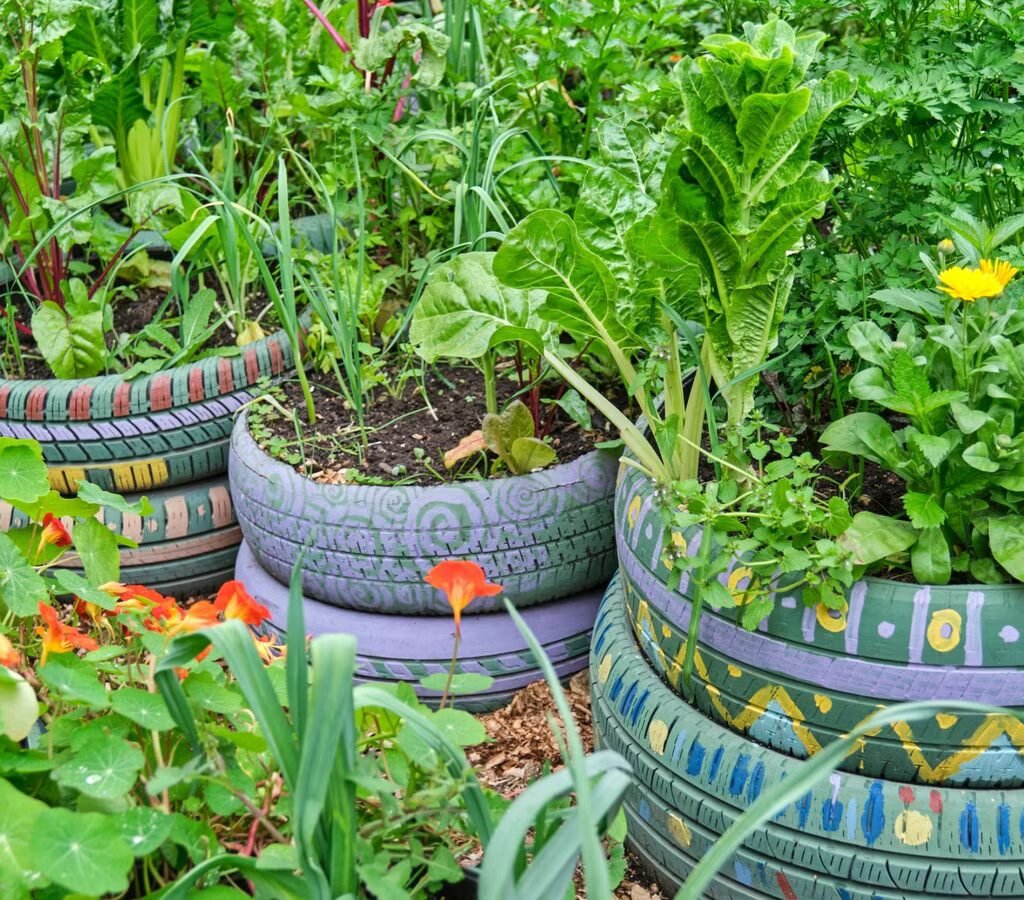
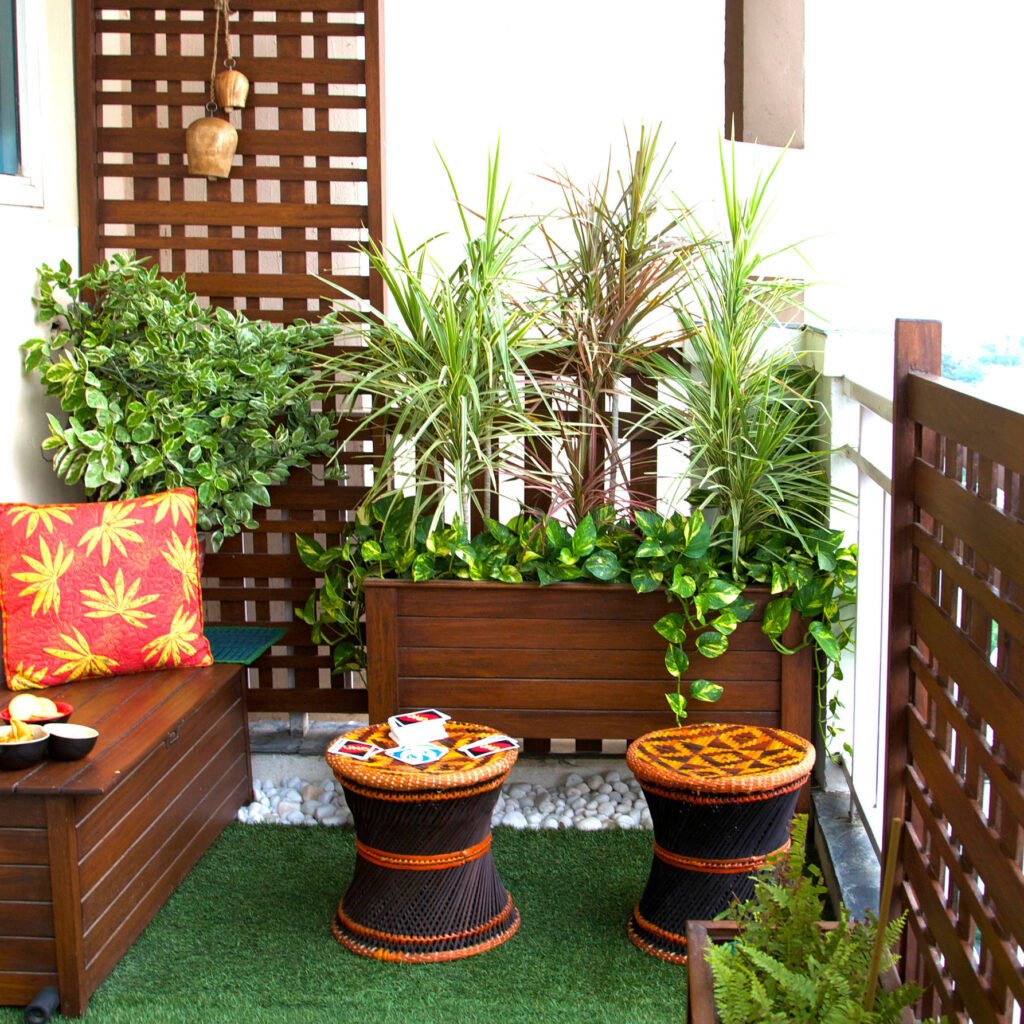
6. Overcrowding the Balcony with Too Many Plants

It’s easy to get excited and fill every inch of your balcony with greenery — but overcrowding is a silent killer of plant health.

Why This Matters

When plants are placed too close:

  • they compete for light,
  • airflow decreases,
  • humidity rises,
  • pests multiply,
  • and diseases spread faster.

How to Avoid This Mistake

  1. Plan your layout.
    Leave enough space between containers for air movement.
  2. Group plants by needs.
    Water-loving plants together.
    Sun-loving plants together.
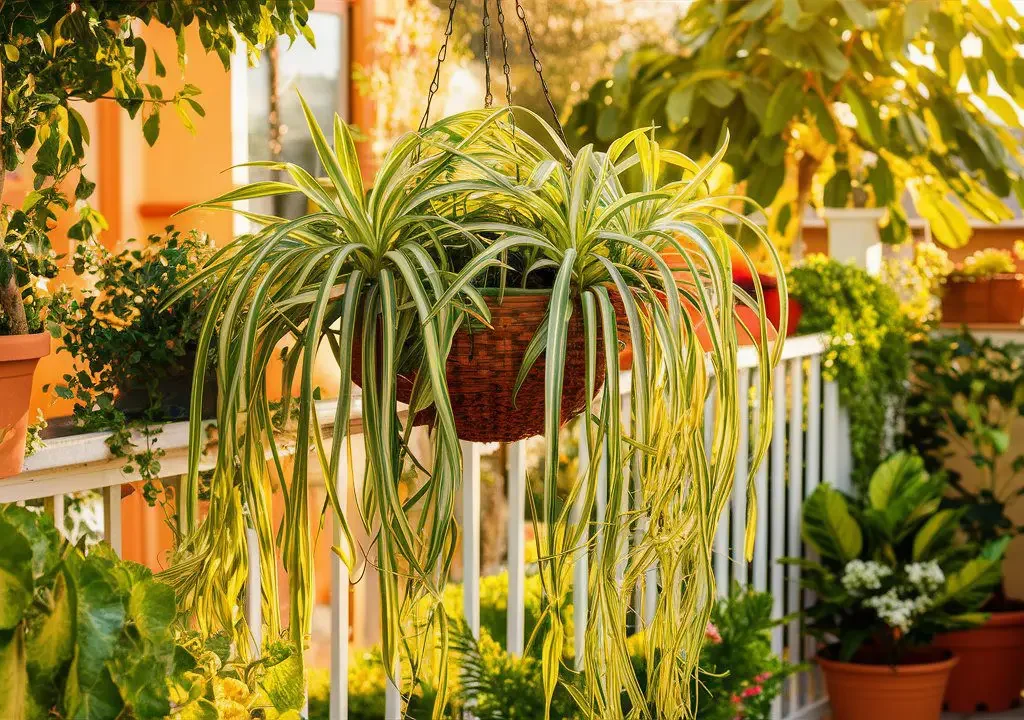
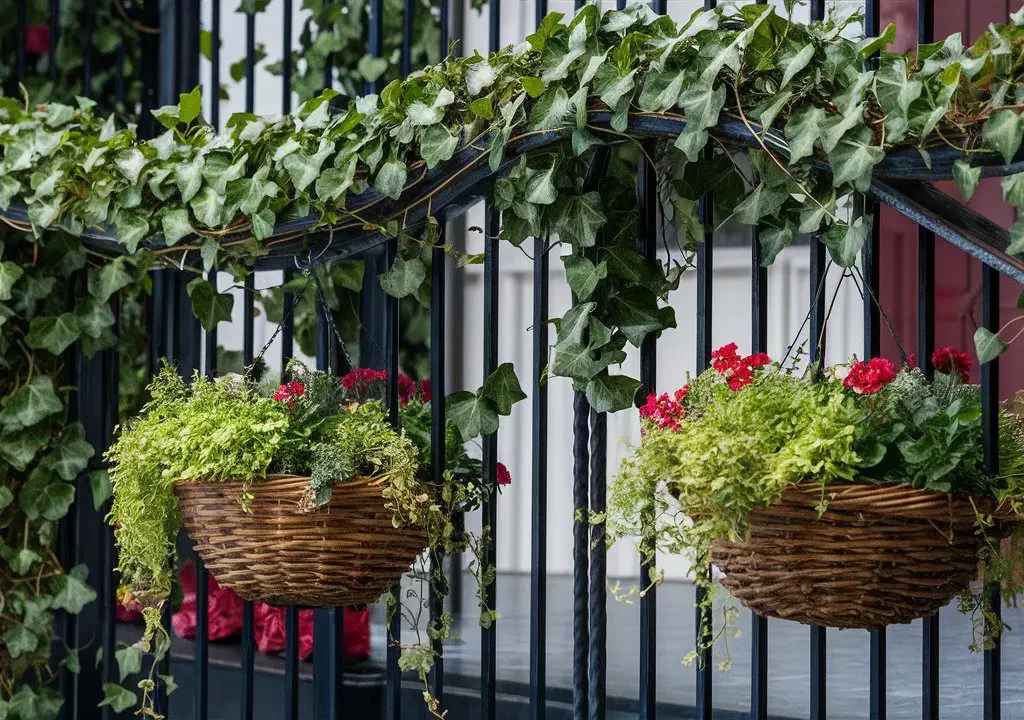
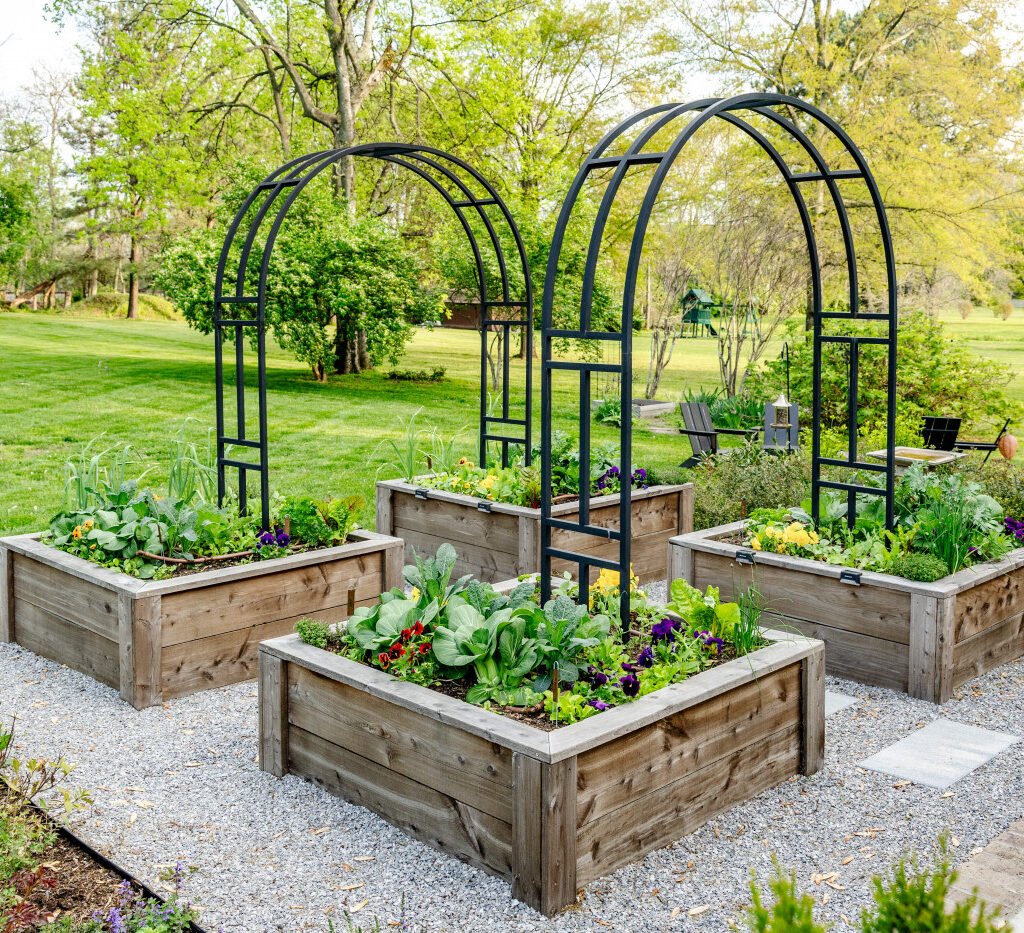
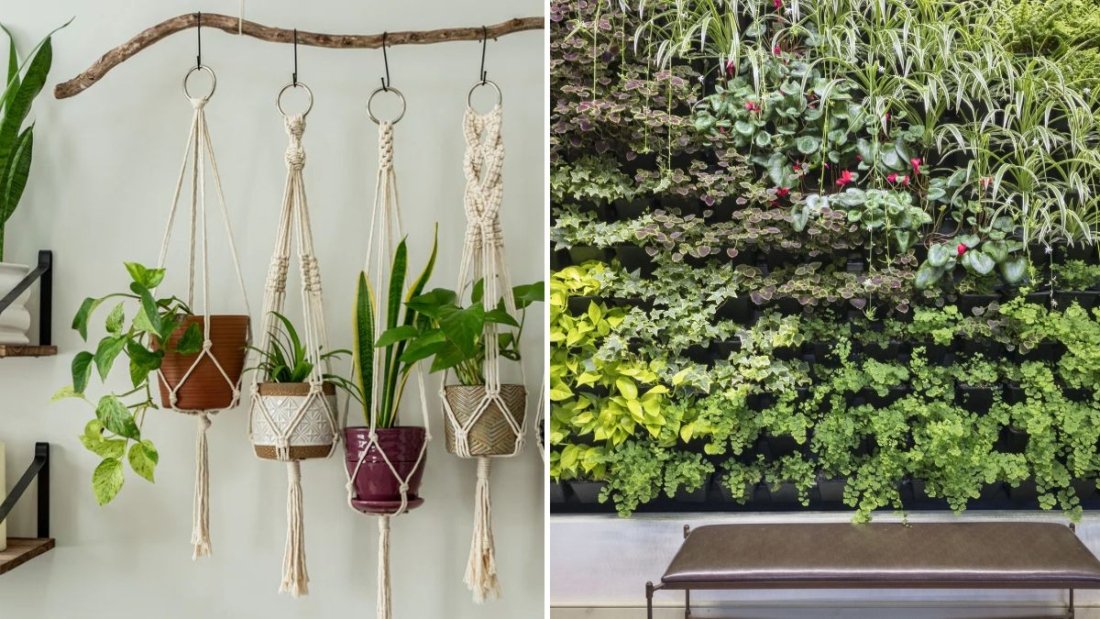
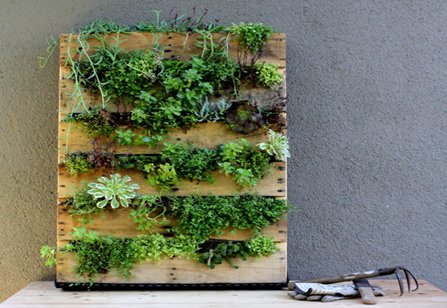
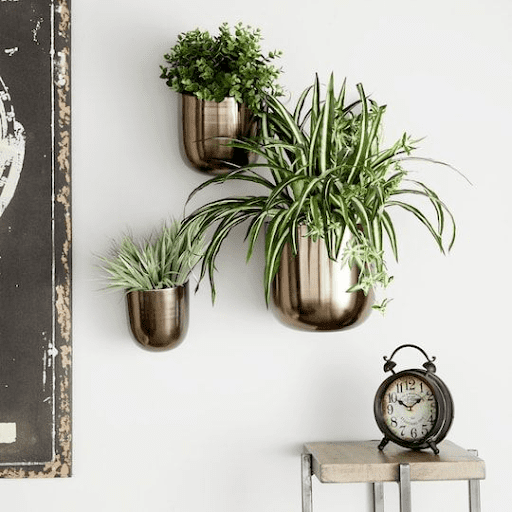
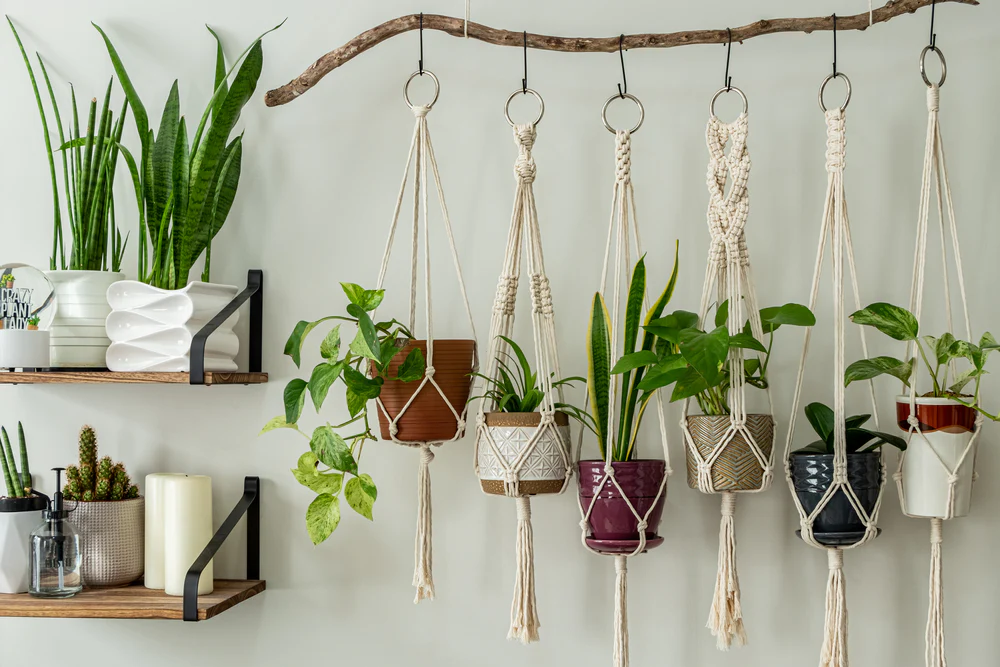
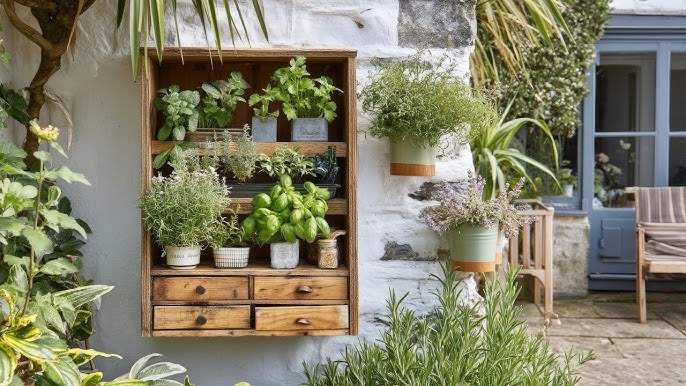
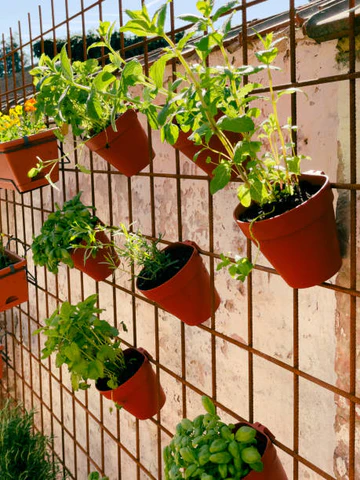
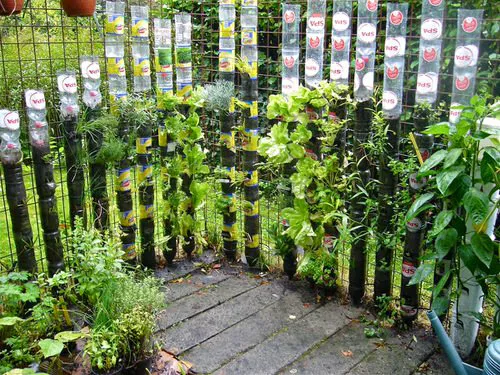
    Shade-tolerant plants separately.
  3. Use vertical gardening techniques.
    • wall planters,
    • trellises,
    • hanging baskets,
    • railing planters.

This frees up floor space while maximizing greenery.

  1. Prune regularly.
    Trimming keeps plants compact and healthy.

Smart Tip

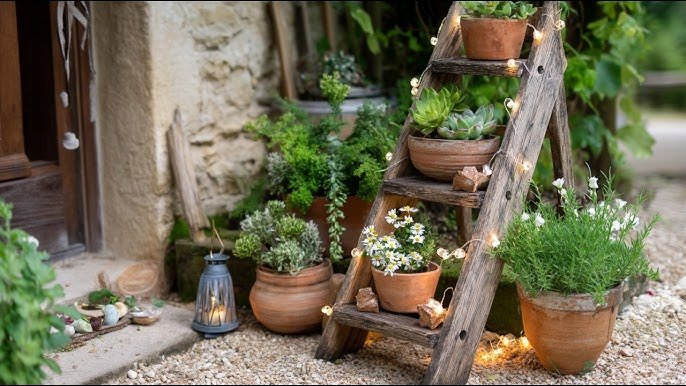
Follow the “3-tier layout”:

  • Tall plants at the back,
  • Bushy plants in the middle,
  • Small herbs in the front.

This ensures all plants get adequate sunlight.


Final Thoughts

Balcony gardening is a joyful hobby — and with the right approach, your small outdoor space can become a flourishing mini-garden. By avoiding these six common mistakes, you’ll create a healthier, more productive, and more beautiful balcony garden.

Remember:
Gardening isn’t about perfection — it’s about learning. With each season, you’ll understand your balcony better and grow more confidently as a gardener.

If you want, I can also help you create:

How to Create Privacy with Balcony Plants: A Complete Guide for Natural, Beautiful Screening

How to Create Privacy with Balcony Plants: A Complete Guide for Natural, Beautiful Screening

Balconies are personal sanctuaries—your morning tea corner, your mini garden, your place to breathe fresh air away from the busy world. But when neighbouring buildings overlook your space or balconies are too close to yours, privacy becomes a challenge. The simplest and most natural solution? Balcony plants.

Plants create a soft, green shield that not only protects your privacy but also makes your balcony serene, fresh, and visually appealing. Whether you want full coverage or just a partial screen, there are many creative ways to use plants as privacy barriers.

This guide explains how to create privacy with balcony plants, the best plant choices, design tips, and smart tricks to build a private, peaceful balcony—no matter how small your space is.


Why Use Plants for Balcony Privacy?

Before diving into the how-to, it’s worth understanding why plants are such a popular privacy solution.

1. Natural and Aesthetic

Plants bring beauty and calmness into your living space. Instead of metal screens or thick curtains, green walls and pots create a soothing, organic environment.

2. Better Air Quality

Plants act like natural air filters, reducing dust and pollutants—perfect for urban homes.

3. Noise and Wind Reduction

Thick foliage helps soften outside noise and blocks harsh winds, making your balcony more comfortable.

4. Flexible and Customizable

You can choose tall plants, climbers, dense shrubs, vertical gardens, or even hanging planters depending on your privacy needs.

5. Budget-Friendly

With clever planning, you can create full privacy using inexpensive pots and fast-growing plants.


Step-by-Step Guide: How to Create Privacy with Balcony Plants

Let’s break down the process so you can design a beautiful and private balcony using plants.


Step 1: Assess Your Balcony’s Privacy Needs

Different balconies have different privacy concerns. Start by identifying the type of coverage you require.

● Direct Front Privacy

If your balcony faces another building directly, choose:

  • Tall plants
  • Dense shrubs
  • Vertical green walls

● Side Privacy

If neighbours can see you from the sides, install:

  • Trellises with climbing plants
  • Tall narrow planters placed at the edges

● Overhead Privacy

For balconies overlooked by upper floors:

  • Use pergolas with climbers
  • Hang trailing plants from a top grid

Understanding your specific privacy requirement helps you choose the right plants and arrangement.


Step 2: Choose the Right Plants for Privacy

Not all plants work well for privacy. You need plants that are tall, dense, fast-growing, or structured for natural screening.

Below are the best types of balcony plants for privacy.


1. Tall Bamboo (Clumping Variety)

Bamboo is one of the most popular plants for privacy due to its height and dense foliage.

Benefits:

  • Grows fast
  • Stays lush year-round
  • Creates immediate privacy
  • Rustles beautifully in the wind

Growing Tips:

  • Choose clumping bamboo, not running bamboo
  • Use large, deep pots
  • Water regularly but avoid waterlogging

2. Areca Palm

Elegant, tropical, and airy, Areca palms are perfect for side and front privacy.

Benefits:

  • Soft fronds filter light
  • Grows well in pots
  • Suitable for partial shade
  • Creates a resort-like look

Growing Tips:

  • Keep soil slightly moist
  • Place in bright indirect light
  • Trim dry fronds

3. Money Plant (Pothos) on Trellis

If you want a green wall without tall pots, climbing plants like pothos are excellent.

Benefits:

  • Very low maintenance
  • Fast-growing
  • Creates a thick vertical curtain
  • Thrives in indirect sunlight

Growing Tips:

  • Give it a trellis or net to climb
  • Prune regularly to make it bushier

4. Hedging Plants (Duranta, Ficus, Privet)

Shrub-style plants form dense foliage and make perfect natural partitions.

Benefits:

  • Highly customizable shapes
  • Can be pruned to maintain height
  • Suitable for long balconies

Growing Tips:

  • Use rectangular planters
  • Trim monthly for compact form

5. Bamboo Palm or Rhapis Palm

These palms grow slowly but make beautiful, long-term privacy screens.

Benefits:

  • Elegant layered foliage
  • Great for shaded balconies
  • Hardy and long-lasting

6. Bougainvillea on Trellis

If you want privacy plus color, bougainvillea is perfect.

Benefits:

  • Bright blooms
  • Fast-growing in sunny balconies
  • Creates vibrant natural coverage

Growing Tips:

  • Needs strong sunlight
  • Water sparingly
  • Add a sturdy support for climbing

7. Creeping Fig or Jasmine

These climbers form dense green walls with minimal space.

Benefits:

  • Thick foliage
  • Beautiful fragrance (jasmine)
  • Excellent for vertical privacy

8. Snake Plant or Tall Succulents

Good for balconies with strong wind exposure.

Benefits:

  • Very hardy
  • Doesn’t topple easily
  • Needs minimal care

Step 3: Use the Right Containers and Supports

How you arrange your balcony plants affects the privacy outcome just as much as the plants themselves.

● Tall Planters for Maximum Coverage

Using tall pots adds extra height instantly.

Materials:

  • Fiberglass
  • Plastic
  • Lightweight concrete
  • Wooden planters

● Vertical Trellises

Attach trellises to:

  • Balcony railing
  • Walls
  • Pots

Great for climbers like jasmine, bougainvillea, or pothos.

● Planter Boxes

Long rectangular boxes help create a continuous privacy line.

● Hanging Baskets and Rail Planters

Use them to cover gaps at eye level.

● Movable Plant Screens

Place plants on stands or wheels so you can shift them depending on sunlight or privacy needs.


Step 4: Arrange Plants for Maximum Privacy

The arrangement determines how effective your green privacy screen will be.

1. Layering Technique

Use plants of different heights to create a multi-level barrier:

  • Tall bamboo or palms at the back
  • Medium shrubs in the middle
  • Trailing plants or small pots at the front

This creates full coverage and visual depth.

2. Build a Living Wall

Vertical gardens save space and provide full privacy without blocking balcony floor area.

3. Group Tall Plants Together

Cluster tall species to create stronger visual barriers.

4. Place Plants Strategically

Identify the most exposed areas:

  • Directly facing neighbours
  • Near railings
  • Toward open buildings

Then place the densest plants there.

5. Fill Gaps with Climbers

If you notice small gaps after arranging tall plants, climbers or hanging plants can cover them easily.


Step 5: Maintain Your Balcony Privacy Plants

Healthy plants = thicker foliage = better privacy.

Watering

  • Windy balconies dry out quickly
  • Use a mulch layer to retain moisture
  • Water early morning or evening

Fertilizing

Feed your plants every 3–4 weeks using:

  • Vermicompost
  • Organic liquid fertilizers
  • Seaweed extract

Pruning

  • Trim palms and bamboo for shape
  • Prune shrubs to maintain density
  • Pinch climbers to encourage branching

Pest Control

Use natural solutions like:

  • Neem oil spray
  • Soap water
  • Garlic-chili spray

Healthy foliage remains dense and private.


Creative Ideas to Boost Balcony Privacy with Plants

Here are some stylish design ideas to elevate your balcony privacy setup:

● Create a Tropical Privacy Wall

Combine:

  • Areca palms
  • Banana plants
  • Calatheas

This adds height and lushness.

● Green Curtain with Creepers

Install a string trellis from top to bottom and grow:

  • Money plant
  • Sweet potato vine
  • Morning glory

● Mix Decorative Screens with Plants

Use bamboo screens, jute blinds, or lattice panels and let plants grow around them.

● Use Colorful Flowering Privacy Plants

Bougainvillea, hibiscus, and mandevilla add color and coverage.

● Hang Planters for Extra Layers

Trailing plants create a soft privacy curtain.


Final Thoughts

Creating privacy with balcony plants is not just practical—it transforms your space into a natural, calming retreat. With the right mix of tall plants, climbers, shrubs, and clever arrangement techniques, you can enjoy a fully private balcony without heavy screens or expensive installations.

Whether you want a dense green wall, a tropical corner, or a colourful flowering curtain, there is a plant combination perfect for your balcony. Start with simple planters, choose fast-growing species, and adjust your arrangement until you get the ideal level of privacy and beauty.

5 Best Plants for Windy Balconies: Hardy Green Choices for Breezy Urban Spaces

5 Best Plants for Windy Balconies: Hardy Green Choices for Breezy Urban Spaces

Balcony gardening is an incredible way to bring nature into your living space, especially in cities where outdoor areas are limited. But if your balcony is located on a high floor or faces an open direction, it may be much windier than a typical garden. Strong winds can break stems, dry out soil rapidly, and stress delicate plants. The good news? Many plants thrive even in windy conditions—some are naturally sturdy, some have flexible stems, and others form compact shapes that resist wind damage.

In this guide, you’ll discover the five best plants for windy balconies, along with practical tips on how to grow, protect, and maintain them. Whether you want greenery, flowers, herbs, or a low-maintenance setup, these plants will withstand breezy environments and still flourish beautifully.


Why Wind Matters in Balcony Gardening

Before exploring the plant list, it’s essential to understand how wind affects balcony gardens. Wind can be both beneficial and challenging.

Benefits of Wind

  • Promotes airflow and reduces fungal issues
  • Helps strengthen stems naturally
  • Keeps pests like aphids and whiteflies away
  • Provides gentle cooling in hot climates

Challenges of Wind

  • Increases evaporation, causing soil to dry quickly
  • Breaks tall, brittle stems
  • Uproots plants in lightweight containers
  • Scorches leaves during hot, dry winds
  • Makes temperature fluctuate dramatically

Choosing wind-resistant plants is the first and most important step in creating a thriving balcony garden that can handle breezy conditions.


1. Lavender (Lavandula) – Hardy, Fragrant, and Wind-Resistant

Lavender is one of the best plants you can grow on a windy balcony. Naturally adapted to Mediterranean climates, it thrives in breezy, well-ventilated environments.

Why Lavender Works Well

  • Has flexible stems that don’t snap easily
  • Tolerates dry conditions and strong airflow
  • Prefers full sun, common on wind-exposed balconies
  • Gives off a calming fragrance and attracts pollinators

Growing Tips

  • Use a wide, well-draining pot
  • Water sparingly; lavender hates overwatering
  • Place in an area with at least 6 hours of sunlight
  • Trim lightly after flowering to maintain shape

Lavender also makes your balcony smell incredible and adds a touch of Mediterranean charm.


2. Snake Plant (Sansevieria) – Tough, Compact, and Almost Indestructible

The snake plant is known for its ability to survive harsh indoor and outdoor conditions, including strong wind. Its upright, sturdy leaves don’t bend or snap easily, making it ideal for exposed balconies.

Why Snake Plant Is Ideal for Windy Spots

  • Tough leaves that withstand pressure
  • Doesn’t topple easily when planted in a wide pot
  • Tolerates sun, shade, and fluctuating weather
  • Extremely low-maintenance and drought-resistant

Growing Tips

  • Use a heavy-bottom pot to avoid tipping
  • Water only when the soil is completely dry
  • Keep in light shade during peak summer heat
  • Wipe leaves occasionally to keep them shining

Snake plants are also excellent air purifiers, adding both beauty and wellbeing to your balcony.


3. Rosemary (Rosmarinus officinalis) – Fragrant Herb that Loves Wind

Rosemary is a powerful herb that thrives in windy, sunny climates. Its needle-like leaves and woody stems naturally endure harsh airflow.

Why Rosemary Thrives in Wind

  • Adapted to rugged coastal environments
  • Wind helps prevent fungal diseases
  • Compact growth makes it highly stable
  • Adds wonderful fragrance and culinary value

Growing Tips

  • Place rosemary in full sun for 6–8 hours daily
  • Use a terracotta or heavy pot for stability
  • Water lightly and allow the soil to dry between sessions
  • Prune regularly to promote bushy growth

Whether you use it for cooking or decoration, rosemary is an all-around winner for windy balconies.


4. Jade Plant (Crassula ovata) – A Sturdy Succulent Perfect for Breezy Conditions

Succulents love sun, airflow, and dryness—all typical in windy balcony conditions. The jade plant is especially well suited because it has thick stems and fleshy leaves that store water, making it resilient.

Why Jade Plant Is Great for Windy Balconies

  • Wind rarely damages its strong, woody structure
  • Thrives in sun and doesn’t require frequent watering
  • Compact shape reduces risk of toppling
  • Adds a unique, sculptural look to your balcony

Growing Tips

  • Use well-draining succulent soil
  • Place in a bright or sunny corner
  • Water deeply but infrequently
  • Protect from cold, harsh winter winds if temperatures drop significantly

Jade plants also bring positive energy according to feng shui, making them a stylish and symbolic addition.


5. Bamboo Palm (Chamaedorea seifrizii) – Flexible and Elegant for Windy Corners

The bamboo palm is known for its graceful, arching fronds that bend rather than break in strong winds. It’s one of the few palms that performs well on balconies.

Why Bamboo Palm Works in Breezy Areas

  • Flexible stems that sway without damage
  • Tolerates partial shade, making it versatile
  • Creates a natural windbreak when planted in a group
  • Adds height and tropical beauty to your balcony

Growing Tips

  • Use a deep pot to anchor the roots
  • Water moderately, keeping soil slightly moist
  • Mist leaves occasionally in hot weather
  • Trim dry or damaged fronds for neat growth

A bamboo palm or a group of them can help shield other plants from excessive wind while enhancing the aesthetics of your balcony.


Bonus Plants That Also Thrive on Windy Balconies

If you want more options, these plants are also great performers in strong winds:

  • Aloe vera
  • Portulaca (Moss rose)
  • Geraniums
  • Agave
  • Sedum
  • Yucca
  • Boxwood shrubs (dwarf variety)

All these plants have either flexible stems, compact structures, or drought-loving characteristics that help them survive windy environments.


Tips to Protect Plants on Windy Balconies

Even wind-resistant plants need some protection in extreme conditions. Incorporate these simple strategies:

1. Use Heavy Pots

Terracotta, ceramic, or weighted plastic pots help plants stay stable.

2. Secure Pots to Railings or Walls

Use brackets, clips, or pot holders to prevent toppling.

3. Install Windbreaks

Options include:

  • Bamboo screens
  • Trellises
  • Tall plants grouped together
  • Fabric privacy screens

These reduce the wind’s intensity without blocking airflow entirely.

4. Keep Plants Well-Hydrated

Wind dries soil faster. Use:

  • Mulch
  • Coco chips
  • Pebbles

These retain moisture and protect the roots.

5. Choose Compact or Low-Growing Varieties

Plants with a naturally low center of gravity are less likely to topple or break.


Final Thoughts

Windy balconies don’t have to limit your gardening options—in fact, they can become vibrant, breezy green retreats with the right plants. Lavender, snake plant, rosemary, jade plant, and bamboo palm are all hardy, beautiful options that flourish even in strong winds. With the addition of protective techniques like windbreaks and weighted pots, you can confidently grow a flourishing balcony garden that stands strong in every season.

How to Build Raised Beds on a Balcony: A Complete Step-by-Step Guide for Urban Gardeners

How to Build Raised Beds on a Balcony: A Complete Step-by-Step Guide for Urban Gardeners

Balcony gardening has become increasingly popular as more people living in urban environments look for creative ways to grow their own food and enjoy greenery in small spaces. One of the most effective and space-efficient methods is building raised beds. Raised beds allow you to garden more comfortably, improve soil quality, maximize vertical space, and grow a variety of plants even on small balconies.

Whether you want a productive vegetable garden, a herb corner, or a decorative flower bed, building raised beds on a balcony is easier than it sounds. This comprehensive guide covers everything you need—from assessing your space and choosing materials to constructing, filling, and maintaining your raised beds.


Why Raised Beds Are Perfect for Balconies

Before diving into the step-by-step process, it’s essential to understand why raised beds work so well in balcony settings.

1. Space Efficiency

Raised beds help you grow more in limited space by:

  • Allowing deeper soil in areas where pots restrict root growth
  • Making it easy to arrange multiple plants in a compact area
  • Allowing vertical gardening with trellises and supports

2. Better Soil Control

You control the soil mix entirely, which ensures:

  • Proper drainage
  • Better aeration
  • Higher nutrient content
  • Reduced diseases from poor ground soil

3. Less Bending and More Comfort

Raised beds are higher than standard pots, so you strain less when watering, pruning, or harvesting.

4. Cleaner and More Organized

A balcony can quickly get cluttered with pots. Raised beds simplify the layout and give your gardening space a neat, aesthetic appearance.


Step 1: Assess Your Balcony’s Space, Sunlight, and Weight Capacity

Before building anything, you should evaluate whether your balcony is suitable for raised beds.

Measure the Available Area

Sketch your balcony layout and note:

  • Corners
  • Safety railings
  • Walls
  • Open walking area
  • Drainage outlets

This helps you decide the right size and number of raised beds. A typical balcony raised bed is:

  • 2–4 feet long
  • 1–2 feet wide
  • 1–2 feet deep

These dimensions allow root growth while keeping the weight manageable.

Check Weight Capacity

Soil is heavy—especially when wet. Raised beds hold large volumes of soil, so knowing how much weight your balcony can support is crucial. If unsure:

  • Consult building management
  • Avoid extremely large or deep beds
  • Choose lightweight materials like grow bags or wooden frames

Observe Sunlight

Identify which parts of your balcony get the most sunlight:

  • 6+ hours: Ideal for vegetables and herbs
  • 3–5 hours: Good for leafy greens and shade-tolerant plants
  • Very little sun: Choose shade-loving ornamentals or install reflectors

Sun mapping helps you position your raised beds for maximum growth.


Step 2: Choose the Best Type of Raised Bed for Your Balcony

Raised beds aren’t one-size-fits-all. Choose one that matches your space, weight limitations, and aesthetic preferences.

Wooden Raised Beds

Wood is the most popular material because it is:

  • Lightweight
  • Affordable
  • Easy to assemble
  • Visually appealing

Use rot-resistant wood like cedar, pine, teak, or bamboo composite.

Metal Raised Beds

Metal beds are long-lasting and modern-looking. However:

  • They can get hot in summer
  • They’re slightly heavier
  • They need a lining to protect roots

Fabric Grow Bags

If weight is your primary concern, grow bags are perfect. They are:

  • Extremely lightweight
  • Affordable
  • Breathable
  • Easy to move around

You can place multiple grow bags inside a wooden or metal frame to create a “raised bed look.”

Plastic or Resin Beds

These are durable and resist moisture but may not be eco-friendly.


Step 3: Build or Assemble Your Raised Bed Frame

Depending on your chosen material, you can either build your raised bed manually or assemble pre-made kits.

For Wooden Raised Beds

You’ll need:

  • Boards (1–2 inches thick)
  • Screws or corner brackets
  • Drill or screwdriver

Steps:

  1. Cut your wood to size or buy pre-cut planks.
  2. Join the corners with screws or metal brackets.
  3. Sand rough edges.
  4. Apply a natural sealant to extend its life.

For Metal Raised Beds

Most metal beds come as kits. Just:

  1. Align the panels.
  2. Attach with screws or provided fasteners.
  3. Add protective edge covers if included.

For Fabric or Plastic Options

Simply unfold and place them where you want.


Step 4: Prepare the Base and Ensure Proper Drainage

Drainage is vital in balcony gardens to prevent waterlogging and structural issues.

Protect the Balcony Floor

Use one of these options:

  • A waterproof sheet
  • Rubber mat
  • Wooden pallet base
  • Plastic tray

This prevents staining and directs water toward the drainage outlet.

Elevate the Raised Bed

Use blocks or stands to slightly raise the bed. This:

  • Improves drainage
  • Allows airflow underneath
  • Reduces mold buildup

Add a Bottom Layer

Before adding soil, create a drainage layer:

  • 1–2 inches of gravel
  • Broken terracotta pieces
  • LECA balls (lightweight and efficient)

This helps prevent root rot and improves soil performance.


Step 5: Fill the Raised Bed with a Balcony-Friendly Soil Mix

The right soil mix ensures healthy plant growth and reduces weight.

Ideal Balcony Soil Mix

A lightweight, nutrient-rich blend:

  • 40% cocopeat – retains moisture without becoming heavy
  • 30% compost – provides nutrients
  • 20% garden soil – gives structure
  • 10% perlite or sand – improves drainage

Avoid using heavy clay soil.

Enrich the Soil

Before planting, mix in:

  • Vermicompost
  • Neem cake powder
  • Organic micronutrients

These boost plant growth naturally.


Step 6: Planting Vegetables, Herbs, and Flowers in Your Raised Bed

Raised beds on balconies can support many crops. Choose plants that match your sunlight conditions.

Best Plants for Sunny Balconies

  • Tomatoes
  • Chilies
  • Beans
  • Okra
  • Spinach
  • Basil
  • Marigold
  • Eggplant

Best Plants for Partial Shade

  • Lettuce
  • Mint
  • Fenugreek
  • Coriander
  • Pansies
  • Ferns
  • Peace lilies

Companion Planting Tips

Grow plants that benefit each other:

  • Basil + tomatoes
  • Marigold + vegetables (repels pests)
  • Mint + leafy greens

Avoid overcrowding—each plant needs space to breathe.


Step 7: Maintain Your Balcony Raised Beds for Long-Term Success

Once your raised beds are set up and planted, consistent care helps them thrive.

Watering

Balcony beds dry faster due to wind exposure.
Tips:

  • Water early morning or evening
  • Use a watering can for gentle flow
  • Add mulch to retain moisture

Mulch options:

  • Dry leaves
  • Coco chips
  • Grass clippings

Fertilizing

Container gardening requires regular nutrition. Feed every 3–4 weeks using:

  • Compost tea
  • Vermicompost
  • Seaweed extract
  • Banana peel fertilizer

Pruning and Harvesting

Regular pruning:

  • Keeps plants bushy
  • Prevents pests
  • Encourages more yield

Harvest frequently to promote new growth.

Pest Management

Use natural solutions:

  • Neem oil spray
  • Soap water
  • Garlic-chili spray

Check your plants weekly for early signs of pests.


Final Thoughts

Building raised beds on a balcony is one of the best ways to create a productive, organized, and visually appealing garden in a small space. With the right materials, soil mix, and care routine, your balcony can become a thriving green sanctuary filled with vegetables, herbs, and flowers.

Whether you’re a beginner or an experienced gardener, raised beds make balcony gardening easier, cleaner, and more enjoyable. Start small, experiment with different plants, and watch your balcony transform into your favourite escape.

5 Steps to Create a Rooftop Garden from Scratch: A Complete Beginner’s Guide

5 Steps to Create a Rooftop Garden from Scratch: A Complete Beginner’s Guide

Transforming a plain rooftop into a lush green oasis is one of the most satisfying and sustainable ways to use your outdoor space. Whether you live in an apartment, a small urban home, or simply want to maximise unused space, a rooftop garden can give you fresh vegetables, vibrant flowers, improved air quality, and even a private relaxation zone. The best part? You can start even if you have zero gardening experience.

This guide breaks down five essential steps to create a rooftop garden from scratch. From planning and selecting the right containers to choosing plants and maintaining the space, you’ll learn everything you need to begin your gardening journey confidently.


Step 1: Assess Your Rooftop and Plan the Layout

Before you buy soil or plants, the first and most important step is understanding your rooftop’s structure and environment. Rooftop gardening is slightly different from ground gardening because of sun exposure, wind, heat, and weight capacity.

Check the Load-Bearing Capacity

Soil, pots, water, furniture, and plants all add weight. A structural engineer or your building management can help confirm whether your terrace can safely support a garden. Opt for lightweight containers and soil mixes if your rooftop has lower load limits.

Observe Sunlight Exposure

Most rooftop gardens receive full sun, especially in tropical and subtropical climates. Spend a few days observing how many hours of sunlight your rooftop gets:

  • 6–8 hours: Ideal for vegetables, herbs, and flowering plants
  • 3–5 hours: Suitable for shade-loving plants like ferns and peace lilies
  • Full sun all day: Use shade nets or pergolas to protect sensitive plants

Consider Wind and Heat

Rooftops experience stronger winds and temperature fluctuations. To protect your plants:

  • Install windbreaks using bamboo screens, trellises, or tall plants.
  • Use mulch to prevent soil from drying out.
  • Avoid metal containers in hot climates as they heat up quickly.

Sketch Your Layout

Plan where each section will go:

  • A vegetable corner
  • A flower area
  • A seating zone
  • Space for storage or composting

This simple planning saves time, effort, and plant losses later.


Step 2: Set Up Proper Waterproofing and Drainage

Rooftop gardening requires responsible water management. Improper drainage or soil seepage can damage ceilings and walls below. Proper waterproofing keeps your garden safe and long-lasting.

Waterproof the Rooftop

If your terrace isn’t waterproofed, get it coated with a reliable waterproof membrane. Many homeowners skip this step and regret it later when they face leakage problems. This is a crucial long-term investment.

Create Good Drainage

Plants don’t like sitting in water, and neither does your terrace surface. Ensure:

  • Drainage outlets are clear
  • There is a slight slope for water to flow
  • You use trays under pots to prevent water from spreading

You can also use drainage mats, gravel layers, or elevated stands to help excess water flow out easily.


Step 3: Choose the Right Containers, Soil, and Tools

Once your rooftop is ready, it’s time to gather the essentials.

Select Lightweight Containers

Because weight is a concern, choose containers such as:

  • Grow bags
  • Plastic or resin pots
  • Wooden planters
  • Fiber-reinforced containers
  • Vertical garden pockets

Avoid heavy ceramic and concrete pots unless your terrace can handle them.

Use Rooftop-Friendly Soil Mix

Rooftop plants need a soil mixture that is:

  • Lightweight
  • Well-aerated
  • Moisture-retaining but not waterlogged

A good mix:

  • 40% cocopeat
  • 30% compost
  • 20% garden soil
  • 10% perlite or sand

This blend keeps plants healthy and reduces the weight carried by your terrace.

Essential Gardening Tools

Start with basic tools:

  • Hand trowel
  • Pruning shears
  • Watering can or hose
  • Gloves
  • Spray bottle
  • Organic fertilizers

You don’t need fancy tools; consistency and good care matter more than equipment.


Step 4: Choose the Right Plants for Your Rooftop Garden

Plant selection can make or break your rooftop gardening experience. Choose plants that thrive in your climate and rooftop conditions.

Start with Easy-Growth Plants

If you’re new to gardening, begin with plants that require minimal care:

  • Herbs: Basil, mint, rosemary, coriander, thyme
  • Vegetables: Tomatoes, chilies, brinjal, okra, spinach, lettuce
  • Flowers: Marigold, zinnias, vinca, hibiscus

These plants are adaptable, fast-growing, and rewarding for beginners.

Add Vertical and Climbing Plants

Climbers are perfect for rooftops because they:

  • Save space
  • Add privacy
  • Reduce heat
  • Look beautiful

Try:

  • Money plant
  • Morning glory
  • Cucumbers
  • Beans

Install trellises or netting to support them.

Grow Shade and Air-Purifying Plants

To cool down a hot terrace, include:

  • Areca palms
  • Snake plants
  • Spider plants
  • Bamboo palms

They help create a comfortable microclimate.

Create Zones for Aesthetic Balance

Distribute plants thoughtfully:

  • Tall plants at the back or corners
  • Medium plants in the center
  • Small pots and herbs in the front

This gives a clean, visually pleasing layout.


Step 5: Maintain and Care for Your Rooftop Garden

A rooftop garden requires consistent but manageable care. Once your garden is set up, maintaining it becomes an enjoyable routine.

Watering Wisely

Rooftops dry faster due to sun and wind, so check soil moisture regularly. Water early in the morning or late evening to reduce evaporation.

To make watering easier:

  • Install a simple drip irrigation system
  • Use self-watering pots
  • Add mulch made of dry leaves, coco chips, or straw

Fertilize Regularly

Plants in containers need nutrients more frequently than ground plants. Feed them with organic options like:

  • Compost
  • Vermicompost
  • Cow dung manure
  • Neem cake
  • Banana peel fertilizer

Feed every 20–30 days for healthy growth.

Prune and Clean

Remove:

  • Dead or yellowing leaves
  • Weeds
  • Weak branches

Pruning encourages healthy plant growth and prevents disease buildup.

Monitor for Pests

Rooftop gardens sometimes attract pests like aphids, mealybugs, or caterpillars. Use natural solutions:

  • Neem oil spray
  • Soap water spray
  • Garlic-chili homemade insect repellent

Check your plants weekly to catch problems early.

Seasonal Care

Adapt your garden to each season:

  • Add shade nets in summer
  • Move delicate plants indoors during monsoon or winter
  • Replace spent plants with seasonal ones

This ensures year-round greenery and productivity.


Final Thoughts

Creating a rooftop garden from scratch may seem overwhelming, but once you begin, it becomes one of the most fulfilling and therapeutic hobbies you can adopt. These five steps—planning, waterproofing, choosing the right materials, selecting suitable plants, and maintaining them—are all you need to transform an empty terrace into a beautiful green escape.

A rooftop garden not only enhances your home but also supports the environment, reduces heat, improves air quality, and gives you fresh produce. Start small, stay consistent, and watch your rooftop slowly turn into a thriving garden sanctuary.

5 Creative Ways to Build a Garden Wall in Small Spaces (No Yard Needed!)

5 Creative Ways to Build a Garden Wall in Small Spaces (No Yard Needed!)

Creating a lush, green space in a small home, compact balcony, or tight urban apartment is easier than you think. Even if you don’t have ground space for traditional gardening, a garden wall—also known as a vertical garden—lets you grow herbs, flowers, succulents, and even vegetables without sacrificing floor area. Whether you live in a studio apartment or a high-rise flat, a garden wall can bring nature right into your living environment, improve air quality, and enhance your décor.

In this 1200-word guide, you’ll discover five brilliant, space-saving ways to build a garden wall, using materials ranging from old racks to wooden pallets. These ideas are practical, budget-friendly, and perfect for anyone who wants to maximize green space in a small area.


1. Use a Wooden Pallet to Build a Rustic Vertical Garden

Wooden pallets are one of the most budget-friendly and effective structures for building instant garden walls. They’re easy to find, easy to customize, and strong enough to hold multiple plant pots.

Why Pallets Work Great for Small Spaces

  • They add vertical height without taking up floor space.
  • The slats naturally create compartments for plant pots.
  • Pallets can be repurposed, keeping your project eco-friendly.

How to Build It

  1. Choose the right pallet – Preferably untreated wood and in good condition.
  2. Sand and paint (optional) – A coat of outdoor paint or varnish enhances its life.
  3. Add landscaping fabric – Staple it to the back to hold soil securely.
  4. Fill with soil – Add potting mix between slats if planting directly.
  5. Mount or lean – Lean it against a wall, or use sturdy hooks to mount it.

Best Plants for Pallet Gardens

  • Leafy greens like lettuce
  • Trailing plants such as ivy or pothos
  • Succulents
  • Herbs like basil, mint, and parsley

Wooden pallet garden walls give your small space a farmhouse charm while keeping your plants beautifully organized.


2. Hang Wall-Mounted Planters for a Modern Green Wall

If you want a sleek and minimalistic look, wall-mounted planters are the perfect solution. They work beautifully in balconies, indoor living rooms, or narrow corridors.

Why Choose Wall-Mounted Planters?

  • They create a clean, structured look.
  • They save maximum floor space.
  • You can arrange them like art for a stylish statement.

Types of Wall-Mounted Planters

  • Ceramic pots with wall hooks
  • Metal containers for a modern aesthetic
  • Terracotta pots for a classic look
  • Pocket planters made of breathable fabric

Installation Tips

  • Use corrosion-resistant nails or wall plugs.
  • Ensure the wall structure can support the weight of soil and water.
  • Arrange the planters in geometric patterns—rows, grids, or zig-zags—for visual appeal.

Plants That Thrive in Wall-Mounted Planters

  • Ferns
  • Spider plants
  • Hoya
  • Small flowering plants

This type of garden wall turns your space into a vertical botanical gallery.


3. Create a Garden Wall Using Vertical Shelving Units

If you want your garden wall to be flexible and easy to move, vertical shelves are an excellent choice. They are one of the easiest methods to get started with a vertical garden.

Why Shelving Units Are Great

  • No installation required—just place and use.
  • Perfect for renters who cannot drill walls.
  • Allows mix-and-match pot arrangements.

Types of Shelving Options

  • Ladder-style shelves
  • Metal wire racks
  • Bamboo shelves
  • Reclaimed wooden shelves

How to Set Up the Garden Wall

  1. Choose a shelf that fits your balcony or indoor space.
  2. Arrange plants based on their sunlight needs—sun lovers on top, shade lovers below.
  3. Use waterproof trays or liners to prevent water damage.
  4. Add decorative items like lanterns or fairy lights for aesthetics.

Plants to Display

  • Succulents
  • Small herbs
  • Ornamental grasses
  • Mini roses or dwarf flowering plants

Shelving units let you grow a large number of plants without making your space feel cramped.


4. Build a Garden Wall with Hanging Pots and Macramé Holders

This idea blends gardening with home décor. Hanging pots look elegant, bohemian, and vibrant—perfect for apartments or balconies with limited ledge space.

Why Hanging Planters Work Well in Small Spaces

  • They make use of ceiling and railing space.
  • They allow light to reach plants from all angles.
  • They add visual height and dimension to your area.

Materials You Can Use

  • Macramé plant hangers
  • Metal or wooden rings
  • Rope and hooks
  • Hanging ceramic or plastic pots

Tips for Using Hanging Pots

  • Ensure hooks are securely fixed and weight-tested.
  • Hang plants at varying heights to create depth.
  • Use light potting soil to avoid unnecessary weight.

Best Plants for Hanging Walls

  • String of pearls
  • Tradescantia
  • Money plant (pothos)
  • Hanging ferns like Boston fern
  • Mini trailing tomatoes (for edible décor!)

Hanging vertical gardens add charm and personality while keeping your space green and uncluttered.


5. Make a Living Wall Using Climbing Plants and a Trellis

If you want a dramatic garden wall that feels lush and full, climbing plants are the best choice. With the help of a trellis, grill, or wire frame, you can transform a plain wall into a green paradise.

Why Trellis Walls Are Ideal

  • They’re excellent for balconies with railings.
  • Climbing plants naturally cover vertical space.
  • They create shade and privacy.

What You Need

  • Wooden or metal trellis
  • Balcony railing or fixed wall hooks
  • Fast-growing climbers
  • Lightweight potting mix

How to Build It

  1. Attach the trellis to the wall or rail using zip ties or hooks.
  2. Place pots at the base of the trellis.
  3. Plant your climbing variety and gently train the vine upward.
  4. Trim periodically to maintain shape and thickness.

Plants Perfect for Garden Wall Trellises

  • Money plant
  • English ivy
  • Jasmine
  • Morning glory
  • Climbing roses

A trellis-style garden wall is both functional and beautiful, offering greenery and natural privacy.


Final Tips for Making the Most of Your Garden Wall

Here are a few last pointers to keep your vertical garden thriving:

1. Use Lightweight Soil

Choose potting soil instead of garden soil to reduce weight.

2. Pick the Right Spot

Most plants love bright indirect light, so place your garden wall accordingly.

3. Water Carefully

Vertical gardens may dry out faster—use a watering can with a long spout or a drip system.

4. Mix Plants with Similar Needs

Combine plants that require similar light, water, and soil conditions.

5. Add Personal Touches

Decorative stones, fairy lights, or small garden accessories can bring your garden wall to life.


Conclusion

Even the smallest corner of your home has the potential to bloom with creativity. A garden wall is not just a space-saving solution—it’s a piece of living art. With these five ideas, you can transform any small balcony, narrow corridor, or unused wall into a lush vertical oasis.

Whether you prefer rustic pallet designs, modern wall-mounted planters, or a romantic climbing trellis, there’s a perfect garden wall option for your space. Start small, stay consistent, and enjoy the satisfaction of building your own green sanctuary.

How to Turn Old Furniture into Stylish Planters: Creative Upcycling Ideas for Your Home Garden

How to Turn Old Furniture into Stylish Planters: Creative Upcycling Ideas for Your Home Garden

Gardening has always been a creative activity, but modern home gardeners are taking it to a whole new level by transforming old, unused furniture into stylish planters. Whether it’s a broken chair, a vintage drawer, an old cabinet, or a side table you no longer use, almost any furniture piece can find new life as a unique and eye-catching planter.

Upcycling not only helps reduce waste but also adds personality, charm, and character to your garden or balcony. Instead of buying expensive décor, you can reuse what you already have and create functional art pieces that make your space stand out.

In this guide, you’ll learn how to turn old furniture into beautiful planters, what type of furniture works best, how to prepare them safely, and the best plants to grow in each type. Get ready to see your old household items with brand-new eyes!


Why Upcycle Old Furniture into Planters?

Before diving into the “how-to,” let’s understand why upcycled furniture planters are worth considering.

1. Eco-Friendly Choice

Instead of throwing away old furniture, repurposing reduces landfill waste and supports sustainable living.

2. Adds Character to Your Garden

A vintage drawer full of flowers or a chair overflowing with greens adds charm that store-bought planters can’t match.

3. Highly Customizable

Paint it, carve it, decorate it, or distress it—the options are endless. Every piece becomes a reflection of your style.

4. Perfect for Indoor or Outdoor

Upcycled planters can be used in:

  • Gardens
  • Balconies
  • Patios
  • Indoors
  • Terraces

5. Cost-Effective

It saves money! Instead of buying new planters, you simply repurpose what you already own.


What Furniture Can Be Turned into Planters?

Almost any sturdy piece of furniture can become a planter with a little creativity. Here are popular options:

  • Old wooden chairs
  • Broken stools
  • Side tables
  • Broken drawers
  • Wooden cabinets
  • Ladder shelves
  • Bed frames
  • Crates or trunks

As long as the furniture can hold a pot, soil, or plant container, it has potential.


Step-by-Step Guide: Turning Old Furniture into Planters

Let’s go through the process of converting your old furniture into a beautiful garden feature.


Step 1: Choose the Right Furniture Piece

Start with a furniture piece that is stable and strong enough to hold soil or containers. Make sure it’s:

  • Not wobbly
  • Not infested with termites
  • Capable of supporting weight
  • Made of a material that can resist moisture (wood, metal, or plastic are ideal)

Even if the piece is broken, you can creatively work around it—especially for rustic or shabby-chic themes.


Step 2: Clean and Repair the Furniture

Before turning it into a planter:

  1. Clean it thoroughly to remove dust, grease, or old paint flakes.
  2. Repair structural weaknesses with nails, wood glue, or screws.
  3. If it’s wooden, treat it for moisture resistance, especially if it will be placed outdoors. Apply:
    • Wood sealant
    • Varnish
    • Outdoor paint

This keeps the furniture from rotting or swelling.


Step 3: Add Drainage

Plants need proper drainage to stay healthy. Depending on the furniture piece, you may need to:

  • Drill holes in the bottom
  • Add a plastic liner with holes
  • Insert pots with drainage holes into the furniture

Remember: standing water will damage both the plant and the furniture.


Step 4: Line the Furniture (Optional but Recommended)

To protect the wood or interior:

  • Use heavy-duty plastic sheets
  • Landscape fabric
  • Waterproof liners

This prevents soil from making direct contact with the furniture, increasing its lifespan.


Step 5: Add Soil or Pots

You can either fill the furniture directly with soil or place pots inside it.

Direct Soil Filling

Ideal for deep drawers, cabinets, or trunks.

Using Pots Inside

Perfect for chairs, shelves, or small tables.
This method makes rearranging plants easier.


Step 6: Paint and Decorate

This is where the fun starts!

Painting Ideas

  • Pastel colors for a shabby-chic look
  • White or grey for a modern minimalist style
  • Bright colors for a playful garden theme
  • Distressed paint for a vintage vibe

Decorative Elements

  • Stencils
  • Decoupage
  • Jute rope
  • Mosaic tiles
  • Garden labels

A little creativity can turn a simple piece into a showstopper.


Creative Furniture Planter Ideas

Here are some of the most popular (and beautiful!) ways to repurpose furniture into planters.


1. The Drawer Garden

Old drawer units are perfect for multi-level gardening.

How to Make It

  • Pull out drawers at different angles
  • Fill each drawer with potting mix
  • Plant flowers, herbs, or trailing plants
  • Paint the exterior for a cohesive look

Best Plants

  • Petunias
  • Mint
  • Pansies
  • Succulents
  • Mini ferns

Drawers create a charming cascading effect when planted with trailing varieties.


2. The Chair Planter

A broken chair can be transformed into a unique planter by replacing its seat with a pot.

How to Make It

  • Remove the broken seat
  • Attach a metal or plastic pot in the empty space
  • Paint the chair to match your garden style

Best Plants

  • Geraniums
  • Chrysanthemums
  • Spider plants
  • Calibrachoa

This design creates an elegant farmhouse-inspired look.


3. The Ladder Shelf Garden

Old ladders—especially wooden ones—make fantastic tiered plant stands.

How to Use It

  • Lean the ladder against a wall
  • Place pots on each step
  • Add vines or trailing plants to enhance the look

Best Plants

  • Money plant
  • English ivy
  • Philodendron
  • Herbs in small pots

It provides a perfect vertical garden solution for small balconies.


4. The Dresser Planter

A dresser offers multiple levels for creative planting.

How to Make It

  • Remove some drawers completely
  • Stagger others halfway
  • Add liners and soil
  • Decorate with paint or stencils

Best Plants

  • Colorful flowers for outdoor settings
  • Succulents and cacti for indoor spaces
  • Leafy greens for kitchen gardens

A dresser planter can become a stunning centerpiece in your garden or patio.


5. The Tabletop Planter

Side tables or coffee tables with hollow centers can be used as planter boxes.

How to Create It

  • Remove the tabletop section
  • Insert a planter box or metal tub
  • Secure it firmly
  • Plant medium-sized houseplants or herbs

Best Plants

  • Aloe vera
  • Basil
  • Ferns
  • Decorative grasses

This design blends seamlessly into both indoor and outdoor aesthetics.


Best Plants for Furniture Planters

When choosing plants, consider the size and depth of your furniture planter.

Shallow Planters

  • Succulents
  • Mint
  • Pansies
  • Marigolds

Medium Depth Planters

  • Basil
  • Lavender
  • Spider plants
  • Petunias

Deep Planters

  • Small shrubs
  • Tomatoes (if outdoors)
  • Peace lilies
  • Snake plants

Maintenance Tips for Furniture Planters

To ensure your upcycled planter lasts long and stays beautiful:

1. Keep It Dry

Avoid overwatering. Excess moisture can damage wooden furniture.

2. Use Outdoor-Grade Paint

This protects against sunlight and rain.

3. Reapply Sealant Annually

Especially if the piece stays outside.

4. Rotate Plants

Give all plants equal sunlight exposure.

5. Monitor Pests

Certain furniture materials can attract ants or termites—keep an eye out.


Final Thoughts

Turning old furniture into stylish planters is more than just a DIY project—it’s an artistic expression and a sustainable gardening solution. With imagination and the right techniques, you can transform worn-out items into stunning garden features that elevate your space.

Whether you’re using drawers for cascading flowers, repurposing chairs into artistic planters, or turning ladders into vertical gardens, each piece becomes a unique story in your home. Plus, it’s a fun, eco-friendly way to decorate without spending a fortune.

5 Balcony Design Ideas for Urban Gardeners: Transform Your Small Space into a Green Oasis

5 Balcony Design Ideas for Urban Gardeners: Transform Your Small Space into a Green Oasis

Urban living often means trading spacious backyards for compact balconies, but that doesn’t have to stop you from growing the lush garden of your dreams. With the right design ideas, even the smallest balcony can become a beautiful, practical, and relaxing green retreat. Whether you want a mini herb garden, a colorful flower corner, a vertical jungle, or a cozy reading nook filled with plants, the possibilities are endless.

In this guide, we’ll explore five creative balcony design ideas tailored specifically for urban gardeners. These designs maximize space, enhance aesthetics, and help you build a thriving garden high above the city streets.


1. The Vertical Garden Balcony

When floor space is limited, think vertically. A vertical garden makes it possible to grow more plants without crowding your balcony. It’s ideal for apartments with small or narrow balconies.

What You’ll Need

  • Wall-mounted planters
  • Hanging pots
  • Trellises
  • Vertical racks or shelves
  • Plastic bottle planters (for a DIY approach)

How to Design It

  1. Use Wall Space Efficiently
    Install hooks, shelves, or racks on the side walls of your balcony. Grow herbs, leafy greens, or flowering plants in small pots.
  2. Choose Tall Plants
    Use climbing varieties such as:
    • Money plant
    • Jasmine
    • Ivy
    • Mini cucumbers
    A trellis or vertical frame can guide their growth upward.
  3. Create a Vertical Green Wall
    Mounted planters or pocket-style felt planters help you grow many plants in one space.
  4. Mix Plants for Balance
    Combine:
    • Trailing plants
    • Upright plants
    • Compact herbs
    This creates a layered, lush look.

Best Plants for Vertical Gardens

  • Basil, mint, parsley
  • Spinach and lettuce
  • Petunias and marigolds
  • Philodendron
  • Ferns and spider plants

Why This Design Works

A vertical garden creates maximum greenery with minimal footprint. It also keeps your balcony clean, airy, and visually stunning.


2. The Cozy Green Reading Nook

If you dream of sipping tea while surrounded by plants, this balcony design is perfect. It blends comfort with greenery, turning a regular balcony into a mini sanctuary for relaxation.

Essential Elements

  • Comfortable seating (floor cushions, a small chair, or a bench)
  • Side table for books or tea
  • Soft lighting (fairy lights or lanterns)
  • Potted plants at various heights

How to Design It

  1. Start with Seating
    Choose a compact piece of furniture:
    • A foldable chair
    • A bamboo bench
    • A cushioned floor mat
    • A hanging egg chair (for larger balconies)
  2. Surround the Space with Plants
    Use medium-sized pots around the seating area.
    Consider:
    • Snake plants
    • Areca palm
    • Rubber plant
    • Lavender (for fragrance)
  3. Add Soft Lighting
    String lights or lanterns create a warm, inviting mood in the evening.
  4. Add a Rug or Mat
    A weather-resistant rug softens the space and adds comfort.

Pro Tips

  • Use scented plants like jasmine or mint to boost relaxation.
  • Add a small shelf or crate to hold books, candles, or decor.

Why This Design Works

It turns your balcony into a peaceful retreat, perfect for meditation, reading, or simply taking a break from the busy city.


3. The Mini Vegetable & Herb Garden

Urban gardeners often want fresh produce without needing a big yard. With the right layout, your balcony can become a productive mini farm.

What You’ll Need

  • Deep pots for vegetables
  • Rail planters for herbs
  • Grow bags for tomatoes and potatoes
  • A watering can or drip irrigation setup

How to Design It

  1. Start with Herbs on the Railing
    Rail planters are perfect for basil, coriander, parsley, and mint.
    They use space efficiently and stay within easy reach.
  2. Use Deep Pots for Vegetables
    Choose containers at least 12–15 inches deep for:
    • Tomatoes
    • Chilies
    • Eggplants
    • Beans
  3. Add Leafy Greens in Shallow Containers
    Spinach, lettuce, mustard greens, and rocket thrive in wide, shallow planters.
  4. Grow Vertically Where Possible
    Use bamboo stakes or trellises for climbing veggies like beans or cucumbers.

Best Vegetables for Balcony Gardens

  • Cherry tomatoes
  • Chili peppers
  • Spinach
  • Lettuce
  • Microgreens
  • Radish
  • Small carrots

Pro Tips

  • Use lightweight potting mix to avoid excessive weight.
  • Install a drip tray under pots to prevent water dripping onto neighbors’ balconies.

Why This Design Works

Fresh, organic vegetables and herbs right at your doorstep—no garden needed.


4. The Flower Lover’s Paradise

If you love color, fragrance, and vibrancy, transform your balcony into a blooming flower corner. Even a tiny balcony can host a rainbow of blossoms.

What You’ll Need

  • Colorful ceramic or terracotta pots
  • Hanging baskets
  • Rail planters
  • Potting mix enriched with compost

How to Design It

  1. Choose a Color Theme
    A coordinated palette enhances the visual appeal.
    Ideas:
    • Pastel theme (pinks, purples, whites)
    • Bold theme (yellows, reds, oranges)
    • Mixed wildflower look
  2. Choose Flowers Based on Sunlight
    Full sun (5–6 hours):
    • Petunias
    • Marigolds
    • Zinnias
    • Geraniums
    Partial shade (2–4 hours):
    • Begonias
    • Impatiens
    • Pansies
  3. Use Hanging Baskets
    Hanging flowers like trailing petunias and bougainvillea add depth and beauty.
  4. Mix Heights & Textures
    Combine tall plants, bushy flowers, and trailing varieties for a rich garden feel.

Pro Tips

  • Deadhead flowers regularly to encourage more blooms.
  • Add compost every 3–4 weeks to boost flowering.

Why This Design Works

A flower-filled balcony uplifts your mood, attracts pollinators, and turns your home into a cheerful, fragrant haven.


5. The Zen Minimalist Green Space

For those who prefer simplicity, clean lines, and peaceful vibes, a minimalist balcony garden is the perfect option. It focuses on fewer plants, neutral colors, and calm arrangements.

Key Components

  • Simple planters in black, white, or earthy tones
  • Smooth stones or pebbles
  • Plants with clean shapes and defined lines
  • Minimalist furniture

How to Design It

  1. Use Symmetry
    Place matching pots on each side of the balcony for balance.
  2. Choose Architectural Plants
    Ideal choices include:
    • Snake plant
    • ZZ plant
    • Succulents
    • Bamboo
    • Fiddle leaf fig (for larger balconies)
  3. Limit the Color Palette
    Stick to whites, greys, greens, and natural wood tones.
  4. Add Soft Elements
    A small water fountain, pebble tray, or bamboo divider adds a calming vibe.
  5. Avoid Overcrowding
    Keep only a few plants, but choose bold statement pieces.

Pro Tips

  • Group 2–3 plants together for a structured, modern look.
  • Use matte-finish planters for a sleek style.

Why This Design Works

Minimalist balconies feel serene, modern, and organized—perfect for meditation or quiet evenings.


Final Thoughts

You don’t need a large backyard to enjoy the beauty of gardening. With creativity and the right design ideas, your balcony can become a vibrant green sanctuary—whether you’re growing herbs, vegetables, flowers, or simply decorating with plants.

The five balcony garden designs shared here—vertical gardening, cozy reading nooks, mini vegetable farms, flower paradise setups, and minimalist zen spaces—offer something for every urban gardener. Mix and match elements from each to create a space that reflects your style, fits your lifestyle, and brings you joy every day.

How to Build a Vertical Garden Using Plastic Bottles: A Complete Step-by-Step Guide for Beginners

How to Build a Vertical Garden Using Plastic Bottles: A Complete Step-by-Step Guide for Beginners

Vertical gardening has become a popular trend among urban gardeners, balcony growers, and anyone trying to make the most of limited space. But while many vertical garden systems can be expensive, you don’t need to spend thousands to create your own. With a stack of empty plastic bottles and a bit of creativity, you can build a beautiful, productive, and eco-friendly vertical garden right at home.

Plastic bottles are durable, easy to work with, and widely available—making them perfect for low-cost gardening projects. Whether you want to grow herbs, leafy greens, flowers, or small vegetables, a vertical plastic bottle garden is a smart solution for turning trash into treasure.

In this complete guide, you’ll learn exactly how to build one—from the materials you need to step-by-step instructions, plant choices, watering tips, and maintenance hacks.


Why Build a Vertical Garden with Plastic Bottles?

Before we dive into the steps, here are a few reasons why plastic bottle vertical gardens are a great choice:

Space-Saving

Perfect for balconies, small patios, terraces, or even indoor walls.

Eco-Friendly

You’re recycling waste and helping reduce plastic pollution.

Low Cost

No fancy tools or expensive planters needed—just simple household items.

Customizable

Make it as tall, wide, colorful, or minimal as you want.

Beginner-Friendly

Even first-time gardeners and kids can build one easily.


Materials You Will Need

To create your vertical garden, gather the following:

  • 1–2 litre plastic bottles (as many as needed)
  • Cutter or knife
  • Scissors
  • Marker
  • Twine, rope, or strong string
  • Nails or wall hooks
  • Drill or a heated metal rod (for holes)
  • Potting soil
  • Small plants, seedlings, or seeds
  • Paint or decorations (optional)

Once your materials are ready, you can begin building your vertical garden.


Step-by-Step Guide to Building Your Vertical Garden

Step 1: Choose the Right Bottles

Any sturdy plastic bottle can work, but 1–2 litre bottles are ideal because:

  • They hold enough soil for most small plants
  • They are easy to cut and hang
  • They are lightweight even when filled

Try to avoid very thin disposable bottles because they may collapse over time.


Step 2: Mark and Cut the Bottle

There are two common designs for vertical plastic bottle planters:

Option A: Side-Cut Planters (Horizontal)

Great for herbs, spinach, strawberries, and flowers.

  1. Lay the bottle horizontally.
  2. Mark a rectangular opening on one side.
  3. Cut the opening using a sharp cutter.
  4. Leave 2–3 cm on all sides for strength.

Option B: Top-Cut Planters (Vertical)

Best for deep-root plants like carrots or basil.

  1. Stand the bottle upright.
  2. Cut the top section (the narrow part) and remove it.
  3. The bottle becomes a simple vertical pot.

Both designs work well—choose based on the plants you want to grow.


Step 3: Create Drainage Holes

Proper drainage is essential for healthy plants.

  • Use a drill or heat a metal rod and poke 4–5 holes at the bottom.
  • Add 1–2 small holes on the sides for extra airflow.

Without drainage, water will stagnate and roots may rot.


Step 4: Add Hanging Holes

To hang your bottles vertically:

  1. Make two holes at the top corners of the bottle (for horizontal planters).
  2. Thread rope or twine through the holes.
  3. Tie knots to secure the bottle.

If you’re using vertical-style planters:

  • Make two small holes near the rim.
  • Add twine to create a hanging loop.

Now your bottles are ready to be suspended on hooks or nails.


Step 5: Decorate the Bottles (Optional)

If you want a colorful or aesthetic look:

  • Paint the bottles with acrylic paint.
  • Wrap them with jute rope.
  • Add stickers or stencil designs.
  • Use waterproof markers to label plant names.

Decorations make your garden look even more beautiful, especially for balconies and indoor walls.


Step 6: Fill the Bottles with Soil

Use a lightweight potting mix instead of garden soil.

Potting mix offers:

  • Good drainage
  • Better airflow
  • Faster root growth

Fill each bottle up to ¾ full, leaving space for watering.


Step 7: Plant Your Seeds or Seedlings

For best results:

  • Make a small hole in the soil.
  • Place the root ball or seed inside.
  • Cover gently with soil.

Water lightly right after planting.

If you’re planting seeds:

  • Sprinkle them evenly on top.
  • Cover with a very thin layer of soil.

Step 8: Hang Your Vertical Garden

Choose a spot where your plants can thrive.

Ideal locations:

  • Balcony walls
  • Sunny indoor windows
  • Terrace railings
  • Fences
  • Kitchen walls (for herbs)

Mount nails, hooks, or a wooden board on the wall.
Hang the bottles one below another using rope or a vertical string system.

Tip: Keep at least 6–8 inches of space between bottles to allow airflow and sunlight.


What to Grow in Your Vertical Plastic Bottle Garden

Choosing the right plants is key to success, especially for limited soil space. Here are the best options:

Herbs

Perfect for beginners and small containers:

  • Basil
  • Mint
  • Coriander
  • Parsley
  • Thyme
  • Oregano

Leafy Greens

They grow fast and don’t need deep soil:

  • Spinach
  • Lettuce
  • Rocket (arugula)
  • Mustard greens

Fruits & Small Veggies

  • Strawberries
  • Cherry tomatoes (with support)
  • Small chili peppers

Flowers

Add beauty and attract pollinators:

  • Petunias
  • Marigolds
  • Pansies
  • Zinnias

Succulents

Great for hot climates and forgetful gardeners:

  • Jade plant
  • Aloe vera (small pups)
  • Echeveria

Watering Your Vertical Garden

One major advantage of vertical gardens is gravity-assisted watering.

How to Water Properly

  • Start watering from the top bottle.
  • Excess water will drip down to the lower bottles.
  • This reduces water waste and ensures even hydration.

Tips to Avoid Overwatering

  • Check soil moisture with your finger before watering.
  • Add a small layer of pebbles at the bottom of each bottle.
  • Water lightly but frequently during summers.

Sunlight Requirements

Different plants need different amounts of sunlight.

Full Sun Plants (5–6 hours of sun)

  • Basil
  • Tomatoes
  • Mint
  • Chilies

Partial Shade (3–4 hours of sun)

  • Spinach
  • Lettuce
  • Parsley
  • Strawberries

Low Light Indoor Plants

  • Money plant
  • Spider plant
  • Snake plant (small pups)

Choose your plant varieties based on the spot where you’re installing the garden.


Maintenance Tips for a Healthy Vertical Bottle Garden

Keeping your garden fresh and productive doesn’t require much time.

1. Trim Regularly

Remove dead leaves and prune overgrown branches to promote new growth.

2. Rotate Bottles

Rotate bottles every 2–3 weeks to ensure equal sunlight exposure.

3. Watch for Pests

Look out for aphids, mealybugs, and fungus gnats.
Use neem oil spray if needed.

4. Replace Soil Every 4–6 Months

Vertical gardens need fresh nutrients from time to time.

5. Fertilize Monthly

Use:

  • Diluted liquid fertilizer
  • Compost tea
  • Vermicompost

These keep your plants healthy and productive.


Benefits of a Vertical Bottle Garden

Creating a plastic bottle vertical garden brings long-term advantages:

Reduces Household Plastic Waste

Every bottle reused is one less in the landfill.

Suitable for Tight Spaces

Perfect for apartment balconies or small urban homes.

Easy to Expand

Add more bottles anytime to grow additional plants.

Improves Indoor Air Quality

If placed indoors, the plants purify air and add freshness.

A Fun DIY Project

Kids and adults alike enjoy building and styling the garden.


Final Thoughts

A vertical garden made from plastic bottles is one of the simplest, most affordable, and most eco-friendly gardening projects you can do at home. It uses materials you already have, takes very little space, and gives you the joy of growing fresh herbs, fruits, flowers, or greens all year long.

Whether you’re a beginner gardener or someone looking to decorate your balcony, this project is a perfect weekend activity that yields long-lasting benefits. With the step-by-step guide above, you can start building your own green wall today and watch it flourish into a beautiful, productive, living display.

5 DIY Recycled Planters You Can Make at Home: Creative, Low-Cost & Eco-Friendly Ideas

5 DIY Recycled Planters You Can Make at Home: Creative, Low-Cost & Eco-Friendly Ideas

If you love gardening but don’t want to spend a lot on fancy pots, recycled planters are the perfect solution. Not only do they save money, but they also help reduce waste and give your indoor or outdoor space a fun, personalized touch. The best part? You probably already have most of the materials lying around your home.

In this guide, we’ll explore five unique DIY recycled planter ideas, step-by-step instructions, and tips to help your plants thrive in them. Whether you’re a beginner or a seasoned gardener, these ideas will spark your creativity and encourage you to look at everyday items in a new, green way.


Why Choose Recycled Planters?

Before we jump into the projects, here’s why recycled planters are unbeatable:

1. Budget-Friendly

Most materials are free or extremely cheap. Old bottles, cans, bowls, and broken household items can be transformed into something beautiful.

2. Eco-Friendly

Every recycled planter keeps one more item out of landfills. It’s an easy way to reduce waste and practice sustainability.

3. Customizable

Unlike store-bought pots, DIY planters can be painted, cut, shaped, and decorated exactly how you like.

4. Fun & Creative

Making these planters is a great activity for families, kids, and anyone who enjoys crafting.

Now let’s dive into the five DIY ideas!


1. Plastic Bottle Planters

Plastic bottles are one of the easiest and most versatile materials to upcycle. They are durable, widely available, and easy to shape.

What You Need

  • 1–2 litre plastic bottles
  • Scissors or a cutter
  • Acrylic paint (optional)
  • Marker
  • Potting soil
  • Small plants or seedlings

How to Make It

  1. Cut the bottle depending on the design you want — horizontal for a trough-style planter or vertical for a traditional pot.
  2. Make drainage holes using a heated nail or screwdriver.
  3. Paint and decorate if you want a prettier look.
  4. Fill with soil and plant herbs, small flowers, or succulents.

Best For

  • Herbs like basil or mint
  • Small indoor plants
  • Hanging planters using twine

Pro Tip: A horizontal cut with strings on both ends makes a beautiful hanging balcony garden.


2. Tin Can Planters

Tin cans from beans, tomatoes, or coffee make excellent rustic planters. They are sturdy and ideal for both indoor and outdoor gardening.

What You Need

  • Clean tin cans
  • Hammer and nail (for drainage holes)
  • Paint, jute rope, or decorative paper
  • Soil and plants

How to Make It

  1. Wash the cans and remove labels.
  2. Punch 5–6 drainage holes at the bottom.
  3. Decorate the outside with paint, rope, or cloth.
  4. Fill with soil and place your chosen plant.

Best For

  • Succulents
  • Cacti
  • Small flowering plants

Pro Tip: Group several tin cans together at varied heights for a beautiful centerpiece.


3. Broken Mug or Cup Planters

If you have chipped mugs or cups lying around, don’t throw them away—turn them into adorable mini planters!

What You Need

  • Old mugs, tea cups, or bowls
  • Pebbles for drainage
  • Potting soil
  • Small plants

How to Make It

  1. If the mug doesn’t have a drainage hole, add a layer of pebbles at the bottom.
  2. Fill the rest with soil.
  3. Plant small succulents or cacti.

Best For

  • Succulents
  • Mini cactus varieties
  • Small indoor desk plants

These planters are perfect for offices, kitchen windows, coffee tables, and shelves. They also make great handmade gifts.

Pro Tip: Create a “tea cup garden” by arranging multiple mugs together with moss and decorative stones.


4. Old Shoe or Boot Planters

Have an old shoe or boot that you don’t wear anymore? Turn it into a quirky and charming planter that adds personality to your garden.

What You Need

  • Old shoes, boots, or sneakers
  • Drill or screwdriver (to make holes)
  • Potting mix
  • Outdoor-friendly plants

How to Make It

  1. Clean the shoe and remove any dirt.
  2. Create drainage holes at the bottom.
  3. Fill with soil and plant something hardy like herbs or flowering plants.

Best For

  • Petunias
  • Marigolds
  • Ferns
  • Outdoor herbs

These quirky shoe planters are great conversation starters and add a rustic touch to patios or garden paths.

Pro Tip: Use colorful children’s rain boots for a cute, cheerful display.


5. Recycled Wooden Crate Planter

Wooden crates from fruit shops or old storage boxes can be repurposed into large, beautiful planters for balconies or patios.

What You Need

  • Wooden crate
  • Sandpaper
  • Plastic lining or landscape fabric
  • Soil and plants
  • Paint (optional)

How to Make It

  1. Sand the crate to remove splinters.
  2. Line the inside with plastic or fabric to prevent soil leakage.
  3. Add soil and plant herbs, flowers, or vegetables.
  4. Paint or stain the wood if you prefer a polished look.

Best For

  • Strawberries
  • Leafy greens (lettuce, spinach)
  • Flowering plants
  • A mixed herb garden

Pro Tip: Place the crate on small bricks or stands to improve drainage and airflow.


Tips to Help Your Recycled Planters Thrive

1. Ensure Proper Drainage

Whatever recycled item you use, drainage is essential. No drainage = root rot.

2. Use Good-Quality Potting Mix

Avoid using garden soil because it becomes compact in containers.

3. Choose the Right Plants

Small containers are better suited for herbs, succulents, and small flowers.

4. Keep an Eye on Watering

Recycled containers—especially plastic and metal—may dry out or heat up faster. Adjust watering accordingly.

5. Add a Layer of Pebbles

It improves drainage and prevents soil leakage.


Final Thoughts

Making recycled planters is more than just a DIY project—it’s a creative, eco-friendly lifestyle choice. With a little imagination, almost anything can become a planter: bottles, jars, baskets, toys, boxes, even kitchen scrap items. The five ideas shared here are just a starting point. Feel free to experiment, paint, stack, arrange, and build your own green haven using materials you already have at home.

Whether you’re decorating a balcony, refreshing your garden, or bringing more nature indoors, these simple recycled planter ideas prove that gardening doesn’t have to be expensive. All it takes is creativity and a willingness to give old objects a new life.