A Citrus Lover’s Dream: How to Grow and Harvest 5 Amazing Citrus Fruits in Your Garden

A Citrus Lover’s Dream: How to Grow and Harvest 5 Amazing Citrus Fruits in Your Garden

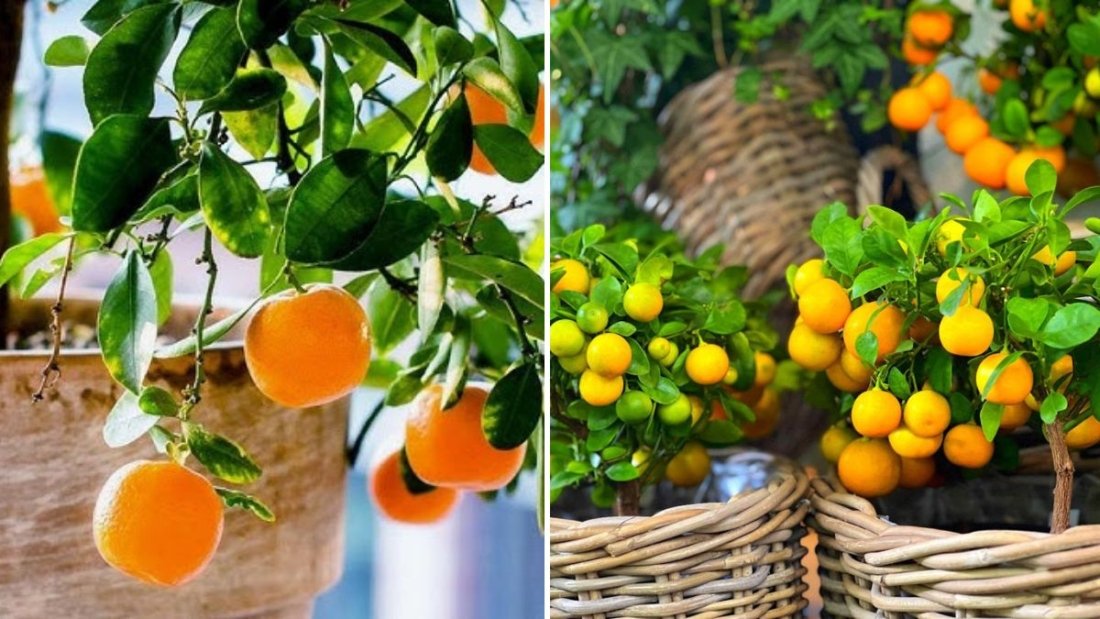
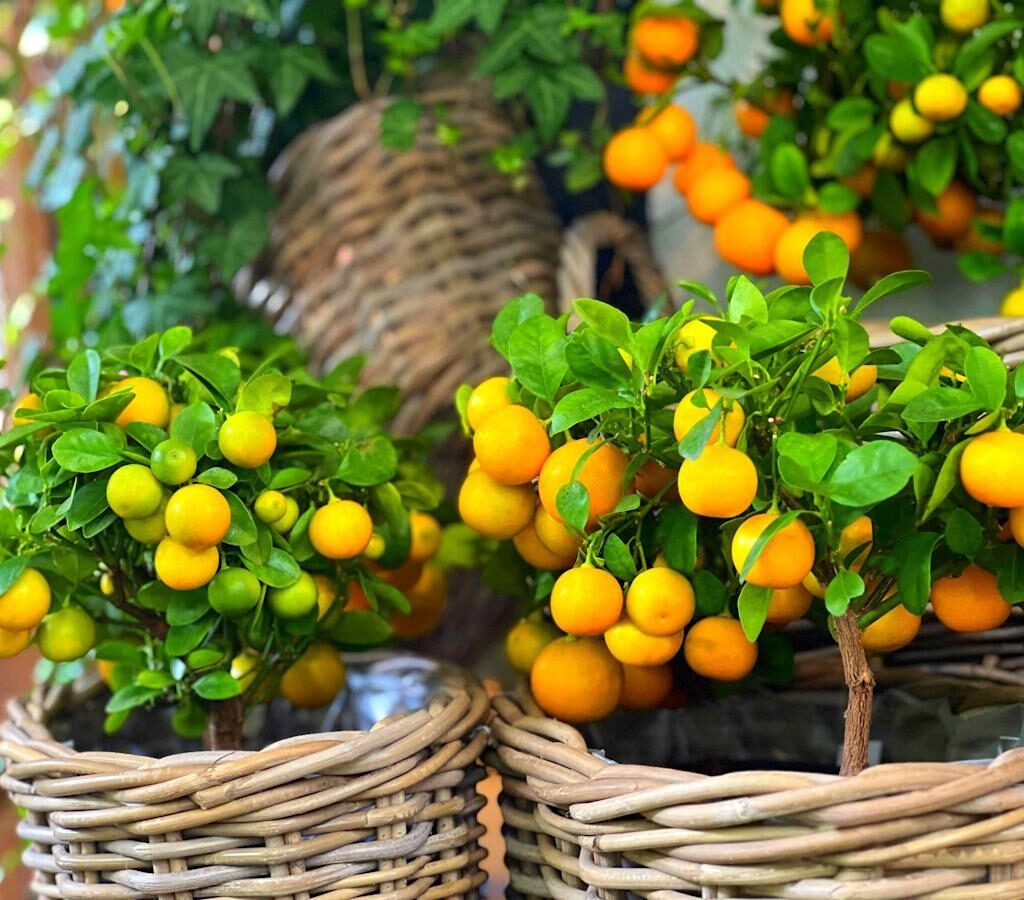
Growing citrus fruits at home is one of the most rewarding gardening experiences. The fresh fragrance of blossoms, the glossy evergreen leaves, and the satisfaction of picking juicy fruits straight from your own garden make citrus gardening truly special. Whether you have a large backyard, a terrace garden, or even a small balcony, you can grow citrus plants successfully with proper care and planning.

In this guide, we’ll walk through how to grow and harvest five different kinds of citrus fruits—from lemons and oranges to kumquats and limes. You’ll discover the best varieties to choose, the ideal growing conditions, pruning techniques, watering rules, fertilizing schedules, and harvesting tips. By the end, you’ll be ready to enjoy your own citrus paradise.


Why Grow Citrus Fruits at Home?

Citrus plants are not only beautiful but also highly practical. Here’s why they make a great addition to your home garden:

  • Fresh, chemical-free fruit supply
  • Long-living, productive trees
  • Attractive fragrance and ornamental value
  • Rich in vitamin C and antioxidants
  • Low maintenance once established

Even better, many citrus varieties can thrive in pots, making them perfect for home growers.


Best Climate for Citrus Growing

Citrus plants love:

  • Warm temperatures
  • Bright sunlight
  • Well-drained soil

The ideal temperature range is:

  • 15°C to 35°C

They dislike frost and cold winds, so in cooler areas, protect the plants or move potted citrus indoors during winter.


General Soil and Container Requirements

Citrus trees grow best in loose, rich, and well-draining soil.

Best Soil Mix:

  • 40% garden soil
  • 30% compost or aged manure
  • 20% cocopeat
  • 10% sand or perlite

If growing in pots, choose containers with drainage holes and at least:

  • 12–18 inches depth for young plants
  • 25–30 inches for mature trees

Top 5 Citrus Fruits You Can Grow and Harvest


1. Lemon

Lemons are one of the easiest citrus fruits to grow. They grow quickly, produce early, and adapt well to containers.

Light Requirement:
6–8 hours of direct sunlight.

Watering:
Water deeply when the topsoil dries, but avoid soggy soil.

Fertilizing:
Use nitrogen-rich fertilizer every 30–40 days for strong foliage and fruiting.

Harvesting:
Lemons are ready when they turn fully yellow and feel slightly soft when squeezed.

Tip:
Remove thorns and prune weak branches to improve airflow and fruit production.
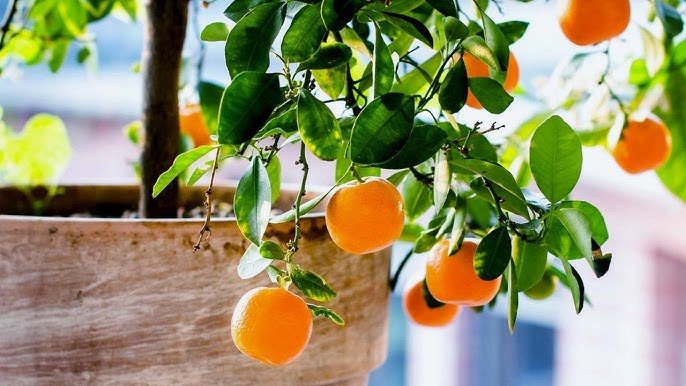

2. Orange

Orange trees take time but reward you with delicious, sweet fruits.

Best Varieties for Home Growing:

  • Nagpur Orange
  • Valencia
  • Blood Orange
  • Washington Navel

Sunlight:
Minimum 7 hours daily.

Care Needs:
Deep watering twice a week during summer and once a week during winter.

Harvesting:
Color alone doesn’t show ripeness—taste tests are best. Once sweet, harvest gently to avoid branch damage.


3. Sweet Lime (Mosambi)

Sweet lime is popular for refreshing juices and is perfect for warm regions.

Ideal Conditions:
Thrives in tropical and subtropical climates.

Feeding Schedule:

  • Apply compost every 3 months.
  • Use liquid fertilizer or banana peel fertilizer during the growing season.

Fruit Ripening:
Sweet lime fruits remain firm even when ripe, but their skin slightly softens and smell becomes citrusy.


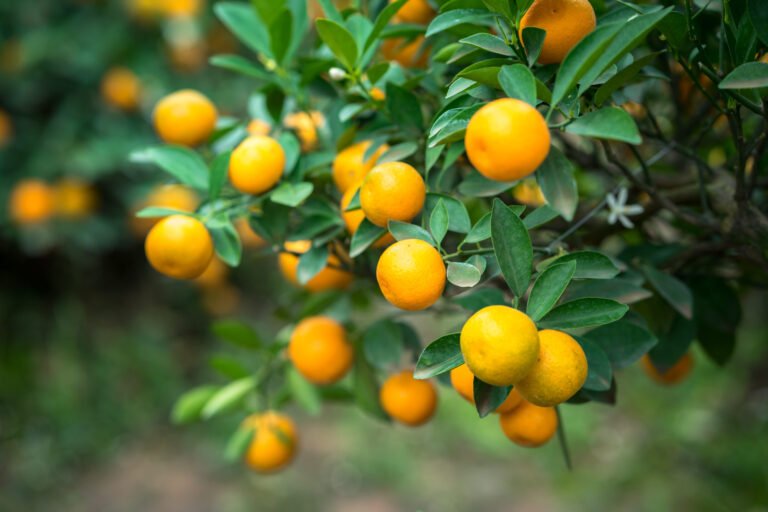
4. Tangerine (Kinnow / Mandarin)

Tangerines are smaller, sweeter, and easier to peel than oranges. They produce heavily once mature.

Growing Tips:

  • Prune regularly to maintain shape.
  • Mulch soil to retain moisture.

Flower to Fruit Timeline:
It takes 7–10 months after bloom for tangerines to ripen.

Harvesting:
Pick when fruits turn bright orange and detach easily with a gentle twist.
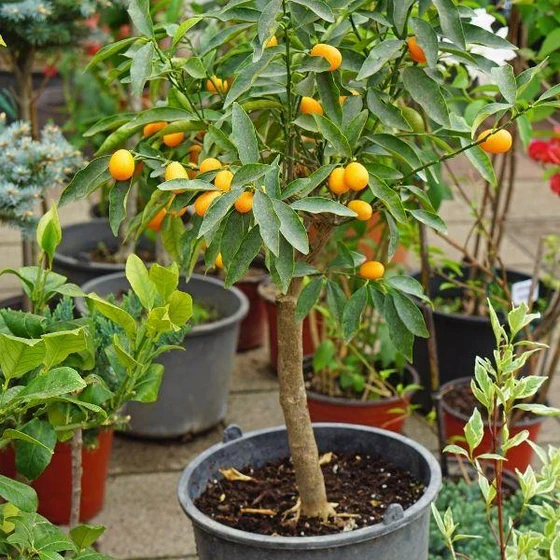
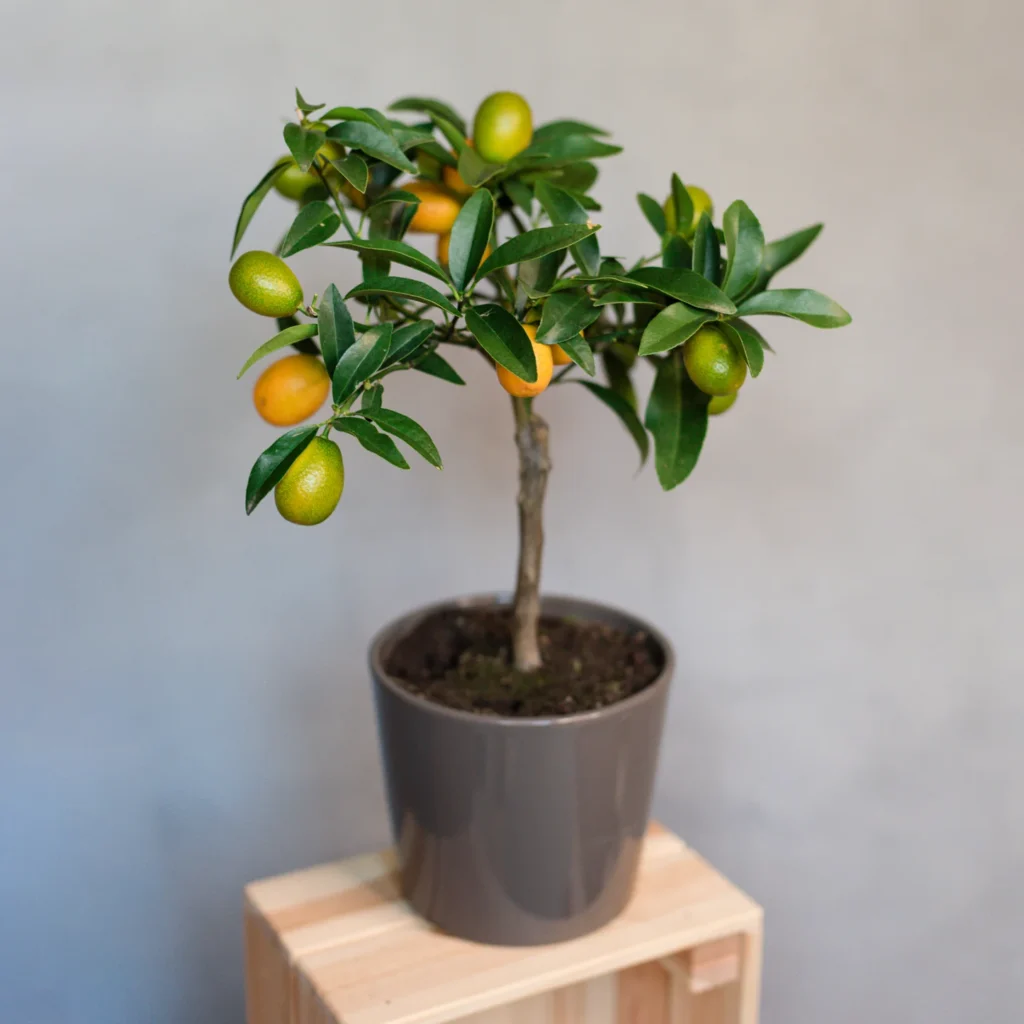

5. Kumquat

Kumquats are unique because you can eat them whole—skin and all! They are compact, making them perfect for small spaces.

Light:
Full sun is essential.

Water and Fertilizer:
Moderate water and monthly feeding during growth.

Harvest Time:
Pick when the peel becomes orange and slightly glossy. The fruit should feel firm.


Essential Citrus Care Tips

Growing citrus isn’t complicated, but a few key practices ensure success:
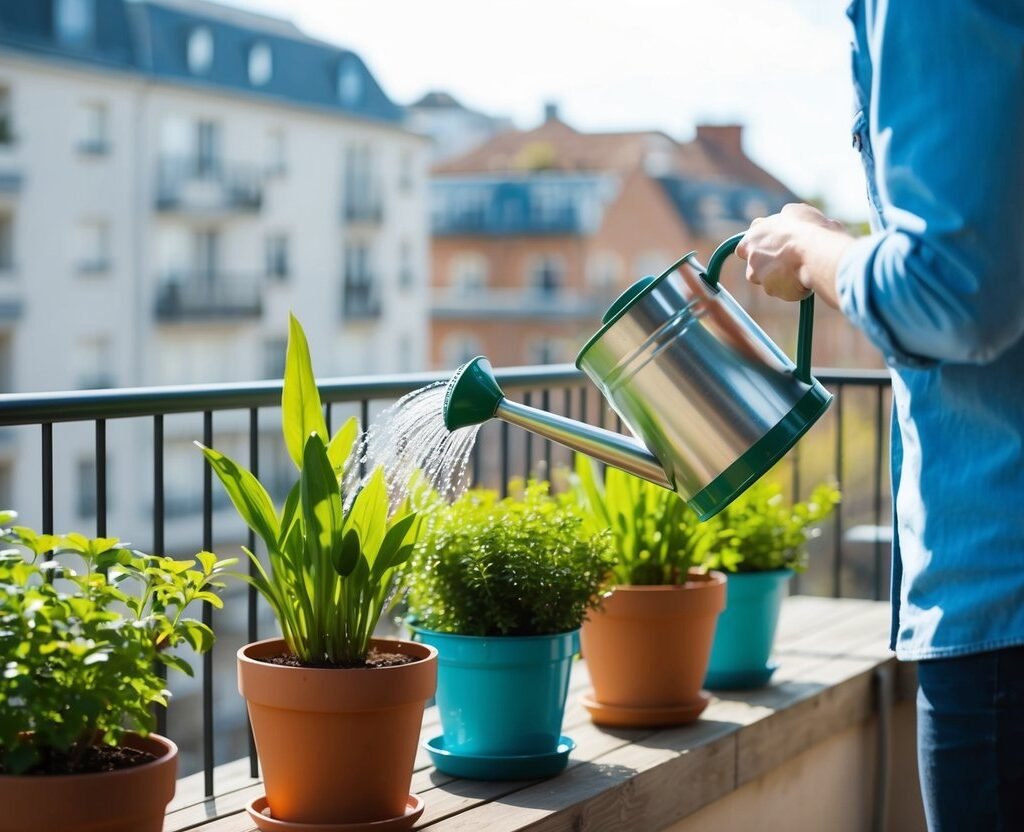
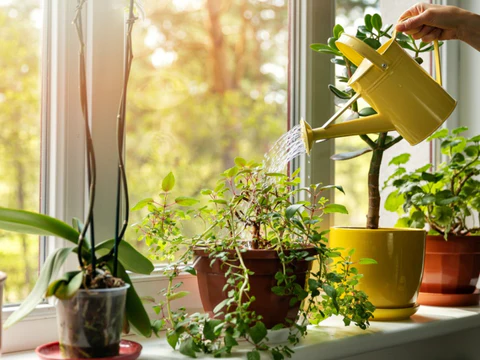

Watering Rule

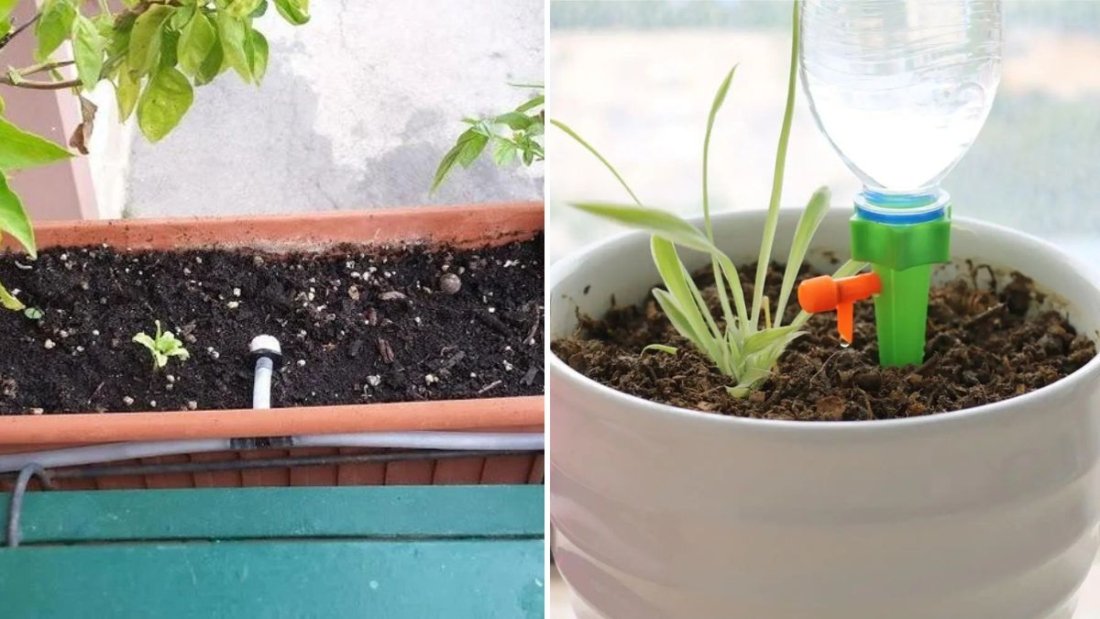
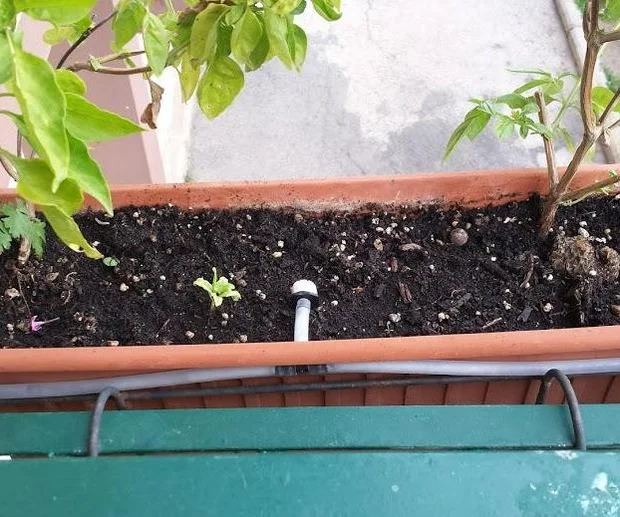
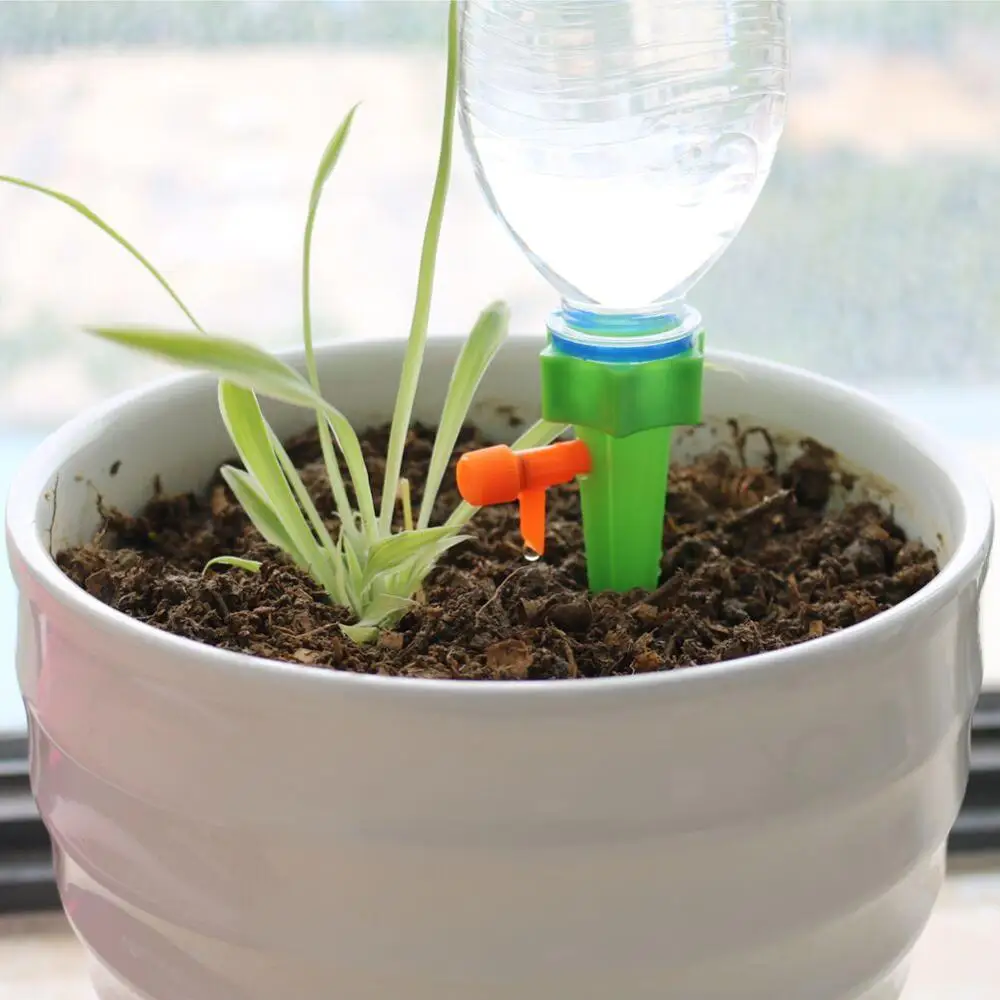
Citrus plants prefer deep watering rather than frequent light watering.

  • Water when the top 2–3 inches of soil feel dry.
  • Avoid waterlogging, as citrus roots rot easily.

Pruning for Shape and Health

Prune:

  • Suckers from the base
  • Dead or diseased branches
  • Branches growing inward

This improves airflow, sunlight penetration, and fruit yield.


Pollination

Citrus flowers are self-pollinating, but planting multiple citrus plants or allowing bees access increases production.


Common Pests and Natural Remedies

PestSolution
AphidsSpray neem oil every 10–15 days
MealybugsUse soap water spray
Fruit fliesHang yellow sticky traps
Leaf minerNeem and pheromone traps

Regular inspection keeps plants healthy and safe.


Signs Your Citrus Tree Needs Attention

SymptomMeaning
Yellow leavesLack of nitrogen
Dropping flowersOverwatering or heat stress
Small fruitsPoor nutrition or pruning required

Correcting issues early saves the harvest.


When and How to Harvest

Most citrus fruits are harvested:

  • Winter to early summer, depending on variety.

Never pull fruits aggressively. Use pruning scissors or gently twist to detach.


Storing Homegrown Citrus

  • Store at room temperature for 1–2 weeks.
  • Refrigerate for longer freshness.
  • Or juice and freeze for later use.

Conclusion

Harvesting five different kinds of citrus fruits from your own garden is not only possible—it’s deeply satisfying. With patience, sunlight, and consistent care, anyone can build a thriving citrus collection at home. Whether you’re growing lemon in a pot or nurturing a full orange tree in your backyard, citrus gardening connects you to nature in the most refreshing way.

Soon, you’ll enjoy the taste of fresh, juicy, homegrown citrus—straight from your garden to your table!

The Ultimate Guide to Growing Cauliflower at Home (Step-by-Step Updates Included)

The Ultimate Guide to Growing Cauliflower at Home (Step-by-Step Updates Included)

Cauliflower is one of the most nutritious and versatile vegetables you can grow in your home garden. From salads and soups to curries and snacks, cauliflower easily fits into countless recipes. But growing cauliflower isn’t just about planting seeds and waiting—this vegetable needs proper planning, care, and attention at each stage. The reward? A healthy, organic, and chemical-free harvest right from your own home.

If you’ve ever wanted to grow cauliflower but didn’t know where to start, this complete guide will walk you through everything—from choosing seeds and soil to harvesting and storing fresh cauliflower. With proper updates and care tips included, even beginners can grow this cool-season vegetable successfully.


Why Grow Cauliflower at Home?

Growing cauliflower at home offers multiple benefits:

  • Fresh and chemical-free
  • Rich in vitamins C, K, and B6
  • Requires very little space if grown in containers
  • Long-lasting yield with proper care
  • One-time effort, high reward crop

Cauliflower thrives best in cooler climates, making it perfect to grow during winter months or in a shaded balcony.


Best Season to Grow Cauliflower

Cauliflower is a cool-season crop, meaning it prefers temperatures between:

  • 15°C to 22°C

Extreme heat may cause the plant to bolt (produce flowers instead of a head). The best time to plant is:

  • September to January in mild climates
  • Autumn or early spring in colder regions

Choosing the Right Seeds

Always select good quality seeds from a reliable source. There are different varieties depending on climate:

TypeBest For
Early varietiesWarmer climates
Mid-season varietiesModerate climates
Late varietiesCold climates

If growing in a tropical climate, choose heat-resistant or hybrid seeds for better results.


Best Soil for Cauliflower

Cauliflower grows best in nutrient-rich, loose, and well-draining soil.

Ideal Soil Mix:

  • 40% garden soil
  • 30% compost (cow dung, vermicompost, or organic manure)
  • 20% cocopeat or peat moss
  • 10% sand or perlite for drainage

Soil pH should be slightly acidic to neutral (6.0–7.0). Add wood ash or lime if soil is too acidic.


Sowing Seeds (Stage 1: Germination)

Cauliflower seeds are small and delicate. Start them in seedling trays or pots.

Steps:

  1. Fill containers with moist potting mix.
  2. Make small holes about 1 cm deep.
  3. Place one seed per hole.
  4. Cover lightly with soil.
  5. Mist water—not too much.

Keep the tray in indirect sunlight. Seeds germinate in 7–12 days.


Transplanting Seedlings (Stage 2: Growth)

Once seedlings reach 4–6 inches tall and develop 4 true leaves, they are ready for transplanting.

Spacing:

  • 18–24 inches between plants
  • 2–3 feet between rows

If growing in containers, choose a 12–18 inch deep pot for each plant.

Before transplanting, harden seedlings by placing them outdoors for a few hours daily for 4–5 days.


Watering Requirements

Cauliflower loves moisture but cannot tolerate waterlogged soil.

  • Water deeply 2–3 times per week.
  • Keep soil consistently moist—not dry or soggy.
  • Mulch using straw or dry leaves to retain soil moisture.

Avoid watering on the head once formed—it may cause rot.


Sunlight Requirements

Cauliflower needs:

  • Full sunlight (6–7 hours daily) for healthy growth.

Insufficient light may cause small, underdeveloped heads.

If growing indoors, place the plant near a south-facing window or balcony.


Fertilizing Schedule (Full Updates)

Cauliflower is a heavy feeder. Feed regularly:

StageFertilizer
2 weeks after transplantVermicompost or cow dung manure
30 days after transplantPotassium-rich fertilizer or wood ash
During head formationLiquid seaweed, compost tea, or bone meal

Avoid too much nitrogen—it results in leafy plants with no heads.


Tying Leaves (Stage 3: Head Formation)

When the cauliflower head appears, cover it by tying the large leaves over it. This protects it from:

  • Sunlight discoloration
  • Pests
  • Temperature stress

This step is especially important for white cauliflower varieties.


Pests and Diseases

Common issues include:

ProblemSignsSolution
AphidsSticky leavesSpray neem oil every 10 days
CaterpillarsHoles in leavesHandpick or use organic insect spray
Fungal infectionYellow or wilted leavesAvoid overwatering

Neem oil, garlic spray, and soap water are effective organic solutions.


Harvesting Cauliflower

Cauliflower is ready to harvest when:

  • The head is full, compact, and firm
  • Head diameter is 6–8 inches
  • Color is bright and even

Harvest by cutting the head with a sharp knife, leaving some leaves around it for protection.

Do not wait too long—overgrown heads may loosen and turn grainy.


Post-Harvest Storage

Fresh cauliflower can be stored by:

  • Keeping whole heads in the refrigerator for 7–10 days
  • Freezing after blanching for long-term storage

Do not wash until ready to use—extra moisture reduces shelf life.


Tips for Success

Maintain consistent moisture
Grow in cool weather
Fertilize regularly
Tie leaves during head formation
Protect from pests early


Conclusion

Growing cauliflower at home may seem challenging initially, but with proper care and step-by-step updates, it becomes a rewarding gardening experience. Whether you’re using a balcony, backyard, terrace, or container garden, cauliflower can thrive beautifully with the right environment.

Nothing compares to harvesting a fresh, chemical-free cauliflower that you nurtured from seed to harvest. So start today, follow this guide, and enjoy a healthy and delicious homegrown cauliflower harvest!

The Complete Guide to Growing Beautiful Geraniums at Home

The Complete Guide to Growing Beautiful Geraniums at Home

Geraniums are one of the most loved flowering plants around the world—not only because they look stunning, but also because they are extremely easy to grow, low-maintenance, and perfect for both indoor and outdoor gardening. Whether placed on a balcony, windowsill, garden bed, or hanging pot, geraniums add a splash of vibrant color that instantly transforms any space.

If you’ve been searching for a plant that blooms abundantly, doesn’t demand too much care, and looks gorgeous throughout most of the year, then geraniums are a perfect choice. In this complete guide, you’ll learn everything you need to know—from planting and soil preparation to watering, pruning, and pest control—to successfully grow geraniums at home.


Why Grow Geraniums?

Before diving into the growing process, it’s helpful to know why geraniums are so popular among gardeners:

  • They bloom for a long duration—from spring to late fall.
  • Suitable for beginners, as they don’t require constant attention.
  • Great air purifiers, improving indoor air quality.
  • Available in many colors like red, pink, white, purple, and salmon.

With proper care, geraniums can bloom year after year, making them a rewarding plant for any home gardener.


Best Location to Grow Geraniums

Geraniums love sunlight. For best growth and flowering, ensure they receive:

  • 4–6 hours of direct sunlight daily
  • Partial shade in extremely hot regions

If growing indoors, place the pot near a south or west-facing window where the plant gets maximum light. Without enough sunlight, geraniums may grow lanky and produce fewer flowers.


Ideal Climate and Temperature

Geraniums prefer warm weather. They grow best between:

  • 18°C – 27°C during the day
  • 10°C – 18°C at night

They do not tolerate frost. If you live in a colder region, bring your geraniums indoors before winter.


Best Soil for Geraniums

The key to healthy geranium growth lies in the soil. Geraniums thrive in well-draining soil.

Recommended Soil Mix:

  • 40% garden soil
  • 30% cocopeat or peat moss
  • 20% compost (vermicompost or cow manure)
  • 10% sand or perlite

The soil should be airy so excess water can drain easily. Good drainage prevents root rot, a common geranium problem.


Planting Geraniums: Seeds vs Cuttings

You can grow geraniums from:

  • Seeds
  • Stem cuttings

Growing from Cuttings (Recommended):

  • Faster growth
  • Identical to parent plant
  • Higher success rate

To grow from cuttings:

  1. Cut a 4–6 inch healthy stem below a leaf node.
  2. Remove lower leaves and dip the cut end in rooting hormone (optional).
  3. Plant the cutting in moist potting mix.
  4. Keep in indirect light until new growth appears.

Watering Rules for Geraniums

Geraniums dislike overwatering. The best rule is:

Water only when the top 2 inches of soil feel dry.

  • Water less in winter.
  • Avoid watering leaves to prevent fungal problems.
  • Ensure proper drainage holes in pots.

Signs of overwatering:

  • Yellow limp leaves
  • Mushy stems
  • Foul smell from soil

Signs of underwatering:

  • Dry crunchy leaves
  • Drooping stems

Fertilizer Requirements

Geraniums respond very well to feeding. Use:

  • Liquid fertilizer every 2–3 weeks during active growth.
  • Balanced 10-10-10 or 5-10-5 fertilizers work well.
  • A fertilizer high in phosphorus helps boost blooms.

Avoid excessive nitrogen—it will grow more leaves but fewer flowers.


Pruning and Pinching for More Flowers

Pruning is essential for dense and bushy growth.

  • Pinch off growing tips when the plant is young.
  • Remove dry or faded flowers to encourage new blooms.
  • Trim leggy branches to maintain shape.

Regular pruning encourages fresh growth and promotes heavier blooming.


Pests and Diseases

Geraniums are generally hardy, but you may find:

ProblemCauseSolution
Yellow leavesOverwateringReduce watering
White powderFungusSpray neem oil
Holes in leavesCaterpillarsHand remove or organic pesticide
Sticky leavesAphids/mealybugsSoap water spray or neem oil

Spraying neem oil every 15 days prevents most infections.


Repotting Geraniums

Geraniums need repotting when:

  • Roots come out of drainage holes
  • Soil becomes compacted
  • Growth slows

Repot every 12–18 months, preferably in spring. Move the plant to a pot that is only 1–2 inches larger, not too big.


Overwintering Geraniums

If you live in a cold climate:

  1. Bring the plant indoors before frost.
  2. Reduce watering.
  3. Keep it in bright, indirect sunlight.
  4. Prune lightly and wait for spring growth.

This helps them survive winter and bloom again next season.


Propagation for More Plants

Each healthy plant can give you many cuttings. Rooting them ensures you never need to buy new plants again—your garden expands naturally!


Tips for Maximum Flowering

  • Give full sun exposure.
  • Use well-draining soil.
  • Avoid overwatering.
  • Fertilize regularly.
  • Remove dead flowers (deadheading).
  • Prune during early spring.

Following these steps guarantees abundant blooms.


Conclusion

Growing geraniums at home is a simple, rewarding, and enjoyable experience. Whether you’re a beginner or an experienced gardener, geraniums offer beautiful year-round color with minimal effort. With proper sunlight, watering, and basic care, your geraniums will thrive and continue to brighten your home for years.

So go ahead—plant a few geraniums today and enjoy a cheerful, colorful garden full of fragrance, beauty, and life!

Grow Tomatoes in a Hanging Plastic Bottle: The Easiest Vertical Gardening Hack for Small Spaces!

Grow Tomatoes in a Hanging Plastic Bottle: The Easiest Vertical Gardening Hack for Small Spaces!

If you’ve ever dreamed of picking fresh, juicy tomatoes right from your home but don’t have space for a garden, here’s good news—you can grow tomatoes in a plastic hanging bottle! Yes, the same bottles you usually throw away can become mini vertical gardens.

This simple and eco-friendly gardening technique is perfect for:

Apartment balconies
Rooftops
Small patios
Windowsills
Urban homes with zero garden space

Growing tomatoes in a hanging bottle saves space, reduces waste, and creates a unique decorative garden—all while giving you fresh organic produce. In this guide, you’ll learn step-by-step how to turn a simple plastic bottle into a productive tomato planter.


Why Grow Tomatoes Vertically in a Plastic Bottle?

Before we jump into the steps, let’s understand why this method is brilliant:

Saves space
Low cost—uses recycled materials
Reduces pests (plants are off the ground)
Ensures better drainage and healthier roots
Creates beautiful hanging green décor
Ideal for cherry tomatoes or dwarf varieties

Even if you’re a complete beginner, this method is easy, fun, and rewarding.


Best Tomato Varieties for Bottle Growing

Not all tomato plants are suitable for hanging containers. Choose compact and trailing types such as:

  • Cherry tomato
  • Tiny Tim
  • Roma baby variety
  • Balcony tomato
  • Micro dwarf tomatoes

These types grow well in limited space and produce plenty of fruits.


Materials Needed

You don’t need expensive gardening tools. Just collect:

  • 1 large plastic bottle (1–2 liters)
  • Tomato seedling (15–20 days old)
  • Garden soil or potting mix
  • Cocopeat or peat moss
  • Compost (vermicompost preferred)
  • Sand or perlite (optional but helpful)
  • Scissors or sharp blade
  • Rope or strong thread
  • Small piece of cotton cloth

Step 1: Prepare the Bottle

  1. Remove the label from the bottle and clean it.
  2. Using a blade, cut the bottom end of the bottle to create a wide opening.
  3. Make 2–4 small drainage holes near the cap area.
  4. Create two holes at the sides near the cut end for hanging ropes.

Your bottle is now ready to turn into a planter.


Step 2: Create a Soil Mix

Good soil is key for healthy tomatoes.

Best Soil Recipe:

IngredientRatio
Garden soil40%
Cocopeat30%
Vermicompost20%
Sand/Perlite10%

This blend ensures:

Proper drainage
Nutrient-rich environment
Moisture retention

Add one tablespoon of neem powder to prevent fungal problems.


Step 3: Planting the Tomato Seedling

Unlike normal planting, in this method the tomato plant goes through the bottle mouth and hangs downward.

Here’s how:

  1. Unscrew the bottle cap and insert a small piece of cloth inside.
    This prevents soil leakage and helps with moisture retention.
  2. Hold your tomato seedling carefully and push the root ball from the top opening until it comes out through the bottle neck.
  3. Gently pull until the plant stems hang downward.
  4. Fill the bottle with the soil mix from the top opening.
  5. Press the soil lightly to remove air gaps.

Your upside-down tomato planter is ready!


Step 4: Placement and Hanging

Tomatoes love sunlight.

Place or hang the bottle where it gets:

At least 6–7 hours of direct sunlight daily.

Suitable locations include:

  • Balconies
  • Rooftops
  • Window grills
  • Pergolas
  • Boundary walls

Hang it strong and stable so wind doesn’t move the planter.


Step 5: Watering the Plant

Because the bottle has a small soil capacity, watering needs attention.

Watering Tips:

  • Water slowly from the top opening until moisture drips from drainage holes.
  • NEVER overwater.
  • During summers: Water every 1–2 days
  • Winters/monsoon: Water only when the top feels dry

Using a watering can or spray bottle works best.


Step 6: Feeding and Plant Care

Tomatoes are heavy feeders, and regular nutrition helps produce more fruits.

Fertilizer Schedule:

TimeFertilizer Type
After 15 daysVermicompost or cow dung manure
After 30 daysBanana peel fertilizer or bone meal
Flowering stageLiquid fertilizer like compost tea
Fruit stageSeaweed fertilizer or Epsom salt solution (optional)

Sprinkle crushed eggshells once a month to prevent blossom end rot.


Step 7: Supporting the Plant

Since the tomato plant grows downward, no staking is needed. However:

  • Remove yellow or damaged leaves
  • Pinch side shoots to encourage bushy growth
  • Keep the bottle free of weeds

Your plant will naturally trail downward and create an attractive hanging display.


Common Issues and Solutions

ProblemCauseSolution
Leaves turning yellowOverwatering or lack of nutrientsReduce watering & add fertilizer
Flowers droppingToo little sunlightIncrease sun exposure
Small tomatoesLack of potassiumAdd banana peel fertilizer
Pest attackExposure outdoorsSpray neem oil weekly

Prevent issues early to keep your plant healthy.


When and How to Harvest

Tomatoes are ready for harvest 60–90 days after planting.

Signs they are ready:

Bright uniform color
Firm but slightly soft
Fresh aroma

Cut or gently twist ripe tomatoes—avoid pulling hard.

The more you harvest, the more the plant produces!


Final Tips for Success

Always choose a sunny spot
Don’t use garden soil alone—use a mix
Water slowly and wisely
Feed regularly for bigger harvests
Rotate the bottle occasionally for even sunlight

With just one plastic bottle, you can grow a surprising number of tomatoes throughout the season.


ConclusionGrowing tomatoes in a hanging plastic bottle is not just a gardening method—it’s a creative, sustainable, and space-saving solution for modern living. Whether you want fresh homegrown food or simply a beautiful green corner, this project is an exciting way to start urban gardening.

The best part? No matter where you live, you can enjoy gardening and harvest your own fresh tomatoes—even from a tiny balcony or window.

So grab a bottle, plant a seedling, and start watching your vertical tomato garden grow beautifully—one step at a time!

Grow Stunning Ranunculus at Home: The Complete Step-by-Step Guide for Beginners

Grow Stunning Ranunculus at Home: The Complete Step-by-Step Guide for Beginners

Ranunculus—often called the rose of spring—is one of the most breathtaking flowers you can grow. With layers of soft, paper-like petals in vibrant shades of pink, orange, white, yellow, and red, these blooms look almost unreal. They’re a favorite among florists, wedding decorators, and home gardeners who love romantic, lush flowers.

The great news? Ranunculus may look delicate, but they’re surprisingly easy to grow when you know the right method. Whether you’re growing them in the garden or containers, this detailed guide will help you succeed—from choosing bulbs to enjoying full blooms.


What Makes Ranunculus Special?

Ranunculus flowers are famous for their:

  • Long-lasting blooms (up to 2 weeks in vases)
  • High petal count and perfect spiral shape
  • Wide range of colors
  • Cold tolerance and ease of cultivation

They’re often considered affordable alternatives to peonies and roses—especially for bouquets.


Understanding Ranunculus Tubers

Ranunculus grows from tubers, often called claws because of their crab-like shape.

A healthy tuber should be:

Firm
Dry
Plump
Golden-brown

The bigger the tuber, the more flowers it will produce.


When to Plant Ranunculus

Ranunculus loves cool weather. The planting time depends on your climate:

Region TypeBest Planting Time
Cold areas (snow/ frost)Plant in early spring after frost
Mild climatesPlant in late fall or early winter
Tropical/warm climatesPlant in late winter or early spring

Ideal temperature for growing: 10°C to 16°C (50°F–60°F).

Extreme heat stops blooming, so avoid summer planting.


Step 1: Soak and Pre-Sprout Tubers

Before planting, soak the tubers to wake them up.

Soaking Process

  1. Place tubers in room-temperature water for 3–4 hours.
  2. Change the water every hour to avoid rot.
  3. The tubers will swell and look plumper.

Optional Step: Pre-Sprouting

Pre-sprouting gives an early start and improves success.

  • Fill a tray with slightly damp peat moss or cocopeat.
  • Place tubers claws-down.
  • Keep in a cool dark area for 7–10 days until tiny white root tips appear.

Step 2: Prepare Soil

Ranunculus must have well-drained, loose soil. They rot easily in wet ground.

Best Soil Mix:

  • 50% garden soil
  • 30% compost
  • 20% sand or perlite

pH should be: 6–7 (slightly acidic to neutral).

Add organic fertiliser like bone meal for strong rooting.


Step 3: Planting

Once tubers have soaked or sprouted, plant them outdoors or in containers.

How Deep to Plant

Plant tubers 5–7 cm (2–3 inches) deep
The claws should face downward

Spacing

  • Small tubers: space 10–12 cm (4–5 inches) apart
  • Large tubers: 15–20 cm (6–8 inches) apart

Patience is required—sprouts may take 2–3 weeks to appear.


Step 4: Watering Carefully

Water immediately after planting to settle the soil.

Watering Rules:

  • Never let the soil stay soggy
  • Water only when the top layer feels dry
  • Reduce watering once blooming starts

Mulching helps retain moisture and reduces weeds.


Step 5: Sunlight Requirements

Ranunculus thrives in:

Full sun — at least 6 hours daily

More sunlight = bigger blooms and longer stems.

If you grow indoors, choose a bright balcony or south-facing window.


Step 6: Fertilizing for Strong Blooms

Feed every 2–3 weeks with:

  • Balanced fertiliser (10-10-10) during growth
  • High phosphorus fertiliser (like bone meal or bloom booster) when buds form

Avoid too much nitrogen—it makes leaves grow, not flowers.


Step 7: Supporting Growth

Tall varieties may need support. Use:

  • Garden stakes
  • Bamboo sticks
  • Plant ring support

This prevents stems from bending during wind or heavy blooms.


Step 8: Blooming Time and Harvesting

Ranunculus typically blooms around 90 days after planting.

You’ll know they’re ready when:

  • Buds swell and color becomes visible.
  • Petals unfurl slightly (marshmallow stage).

For cut flowers:

Cut stems early morning
Use clean shears
Place stems in cool water immediately

Cutting flowers encourages the plant to produce more.


Common Problems and Solutions

ProblemCauseSolution
Rotting tubersOverwateringImprove drainage; water less
Weak growthToo much shadeProvide full sunlight
No flowersExcess nitrogen or heatSwitch to bloom fertiliser, plant during a cooler season
Yellow leavesPoor soil nutritionAdd compost and fertiliser

Luckily, ranunculus rarely suffers from pests.


Growing Ranunculus in Pots

Ranunculus thrives in containers if:

  • Pot is at least 8–12 inches deep
  • Has good drainage holes

Choose multiple tubers for a fuller pot.


After Flowering: What to Do?

Once heat arrives and leaves yellow:

  1. Stop watering.
  2. Allow tubers to dry in soil.
  3. Dig them out gently.
  4. Clean and store in a cool, dry, dark place.

Replant next season!


Final Tips for Success

Choose high-quality tubers
Plant at the right season
Avoid soggy soil
Give full sunlight
Feed regularly

With the right care, ranunculus will reward you with stunning, layered blooms that feel like living artwork.


Conclusion

Growing ranunculus may seem intimidating at first, but it’s incredibly rewarding once you understand their needs. From the moment the first buds appear to the time you enjoy them in a vase, every step feels magical.

Whether you’re a beginner gardener or an experienced plant lover searching for something truly beautiful, ranunculus is a must-grow flower. With this complete guide, you’re now fully ready to grow your own garden full of vibrant, luxurious blooms.

5 Creative Ways to Use Planters as Outdoor Art Pieces

5 Creative Ways to Use Planters as Outdoor Art Pieces

Outdoor spaces—whether a balcony, patio, terrace, or garden—offer endless possibilities for creative expression. And one of the most underrated ways to elevate these spaces is by turning ordinary planters into extraordinary art pieces. Planters aren’t just containers for soil and roots—they can enhance mood, add personality, and create a visually striking environment that feels curated, vibrant, and uniquely yours.

If you’re looking for ways to transform your outdoor area without expensive landscaping or major renovations, using planters as outdoor art is one of the easiest and most rewarding approaches. In this 1200-word guide, you’ll discover five artistic, innovative ways to turn planters into stunning décor elements that reflect your style while bringing life and beauty to your space.


1. Use Vibrant Painted Planters to Add a Pop of Color

A fresh coat of paint can instantly transform a plain planter into a bold artistic centerpiece. Whether you prefer bright tones, soft pastels, or earthy hues, painted planters offer endless creative flexibility.

Why Painted Planters Work as Art

Color influences emotion. A vibrant yellow pot energizes a space, while cool blues create calmness. When coordinated or contrasted intentionally, planters become visual highlights that draw the eye.

Ideas to Try

  • Geometric Patterns: Use painter’s tape to create triangles, stripes, or abstract shapes.
  • Ombre Effects: Blend two or three colors for a smooth gradient.
  • Bold Solids in a Series: A row of planters in the same shape but different colors creates playful harmony.
  • Metallic Accents: Gold, copper, and silver highlights elevate even the simplest planter.

Best Materials for Painting

  • Terracotta
  • Ceramic
  • Concrete
  • Wood

Just use outdoor-grade acrylic or spray paint with a weatherproof sealant to ensure longevity.

Where to Display Painted Planters

  • Window sills
  • Balcony corners
  • Entryway steps
  • Along railing shelves

Painted planters are one of the cheapest yet highest-impact ways to turn functional containers into decorative art.


2. Create Plant Sculptures with Tiered or Stacked Planters

If you love dimension, height, and structural art, stacked planters and tiered arrangements are a perfect option. They create a sculptural effect that adds architectural interest to your space.

Types of Stacked Art Planters

  • Vertical Towers: Small pots stacked over larger ones, glued or supported with rods.
  • Tiered Stands: Use metal or wooden stands to display planters at different levels.
  • Spiral Arrangements: Arrange pots in a spiral for a visually flowing design.
  • Leaning Tower Style: Offset pots slightly to create a whimsical “tipping” effect.

Why They Stand Out

Stacked arrangements create:

  • Movement
  • Height variations
  • A focal point
  • Artistic balance

They turn plants into a living sculpture rather than just décor.

Best Plants for Tiered Art

  • Trailing vines like pothos or ivy
  • Colorful petunias or marigolds
  • Succulent clusters
  • Ornamental grasses for height

Tips for Stability

  • Place heavier pots at the bottom
  • Use rebar or rods for internal support
  • Avoid windy edges of balconies unless weighted well

Tiered planters make a statement while optimizing vertical space—perfect for small balconies.


3. Incorporate Mosaic or Tile Art on Planters

Mosaic planters add handcrafted beauty and texture. Using broken tiles, glass pieces, or ceramic fragments, you can create patterns that feel artistic, cultural, and timeless.

Why Mosaic Planters Are Stunning

They reflect light in unique ways, adding sparkle and depth. They also introduce color and texture without overwhelming the plant itself.

Creative Mosaic Ideas

  • Mediterranean Patterns: Blues, whites, and terracotta tones.
  • Abstract Art: Random colored pieces arranged freestyle.
  • Nature Themes: Leaves, waves, sunbursts, or floral shapes.
  • Mirror Tiles: Add shimmer that brightens small spaces.

Materials You Can Use

  • Broken ceramic dishes
  • Glass beads
  • Mirror pieces
  • Stone chips
  • Craft mosaic tiles

Where Mosaic Planters Shine Most

  • Balcony corners
  • Patio tables
  • Garden pathways
  • Entry door area

These planters bring a hand-crafted charm and artistic elegance that transforms even minimalistic outdoor spaces.


4. Use Planters as Hanging Art Installations

Hanging planters can become aerial art when arranged thoughtfully. Instead of placing planters on the ground, using vertical or suspended installations adds motion, depth, and creativity.

Hanging Art Concepts

  • Macramé Holders: Bohemian, cozy, and textural.
  • Hanging Shelves: Wooden planks suspended with ropes to hold multiple pots.
  • Floating Wall Frames: Planters arranged inside frames as living paintings.
  • Grid Walls: Metal grids used to hold small pots like an art gallery.
  • Chandelier-Style Planters: A hanging cluster of pots in varying heights.

Why Hanging Planters Become Art

They:

  • Maximize small balcony space
  • Create layered visual storytelling
  • Draw attention upward
  • Offer movement when the wind blows

Best Plants for Hanging Art

  • String of pearls
  • Spider plants
  • Trailing philodendrons
  • Ferns
  • Flowering vines like bougainvillea or mandevilla

Tips for Stability and Safety

  • Use strong hooks or ceiling mounts
  • Choose lightweight planters
  • Keep away from high wind zones

When executed well, hanging planter installations look more like suspended sculptures than gardening elements.


5. Turn Planters into Themed Decorative Art Pieces

If you love storytelling and cohesive aesthetics, themed planter art is a great way to build a visually immersive outdoor environment.

Theme Ideas to Inspire You

  1. Rustic Garden Theme:
    Wooden barrels, distressed pots, and jute-wrapped planters.
  2. Modern Minimalist:
    Monochrome planters, clean lines, and sleek geometric shapes.
  3. Tropical Oasis:
    Bright colors, leaf-patterned planters, and lush greenery.
  4. Vintage or Retro:
    Repurposed containers like old kettles, metal buckets, or antique tins.
  5. Zen Garden Theme:
    Stone pots, gravel top layers, bonsai, and calming tones.

Ways to Enhance Your Theme

  • Match planter shapes and finishes
  • Use complementary plant varieties
  • Add lighting around themed planters
  • Include accessories like pebbles, driftwood, lanterns, or sculptures

Why Themes Turn Planters into Art

A unified style creates harmony, making your balcony or patio look intentional and professionally designed—just like curated outdoor art.


Final Thoughts: Your Outdoor Space Is a Canvas

Using planters as outdoor art pieces is one of the most enjoyable, low-cost, and creative ways to transform your balcony or garden. Whether you choose painted pots, stacked sculptures, mosaics, hanging installations, or themed décor, each idea allows you to express your personality while making your space more beautiful and inviting.

With a little creativity and a few DIY touches, your outdoor area can become a living gallery—full of color, texture, artistry, and life.

How to Match Plants with Home Décor Styles: A Stylish Guide for Every Home

How to Match Plants with Home Décor Styles: A Stylish Guide for Every Home

Indoor plants do more than purify air—they shape a home’s character, reflect your personality, and elevate the visual appeal of your living space. But choosing plants randomly often leads to mismatched aesthetics, overcrowded corners, and décor styles that clash. The secret to a beautifully curated home lies in matching the right plants with the right décor style.

Whether your interior is modern, bohemian, minimalist, rustic, or traditional, the plants you choose can enhance and harmonize with your home’s design. This guide breaks down how to pair greenery with different décor themes so you create a visually cohesive, stylish, and refreshing living space.


Why Matching Plants with Decor Matters

Plants naturally add life and beauty, but when thoughtfully chosen, they become a seamless part of your interior design.

They enhance visual harmony

The color, shape, and size of plants can complement furniture, wall colors, and textures.

They add depth and texture

Plants introduce soft edges, vertical lines, and organic movement into structured spaces.

They highlight focal points

A well-placed plant can draw attention to accent walls, cozy corners, or artistic elements.

They complete a home’s theme

Different plants carry different personalities—elegant, rustic, tropical, calm, or vibrant.

Matching plants with décor strategies brings unity to the entire space.


1. Modern & Contemporary Décor

Key Style Traits: Clean lines, neutral colors, polished surfaces, minimal clutter, geometric shapes.

Modern homes call for plants that are sleek, architectural, and visually striking. Choose plants that complement sharp lines and uncluttered layouts.

Best Plants for Modern Homes

  • Snake Plant (Sansevieria): Its upright, sword-like leaves match a modern aesthetic.
  • ZZ Plant: Glossy leaves and simple form fit seamlessly into contemporary spaces.
  • Fiddle Leaf Fig: Bold, sculptural shape adds drama to minimalist rooms.
  • Rubber Plant: Thick, shiny leaves create a polished look.
  • Bird of Paradise: Adds a tropical yet structured vibe.

Pot and Placement Ideas

  • Use matte black, metallic, or concrete pots for a modern edge.
  • Place tall plants in corners to create vertical balance.
  • Use geometric stands or clean, simple planters.

Design Tips

  • Keep the plant count low—focus on statement pieces.
  • Avoid messy or trailing plants, which can disrupt modern symmetry.
  • Group plants in threes only if you have a large space.

2. Bohemian (Boho) Décor

Key Style Traits: Colorful, eclectic, layered textures, artistic vibes, natural materials.

Boho décor embraces free-spirited chaos and lush greenery. Think overflowing leaves, colorful pots, and hanging planters.

Best Plants for Boho Homes

  • Pothos: Trailing vines add movement and wild texture.
  • String of Pearls: A perfect match for boho hanging styles.
  • Areca Palm: Adds tropical flair and soft leaves.
  • Spider Plant: Easy to grow, ideal for shelves and hammocks.
  • Monstera Deliciosa: Iconic split leaves suit boho artistry.

Pot and Décor Ideas

  • Woven baskets
  • Macramé hangers
  • Terracotta pots
  • Colorful ceramics
  • Jute or cane planters

Design Tips

  • Mix heights and textures for a layered effect.
  • Display plants on shelves, hanging holders, and windowsills.
  • Use bold, patterned pots to enhance the bohemian collage.

3. Minimalist Décor

Key Style Traits: Simplicity, function over form, open space, muted colors, uncluttered surfaces.

Minimalist homes require calm, structured, low-maintenance plants that reinforce the clean aesthetic.

Best Plants for Minimalist Spaces

  • Peace Lily: Smooth leaves and elegant white blooms.
  • ZZ Plant: Effortless beauty with a simple silhouette.
  • Succulents: Tiny and easy to maintain.
  • Sansevieria Moonshine: Silver-toned leaves fit minimalist color palettes.
  • Air Plants: Great for floating shelves or wall mounts.

Best Pot Styles

  • White, grey, black
  • Simple cylindrical pots
  • Unpatterned clay or ceramic
  • Low-profile, compact planters

Design Tips

  • Limit the number of plants—each one should serve a clear visual purpose.
  • Avoid cluttered displays or overly bushy plants.
  • Stick to neutral tones and straight shapes.

4. Rustic & Farmhouse Décor

Key Style Traits: Natural wood, vintage pieces, cozy tones, earthy textures, distressed finishes.

Rustic interiors look best with hardy, earthy plants that reflect the natural charm of the style.

Best Plants for Rustic Homes

  • Aloe Vera: Simple and natural.
  • Herbs (rosemary, thyme, basil): Rustic kitchens love fresh herbs.
  • Lavender: Adds charm and fragrance.
  • Ivy: Trailing vines pair beautifully with wooden textures.
  • Calathea and Ferns: Soft, lush greenery complements rustic warmth.

Pot and Display Ideas

  • Metal buckets
  • Mason jars
  • Distressed wooden planters
  • Terracotta pots
  • Wicker or jute baskets

Design Tips

  • Mix natural materials with greenery.
  • Display plants on wooden crates or vintage shelves.
  • Incorporate dried flowers alongside live plants.

5. Scandinavian Décor

Key Style Traits: Bright, airy interiors, muted tones, natural textures, minimalist elegance.

Scandinavian design pairs best with soft, fresh, uncluttered plant choices that enhance the room’s brightness.

Top Plants for Scandinavian Homes

  • Parlor Palm: Light and airy.
  • Rubber Plant: Adds height without overwhelming the room.
  • Monstera Adansonii: Light, airy leaves fit the vibe.
  • Pilea Peperomioides: A classic Scandinavian favorite.
  • White Bird of Paradise: Stately, sculptural leaves.

Pot and Style Tips

  • Light wooden stands
  • White ceramic pots
  • Neutral or pastel planters
  • Simple woven baskets

Design Tips

  • Use plants sparingly—quality over quantity.
  • Pair greenery with natural light, soft fabrics, and wooden accents.
  • Keep plant shapes clean and well-defined.

6. Industrial Loft Décor

Key Style Traits: Exposed brick, metal accents, dark tones, large open spaces.

Industrial-style homes pair beautifully with bold plants that add softness and contrast to rugged materials.

Best Plants for Industrial Homes

  • Snake Plant: Strong lines work with metal and concrete.
  • Fiddle Leaf Fig: Adds lush height.
  • Cactus varieties: Complement industrial minimalism.
  • Rubber Plant or Burgundy Rubber Plant: Dramatic and bold.
  • Philodendron varieties: Adds texture and movement.

Pot Ideas

  • Metal planters
  • Concrete pots
  • Black and charcoal finishes
  • Iron stands

Design Tips

  • Use tall, dramatic plants to soften industrial edges.
  • Place plants near brick walls to create visual contrast.
  • Combine plants with steel or wood for a rugged yet warm vibe.

7. Traditional & Classic Décor

Key Style Traits: Symmetry, timeless furniture, elegant patterns, warm colors.

Traditional interiors thrive with classic plants that look refined and structured.

Best Plants for Traditional Homes

  • Peace Lily: Elegant, timeless blooms.
  • Orchids: Sophisticated and graceful.
  • Rubber Plant: A traditional favorite.
  • Boston Fern: Softens traditional corners.
  • Topiary or Ficus trees: Perfect for entryways and living rooms.

Pot Ideas

  • Decorative ceramic planters
  • Gold-accented pots
  • Ornate stands
  • Deep-toned terracotta

Design Tips

  • Symmetry is key—place matching plants on each side of furniture pieces.
  • Choose polished pots with minimal patterns.
  • Use classic shapes and upright plants.

8. Coastal Décor

Key Style Traits: Light colors, ocean-inspired palette, breezy, nautical touches, natural fibers.

Coastal homes pair beautifully with tropical or beachy plants.

Best Plants for Coastal Homes

  • Areca Palm: Brings beach house freshness.
  • Kentia Palm: Elegant and breezy.
  • Spider Plant: Light, airy foliage fits coastal themes.
  • Succulents: Evoke sandy shore vibes.
  • Yucca Plant: Strong, coastal character.

Pot Ideas

  • Whitewashed wooden planters
  • Sea-blue ceramic pots
  • Woven baskets
  • Rope-accented pots

Design Tips

  • Place plants near natural light to reflect the coastal brightness.
  • Incorporate seashells, driftwood, or jute décor.
  • Choose plants with soft, flowing leaves.

Final Thoughts

Matching plants with home décor styles is an art that blends creativity with design sense. The right plants can elevate a space, highlight décor features, and create a harmonious environment. Whether your home is modern, rustic, bohemian, or minimalist, there’s a perfect plant to complement your style.

Start small, experiment with plant shapes and textures, and choose pots that complete the look. With thoughtful placement and smart selection, your home will feel more cohesive, stylish, and vibrantly alive.

How to Start Container Gardening on a Budget: A Complete Beginner-Friendly Guide

How to Start Container Gardening on a Budget: A Complete Beginner-Friendly Guide

Starting a garden doesn’t require a large yard or a lot of money. Even if you live in an apartment or have limited outdoor space, container gardening allows you to enjoy the beauty of plants, grow your own herbs and vegetables, and create a refreshing green oasis—without spending much. With a little creativity and smart planning, you can build a thriving garden using inexpensive materials and beginner-friendly techniques.

Whether you’re a student, a new gardener, or just someone trying to keep costs low, this guide will show you exactly how to start container gardening on a budget. You’ll learn where to find affordable containers, how to save money on soil, which plants give the best value, and simple hacks to build a beautiful garden without overspending.


Why Container Gardening Is Perfect for Budget Gardeners

Container gardening is one of the most cost-effective ways to begin gardening for several reasons:

Grow anywhere

A balcony, windowsill, terrace, patio, or even a sunny indoor corner works.

Low maintenance

Containers are easy to water, move, and manage.

Flexible

Grow flowers, herbs, vegetables, or even small fruit trees.

Ideal for beginners

Less intimidating than digging a traditional garden bed.

Affordable

You can reuse household items, propagate plants, and buy only what you need.

If you’re trying to keep costs low, container gardening is truly the most beginner-friendly option.


1. Choose Budget-Friendly Containers

Containers are often the most expensive part of gardening, but they don’t have to be. Many everyday items can be reused or repurposed into perfectly functional plant pots.

Use what you already have

Before buying anything, look around your home for items like:

  • Plastic buckets
  • Old mugs or bowls
  • Paint cans
  • Food-grade plastic jars
  • Broken storage boxes
  • Old baskets (line with plastic)

As long as it can hold soil and has drainage holes, it can be used.


Affordable Container Options

If you need to purchase containers, look for:

Plastic pots

Lightweight, durable, and extremely budget-friendly.

Grow bags

Cheap, easy to store, and available in multiple sizes—perfect for tomatoes, potatoes, and flowers.

Clay pots (second-hand)

Local nurseries often sell damaged or slightly chipped pots at discounted rates.

Recycled containers

Many grocery stores or small shops discard large plastic cans or crates you can request for free.


DIY Container Ideas

You can create your own stylish pots with minimal effort:

  • Decorate tin cans using paint
  • Cut old water bottles into planters
  • Convert broken buckets by drilling holes at the bottom
  • Build wooden planters from leftover planks or crates

The key is to focus on functionality; aesthetics can be improved later with paint, wrappers, or fabric.


2. Save Money on Potting Soil

Good-quality soil is the foundation of healthy plants, but it can also be expensive. Thankfully, you can reduce cost significantly with a few smart choices.

Make your own potting mix

A simple and affordable DIY mix includes:

  • 40% garden soil
  • 40% compost
  • 20% sand or cocopeat

This mix drains well, supports root development, and keeps nutrients available.


Use compost to reduce fertilizer costs

Compost is nature’s free fertilizer, and you can make it at home.

How to make compost easily:

  • Use kitchen scraps like vegetable peels, eggshells, tea leaves, and coffee grounds.
  • Add dry leaves, shredded paper, or cocopeat to balance moisture.
  • Let it decompose in a bucket or container.

In 6–8 weeks, you’ll have rich compost that improves soil health and saves money on store-bought fertilizers.


Reuse old potting soil

If you already have soil from old pots:

  • Remove old roots
  • Mix in fresh compost
  • Add cocopeat for moisture retention
  • Add perlite or sand to improve drainage

This revitalizes the soil and saves money.


3. Choose Low-Cost, Easy-to-Grow Plants

Some plants thrive with minimal care and don’t need expensive fertilizers, making them ideal for budget gardeners.


Best budget-friendly plants for beginners

Herbs

  • Mint
  • Basil
  • Coriander (cilantro)
  • Curry leaves
  • Lemongrass

These grow quickly and can be used in cooking—saving money on groceries!


Leafy greens

  • Spinach
  • Lettuce
  • Fenugreek (methi)
  • Kale
  • Swiss chard

Leafy greens grow fast and can be harvested multiple times.


Vegetables

  • Cherry tomatoes
  • Chilies
  • Okra
  • Beans
  • Radish

These can grow in small containers and yield well.


Flowering plants

  • Marigold
  • Petunia
  • Zinnia
  • Portulaca
  • Sunflowers (dwarf varieties)

Flowers help attract pollinators and add beauty to your space.


4. Start Your Plants from Seeds or Cuttings

Buying fully grown plants can be expensive, but seeds and cuttings are extremely budget-friendly.


Growing from seeds

Seeds cost only a fraction of what you’d pay for nursery plants.

Tips for successful seed-starting:

  • Use trays, egg cartons, or yogurt cups
  • Don’t bury seeds too deep
  • Keep the soil moist
  • Provide partial sunlight until seedlings develop

Use kitchen scraps to grow new plants

Some vegetables can regenerate from scraps:

  • Grow green onions from the white roots
  • Regrow lettuce from the base
  • Plant garlic cloves to grow garlic greens
  • Use sprouted potatoes to grow new plants

This gives you free plants without buying seeds.


Propagate plants from cuttings

Cuttings can be taken from:

  • Mint
  • Basil
  • Pothos
  • Hibiscus
  • Rosemary
  • Coleus

Just place them in water for a few days until roots form. Then pot them in soil.

This method saves money and multiplies your plant collection quickly.


5. Water Efficiently to Reduce Waste

Watering is essential, but wasteful watering leads to higher bills and weaker plants.

Smart water-saving tips

  • Water early morning or late evening
  • Use a watering can instead of a pipe
  • Mulch the soil to prevent evaporation
  • Group plants with similar watering needs
  • Use a tray under pots to reuse excess water

Create a DIY self-watering setup

You can make a simple self-watering system with:

  • Plastic bottles
  • Cotton wicks
  • Recycled containers

These systems ensure plants get consistent moisture without overspending.


6. Use Natural, Cheap Fertilizers

You don’t need expensive chemical fertilizers to keep your plants growing. Natural options are cheap and effective.


DIY fertilizers you can make at home

  • Banana peel water for potassium
  • Eggshell powder for calcium
  • Rice water for overall plant growth
  • Diluted cow dung or vermicompost tea
  • Epsom salt (occasionally for magnesium)

These help maintain healthy growth without costing much.


7. Make Your Garden Look Beautiful—Affordably

A pretty garden doesn’t require expensive décor.

Affordable decoration ideas

  • Paint old containers for a fresh look
  • Use fairy lights for ambiance
  • Hang pots with jute rope
  • Build a vertical garden using old shoe racks or crates
  • Add pebble or stone borders
  • Use reclaimed wood to build shelves

These small touches create a cozy garden atmosphere without spending much.


8. Avoid Common Beginner Mistakes

To keep costs low, avoid mistakes that lead to plant loss or wasted materials.

Common mistakes in budget container gardening:

  • Choosing the wrong pot size
  • Overwatering
  • Using poor-quality soil
  • Growing plants without enough sunlight
  • Buying too many plants at once

Start small, observe your plants, and expand gradually.


Final Thoughts

Starting container gardening on a budget is entirely possible—even with limited space and resources. By reusing containers, making your own soil and compost, choosing affordable plants, growing from seeds or cuttings, and following cost-saving watering techniques, you can create a beautiful and productive garden without overspending.

Your balcony or home can become a green, peaceful space filled with herbs, vegetables, and flowers—all grown in creative DIY containers and nurtured with simple, budget-friendly methods.

How to Build a Drip Irrigation System for Balconies

How to Build a Drip Irrigation System for Balconies

Watering balcony plants can be challenging, especially if your schedule is busy or your space receives strong sun and wind. Containers dry out quickly, and hand-watering every day can become exhausting. That’s where a drip irrigation system comes in—a simple, efficient, cost-effective solution that delivers water directly to your plants’ roots while saving time, effort, and water.

The best part? You don’t need a garden or professional tools to set this up. A small balcony is perfect for drip irrigation, and you can easily build it yourself using readily available parts. This guide breaks down every step so even beginners can create a reliable, long-lasting irrigation system.


Why Use Drip Irrigation on a Balcony?

Before getting into the installation process, it’s important to understand why drip irrigation is ideal for small balcony gardens:

Saves Water

Unlike hand-watering or using a hose, drip systems deliver water directly to the soil with minimal evaporation.

Ensures Even Moisture

Each plant gets the right amount of water, preventing underwatering or flooding.

Perfect for Busy Gardeners

Set it on a timer and water your plants automatically—even when you’re on vacation.

Reduces Fungal Issues

Leaves stay dry, lowering the risk of diseases like mildew.

Works for Any Type of Balcony Garden

Whether you grow herbs, vegetables, flowers, or ornamentals, drip irrigation fits all container types.


Materials You’ll Need

All items are easily available online or at local gardening stores.

Essential Components:

  • Water source (tap or water tank)
  • Pressure regulator (optional but recommended for apartment taps)
  • Main supply tubing (usually 12mm or 16mm)
  • Micro tubing (4mm for connecting to individual pots)
  • Drip emitters (1–4 liters per hour, depending on plant needs)
  • T- and L-connectors (for branching pipes)
  • Inline connectors (for extending tubes)
  • Hole punch tool (for main line)
  • End caps (to close the system at the end)
  • Plant stakes or clips (to fix emitters)
  • Timer (optional but ideal for automation)

Step-by-Step Guide to Building a Drip Irrigation System

Step 1: Plan Your Layout

Before installing anything, observe your balcony:

Map Out Your Plants

  • Count how many pots you have.
  • Group plants with similar water requirements together.
  • Identify where the water source is located.

Decide the Main Line Path

  • The main tubing should run along the railing, wall, or floor edge.
  • Keep it as straight as possible for better pressure distribution.

Measure the Distances

This helps you cut tubing correctly and avoid wastage.


Step 2: Install the Main Supply Line

The main supply line acts as the backbone of your drip system.

How to Set It Up

  1. Connect the main tubing to your water tap.
  2. Add a pressure regulator if your tap water pressure is high.
  3. Add a filter to prevent clogging (highly recommended).
  4. Run the main line along the perimeter of your balcony.
  5. Use clips or zip-ties to hold it firmly in place.

Tip:

Avoid bending the tubing too sharply—this restricts water flow.


Step 3: Connect Micro Tubes to Individual Pots

Micro tubing (4mm) distributes water from the main line to each container.

Steps to Follow:

  1. Use a hole punch to make a small opening in the main line.
  2. Insert a connector (also called a barb).
  3. Attach the micro tube onto the connector.
  4. Run the micro tube to the pot.
  5. Secure it using a plant stake.

Pro Tip:

Try to keep micro tubes short; longer tubes reduce water pressure.


Step 4: Install Drip Emitters

Emitters control how much water each plant receives. Different plants require different flow rates.

Types of Emitters:

  • Drippers (1–4 L/hour)
  • Adjustable emitters (let you control the flow manually)
  • Micro-sprinklers (for wide containers)
  • Bubblers (for thirsty plants like tomatoes or cucumbers)

How to Install Emitters:

  1. Attach them at the end of the micro tube.
  2. Insert the drip emitter into the soil near the plant base.
  3. Test the flow to ensure even distribution.

Step 5: Close and Secure the System

To ensure water flows properly:

Finish the Main Line

  • Add an end cap to seal the main tube.
  • This prevents water waste and maintains pressure.

Test Your System

  • Turn on the water tap.
  • Check each emitter in every pot.
  • Ensure no tubes are leaking or popping out.

Adjust Flow Rates

If a pot gets too much or too little water:

  • Adjust the emitter manually (if you chose adjustable ones)
  • Change to a higher or lower-flow emitter

Bonus: Automate Your Watering Schedule

If you want your system to work even when you’re away, add a timer.

Benefits of a Timer

  • Waters at the same time every day
  • Ensures consistency for sensitive plants
  • Saves water and prevents overwatering

Best Time to Water

  • Early morning
    or
  • Late evening

This minimizes evaporation and helps plants absorb more water.


Maintenance Tips for Long-Lasting Drip Irrigation

A well-maintained system can last for years.

Clean the Filter Regularly

Once every two weeks is enough.

Flush the Pipes

Open end caps every month and let water run through to remove debris.

Check Emitters

Replace clogged or slow-flowing ones immediately.

Protect Tubes from Direct Sun

Although UV-resistant, long-term harsh sunlight can wear them out faster.


Common Mistakes to Avoid

Using too many emitters on one line → reduces pressure
Running micro tubes too long → uneven water flow
Mixing high- and low-water plants on one emitter line
Not securing pipes properly → pipes may shift or disconnect
Ignoring leaks → wastes water and reduces pressure


Final Thoughts

A drip irrigation system is one of the most efficient ways to water balcony plants—whether you’re a beginner or an expert gardener. It saves time, reduces effort, and ensures your plants always get consistent hydration. With a basic setup and a little planning, you can build your entire system in just a couple of hours.

From small herb pots to big vegetable containers, drip irrigation keeps your balcony garden healthy, green, and thriving—all year long.

5 Tips for Watering Balcony Plants Efficiently: Smart Ways to Keep Your Garden Healthy Without Waste

5 Tips for Watering Balcony Plants Efficiently: Smart Ways to Keep Your Garden Healthy Without Waste

Watering balcony plants may seem like a simple task — just pour water and walk away. But when you’re gardening in containers, especially in the limited space of a balcony, watering becomes one of the most important (and most misunderstood) aspects of plant care. Overwatering, underwatering, inconsistent watering, and poor drainage are among the most common reasons plants struggle in balcony gardens.

Efficient watering is about giving plants exactly what they need — not too much, not too little — while conserving water and reducing maintenance time. In this comprehensive 1200-word guide, you’ll learn five highly effective watering strategies to help your balcony plants thrive effortlessly.


1. Understand Your Balcony’s Microclimate Before Watering

Every balcony has its own unique microclimate. This includes factors such as sunlight exposure, temperature, wind level, and humidity — all of which directly influence how often and how much you should water your plants.

Why Microclimate Matters

  • A south-facing balcony dries out soil quickly.
  • A shaded or north-facing balcony keeps soil moist for longer.
  • High-rise balconies receive stronger winds that cause faster evaporation.
  • Covered balconies may trap humidity and reduce water needs.

How to Assess Your Balcony’s Environment

  1. Track sunlight hours for a few days.
  2. Observe wind patterns — are your plants exposed or protected?
  3. Check soil drying rates in different areas of the balcony.
  4. Note the season — plants need more water in summer and much less in monsoon/humid months.

Smart Tip

Place plants with similar watering needs together. This prevents overwatering shade-loving species or underwatering sun-loving ones.


2. Choose the Right Containers and Soil for Efficient Water Use

Efficient watering isn’t just about how you water — it starts with the right containers and soil setup. Both play a major role in how well your balcony garden retains moisture without becoming waterlogged.

Select the Right Containers

  • Terracotta pots: Breathable but dry out quickly — perfect for succulents.
  • Plastic/Resin pots: Retain moisture longer — suitable for herbs and vegetables.
  • Fabric grow bags: Excellent aeration, prevent overwatering, ideal for most edible plants.
  • Self-watering containers: Great for busy gardeners and consistent moisture lovers.

Always Use Pots with Drainage Holes

This is non-negotiable.
No matter how careful you are, stagnant water at the bottom leads to:

  • root rot
  • fungal growth
  • pest infestations
  • nutrient deficiency

Use the Correct Soil Mix

Balcony plants thrive in light, airy, well-draining soil.
Avoid garden soil, which becomes compact in containers.

Ideal Soil Mix for Balcony Plants

  • 50% high-quality potting mix
  • 20% compost
  • 20% cocopeat
  • 10% perlite or sand

This mix holds enough moisture while allowing excess water to drain away efficiently.

Smart Tip

Mulch the top layer with dried leaves, coco chips, or rice husk. Mulching reduces evaporation by 50%, keeping the soil moist for much longer.


3. Water Deeply, Not Frequently — The Golden Rule of Efficient Watering

One of the biggest mistakes balcony gardeners make is watering too lightly but too often. Shallow watering encourages shallow roots, making plants weak and more dependent on daily watering.

Why Deep Watering Works Better

  • Encourages strong, deep root growth
  • Helps plants withstand heat and wind
  • Reduces watering frequency
  • Keeps soil evenly moist

How to Water Deeply

  1. Water slowly until it starts draining from the bottom.
  2. Allow the soil to absorb water fully before watering again.
  3. For large pots, water in stages — pour a little, let it soak, then pour again.

How Often Should You Water?

It depends on the plant and your climate.

General Guide

  • Succulents: Once every 10–14 days
  • Herbs: Every 1–3 days
  • Leafy greens: Daily or every alternate day
  • Flowering plants: 2–3 days depending on heat

Smart Tip

Stick your finger 1–2 inches into the soil — if it feels dry, water; if moist, wait. This simple method prevents 90% of overwatering problems.


4. Use Smarter Watering Techniques for Efficiency and Convenience

Balcony gardening doesn’t mean you must manually water each plant every day. There are several clever techniques and tools that save time, prevent water waste, and ensure consistent hydration.


A. Self-Watering Pots

These containers have a water reservoir at the bottom. Plants take up water as needed through capillary action.

Best for:

  • Tomatoes
  • Basil
  • Indoor plants
  • Busy gardeners

B. Drip Irrigation for Balconies

Yes, drip systems aren’t just for large gardens! Compact balcony kits are available and easy to install.

Benefits:

  • Delivers water directly to roots
  • Saves up to 60% water
  • Extremely convenient
  • Prevents leaf diseases caused by wet foliage

C. DIY Bottle Watering

A simple inverted water bottle can slowly release water into the soil.

Good for:

  • When you’re on vacation
  • Water-thirsty plants

D. Pebble Trays

Place pots on trays filled with pebbles and water. As water evaporates, humidity increases around the plants.

Useful for:

  • Ferns
  • Calatheas
  • Peace lilies

E. Water from the Base

Instead of watering from the top, place the pot in a tub of water for 10–15 minutes. The soil absorbs exactly what it needs.

Perfect for:

  • Seedlings
  • Indoor plants
  • Overwater-prone species

5. Water at the Right Time and Adjust Seasonally

Even if you water the right amount, timing and seasonal changes can make a huge difference.


Best Time to Water Balcony Plants

Early morning (6 AM – 9 AM) is ideal.
Why?

  • Plants absorb water best in the morning
  • Temperatures are lower, reducing evaporation
  • Leaves dry quickly, preventing fungal issues

If you cannot water in the morning, late afternoon is the second-best option.


How Your Watering Needs Change with Seasons

Summer

  • Fast evaporation
  • Water more frequently
  • Mulch becomes essential
  • Shade nets may help prevent heat stress

Monsoon

  • Reduce watering dramatically
  • Watch for fungal infections
  • Ensure pots drain properly

Winter

  • Plants grow slowly → need less water
  • Water only when the soil feels dry
  • Avoid watering in the evening (cold soil = root damage)

Smart Tip

Lift your pots occasionally. Light pot = dry soil, heavy pot = moist soil. This trick works especially well for large containers.


Bonus Tips: Making Your Watering Routine Even More Efficient

1. Group Plants with Similar Needs

This reduces the chances of overwatering one plant while underwatering another.

2. Use Mulch Generously

Coco chips, straw, pebbles, or dried leaves reduce evaporation significantly.

3. Choose Drought-Tolerant Plants

If you’re busy or travel often:

  • Portulaca
  • Jade plant
  • ZZ plant
  • Aloe vera
  • Sedum

These survive with minimal watering.

4. Avoid Wetting Leaves

Wet leaves encourage fungus, especially in low-light balconies.
Always water the soil directly.

5. Keep Tools Handy

A small watering can, moisture meter, or spray bottle makes consistent care easier.


Final Thoughts

Efficient watering is the secret to a healthy, thriving balcony garden. With the right soil, smart containers, proper watering techniques, and seasonal adjustments, you can maintain beautiful plants without wasting water or spending too much time.

Remember: plants in balcony containers depend entirely on you for moisture, so learning how to water correctly is one of the most important skills for any urban gardener.

Whether your balcony gets full sun, partial shade, or low light, these watering tips will help your plants grow stronger, greener, and happier than ever.