How to Grow Flower Seeds at Home: Complete Step-by-Step Guide for Beginners (Full Updates & Easy Method)

How to Grow Flower Seeds at Home: Complete Step-by-Step Guide for Beginners (Full Updates & Easy Method)

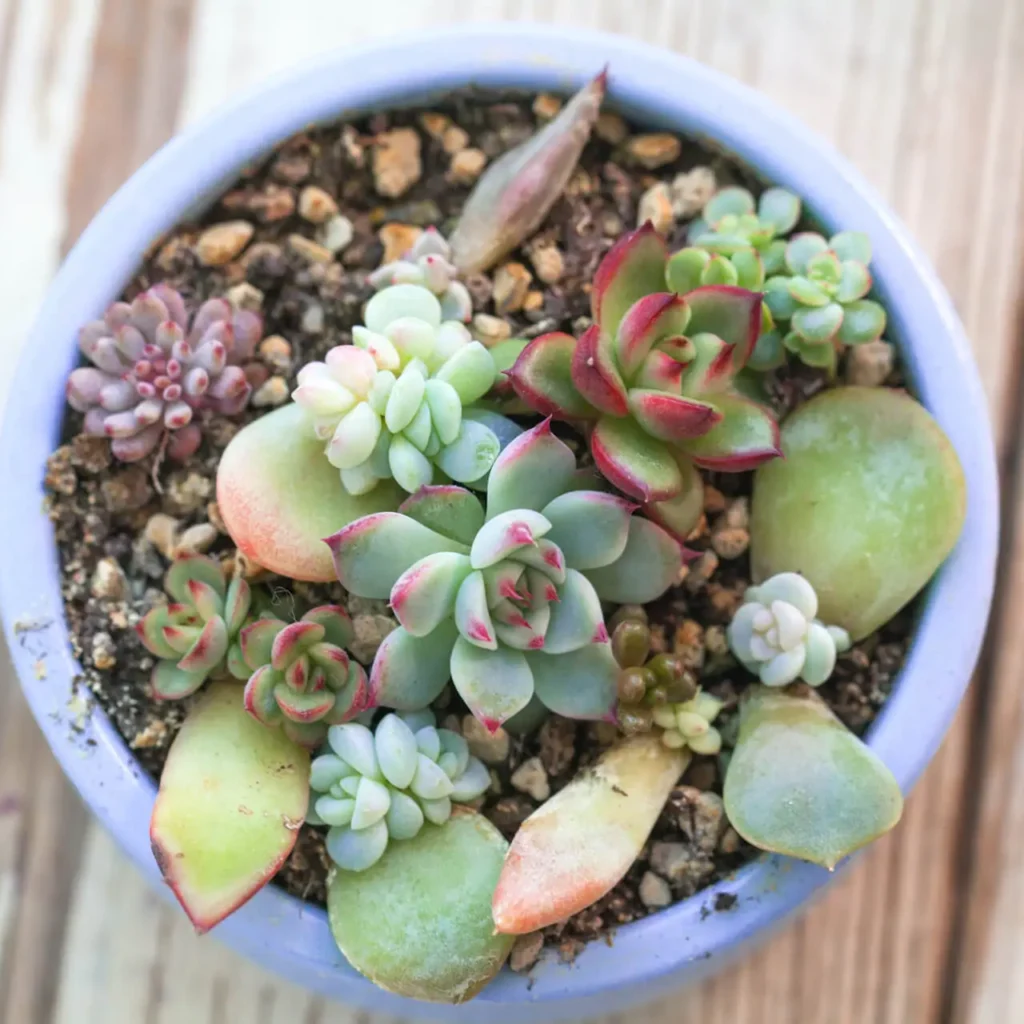
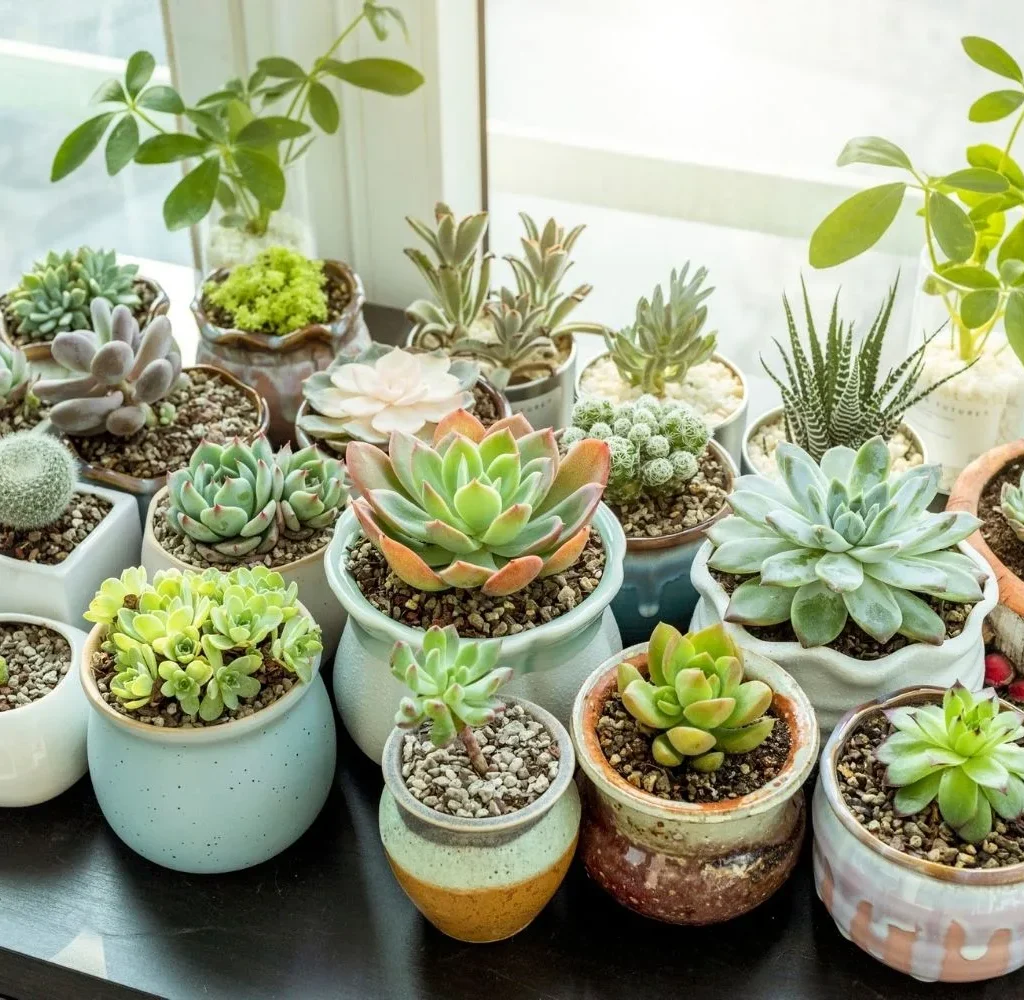
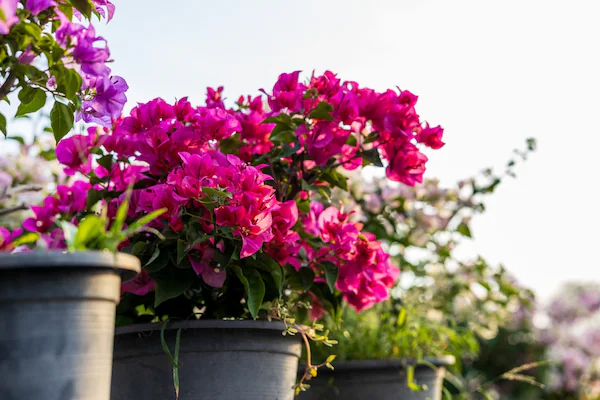
Growing flowers from seeds is one of the most rewarding experiences for home gardeners. Whether you have a small balcony, a terrace garden, or even just a sunny window, you can easily grow beautiful flowering plants right at home. Starting flowers from seeds gives you stronger plants, more variety, and the joy of witnessing the entire life cycle—from seed to sprout to full bloom.

In this complete 1200-word guide, you will learn exactly how to grow flower seeds at home using simple materials. This includes seed selection, soil preparation, sowing techniques, watering, transplanting, care, updates on seed growth stages, and solutions for common problems. Whether you’re a beginner or an experienced gardener, this guide will help you grow healthy, vibrant flowering plants from scratch.


1. Why Grow Flowers from Seeds?

Growing flowers from seeds offers many benefits:

Wide Variety to Choose From

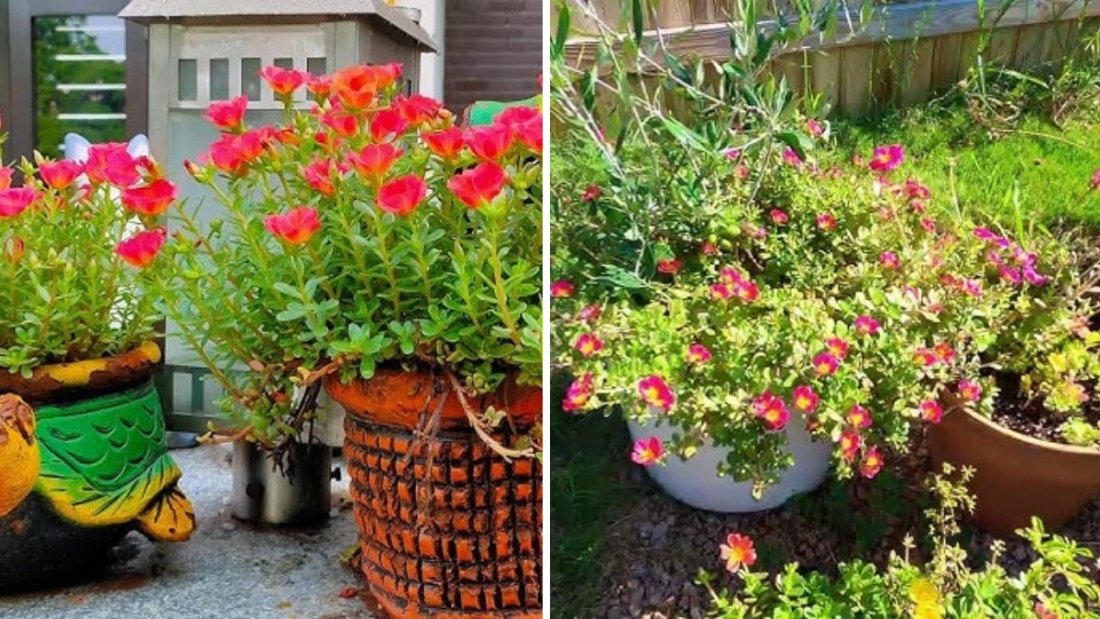
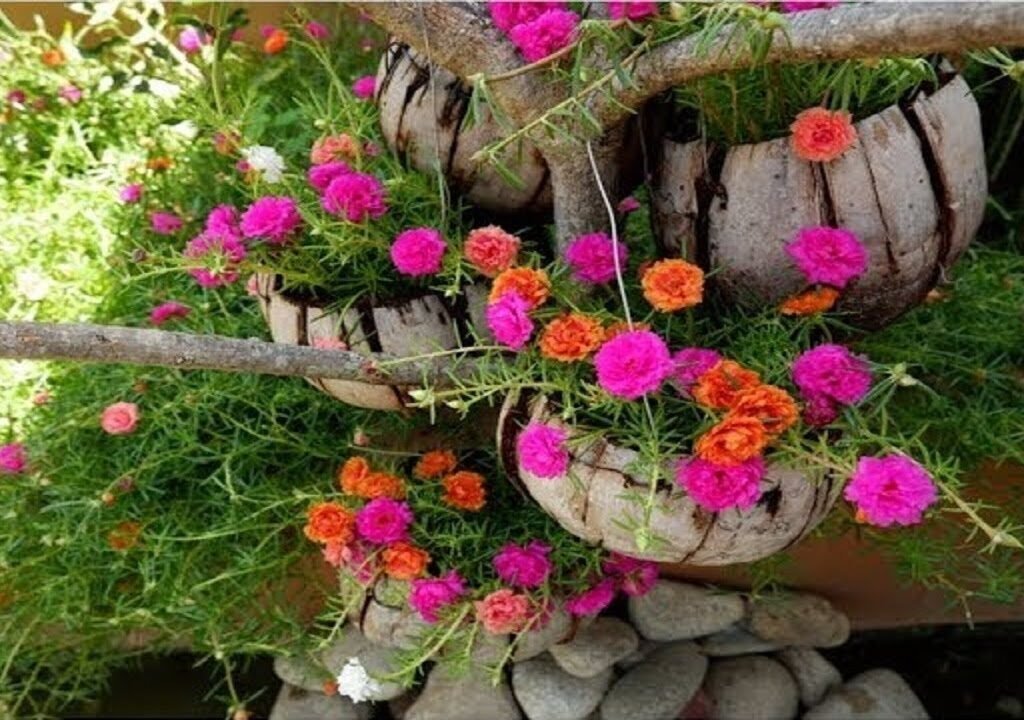
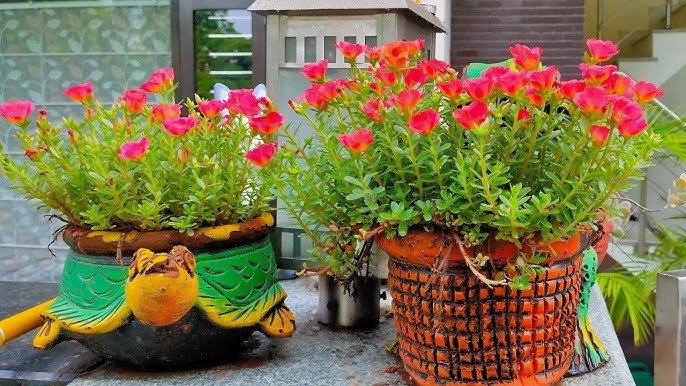
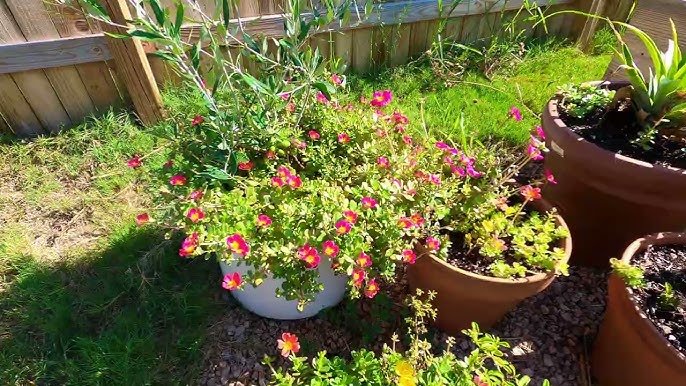
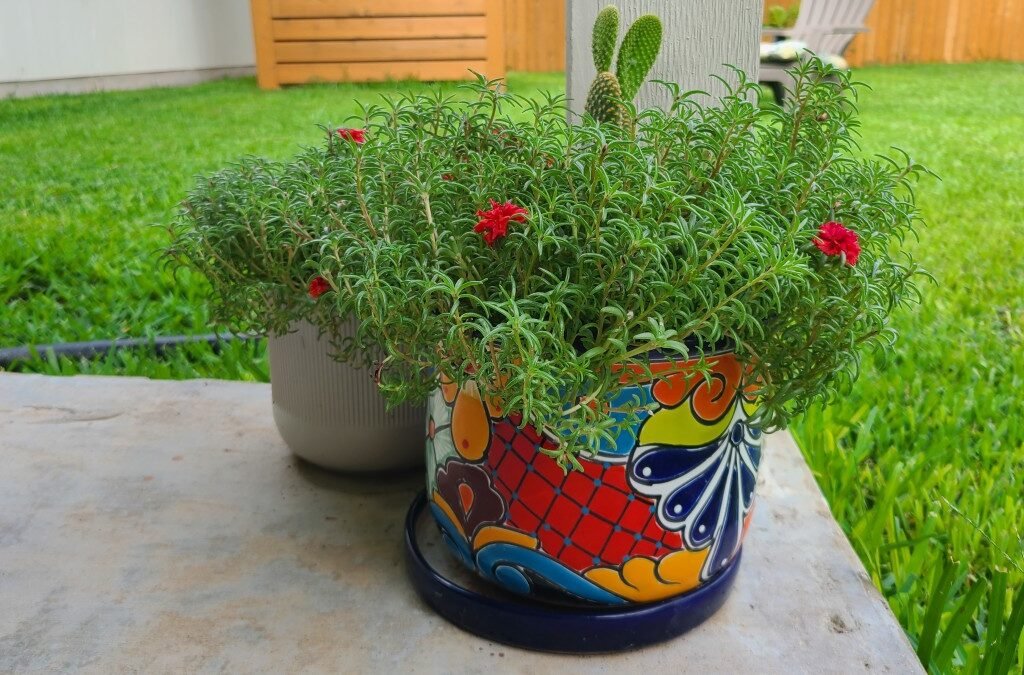
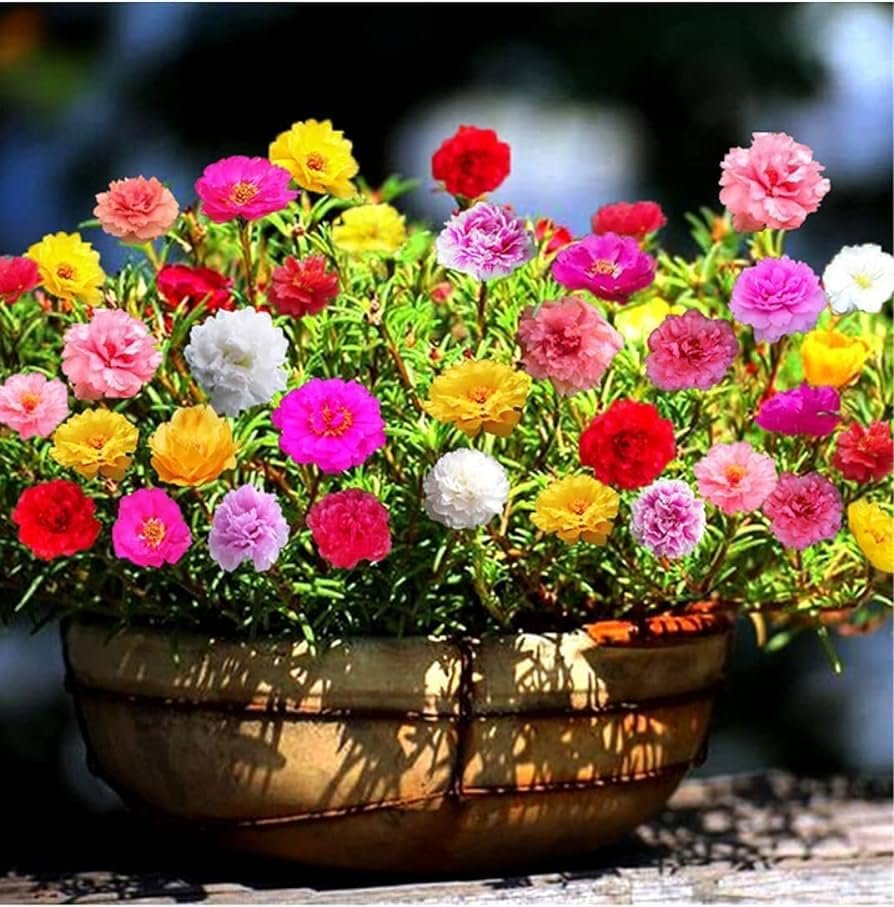
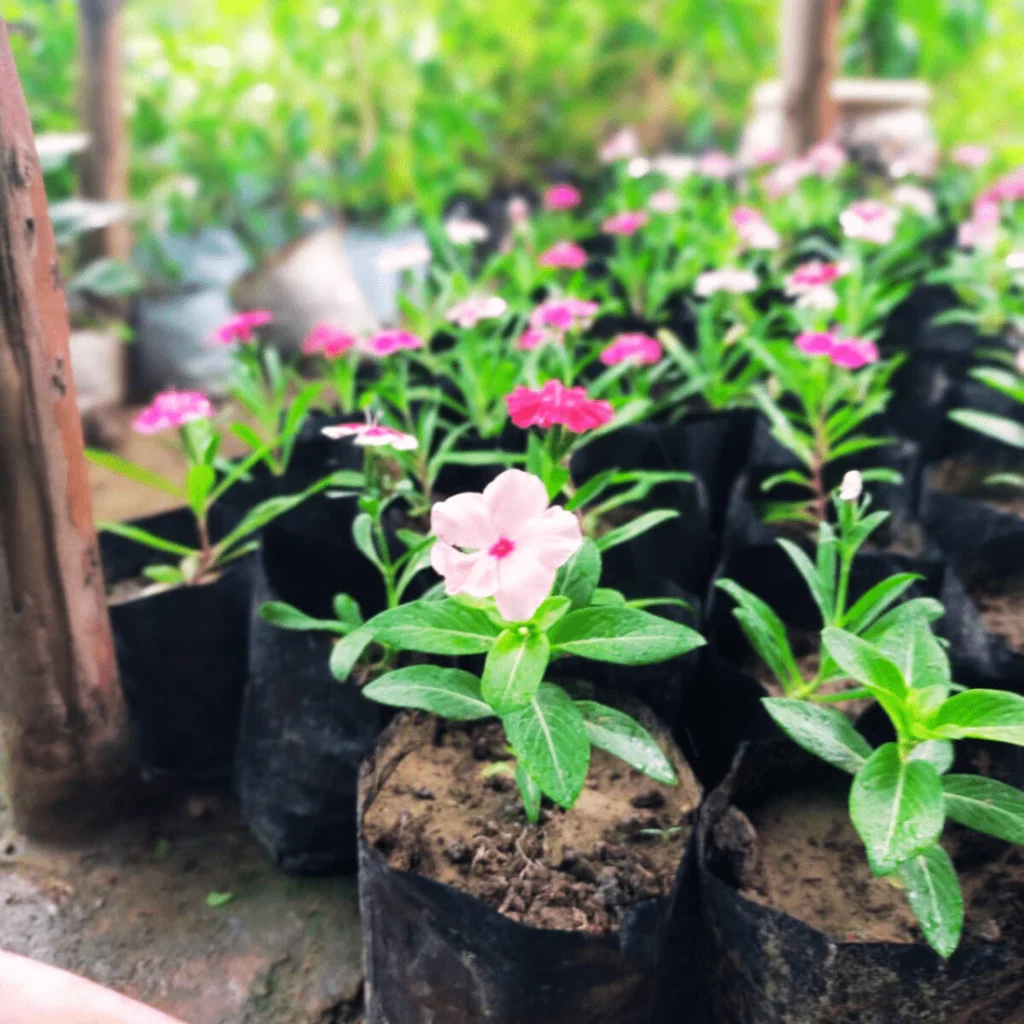
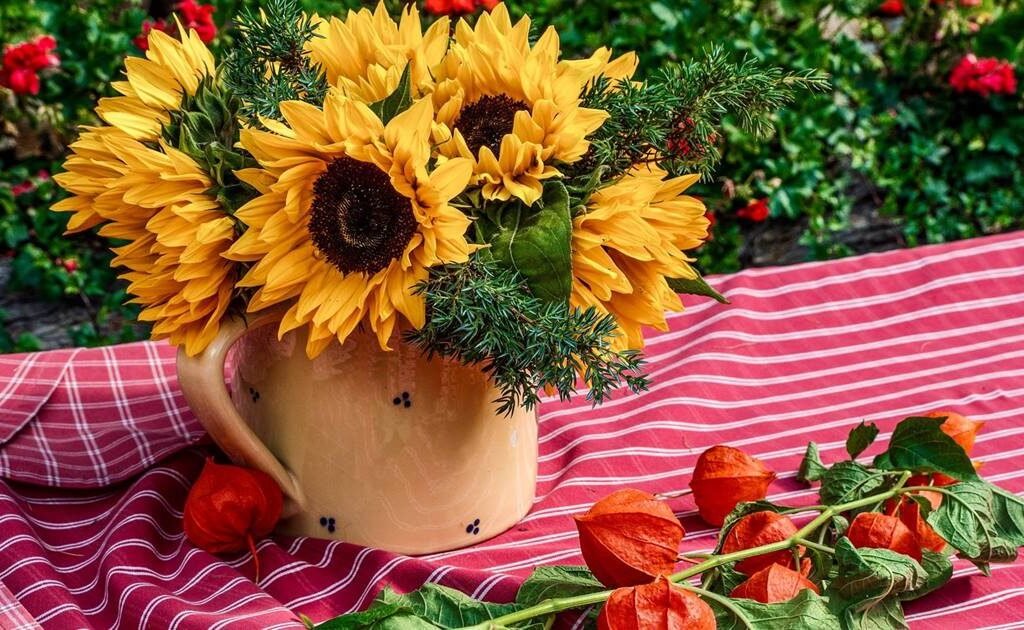
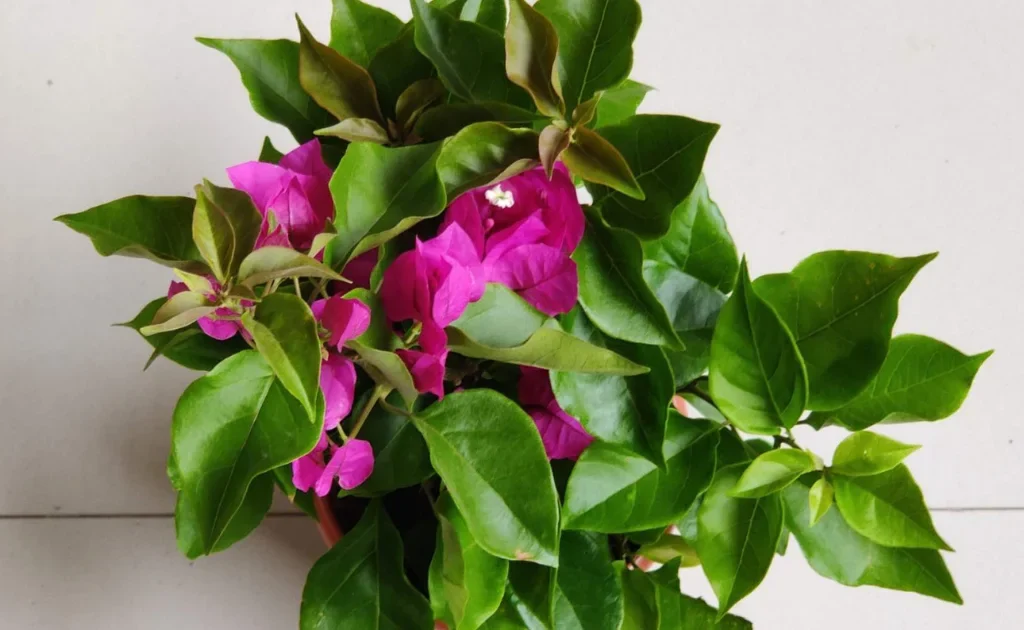
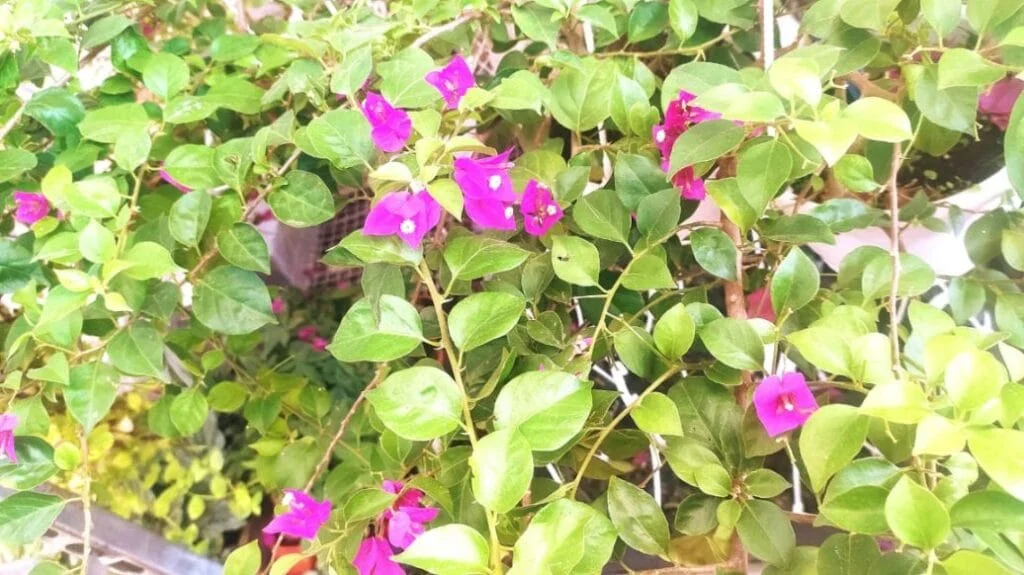
You can grow marigolds, zinnias, sunflowers, cosmos, petunias, vinca, pansies, portulaca, and many more.

Cost-Effective

Seed packets are inexpensive and can produce dozens of plants.

Stronger Plants

Seed-grown plants often adapt better to your home environment.

Satisfying Experience

Watching seeds sprout and grow is extremely rewarding.


2. Choosing the Best Flower Seeds for Home Gardening

Selecting the right seeds increases your success rate.

Easiest Flowers to Grow from Seeds:

  • Marigold
  • Zinnia
  • Cosmos
  • Sunflower
  • Portulaca
  • Gomphrena
  • Petunia
  • Chrysanthemum (from cuttings and some varieties from seeds)

For Shady Areas:

  • Begonias
  • Impatiens

Warm-Season Flowers:

  • Marigold
  • Zinnia
  • Sunflower
  • Portulaca

Cool-Season Flowers:

  • Petunia
  • Pansy
  • Dahlia (from tubers and seeds)

Choose seeds based on your climate and season.


3. Preparing the Perfect Soil Mix for Seed Germination

Seeds need soft, airy, and moisture-retentive soil.

Best Seed Starting Mix:

  • 40% cocopeat
  • 30% vermicompost
  • 20% garden soil
  • 10% sand or perlite

Why This Mix Works:

Cocopeat helps retain moisture
Vermicompost provides nutrients
Sand/perlite improves drainage
Soft texture helps seeds sprout easily

Avoid heavy clay soil—it suffocates the seeds and slows germination.


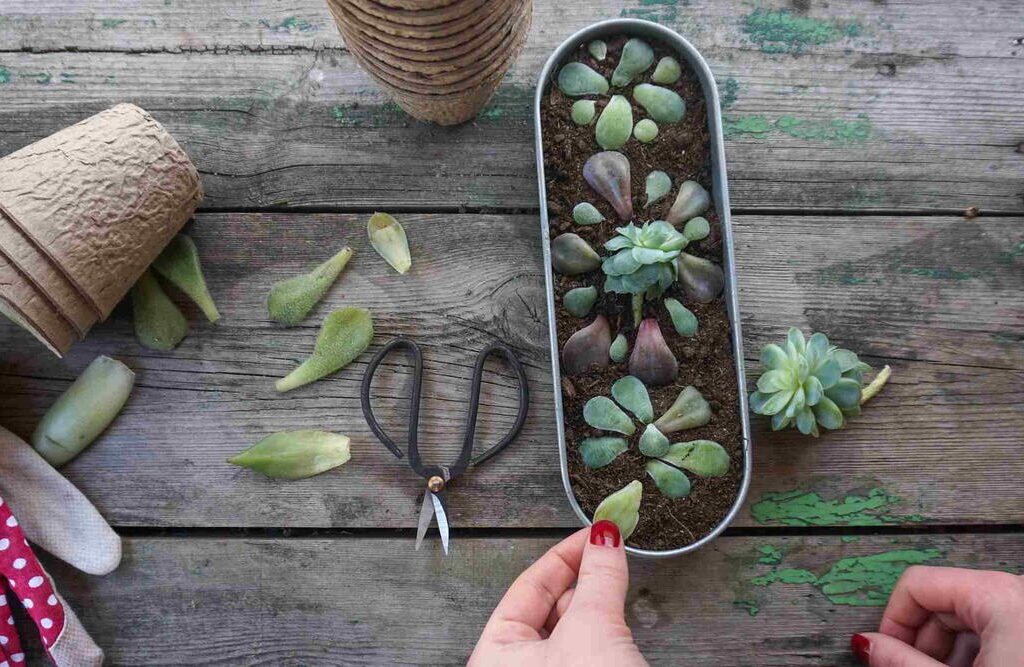
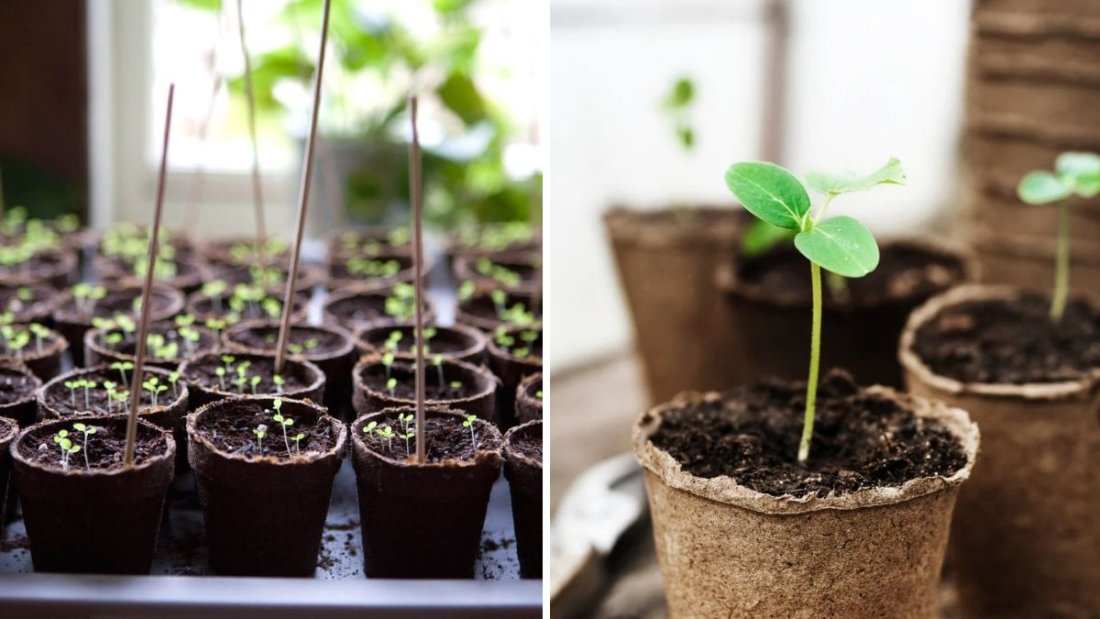
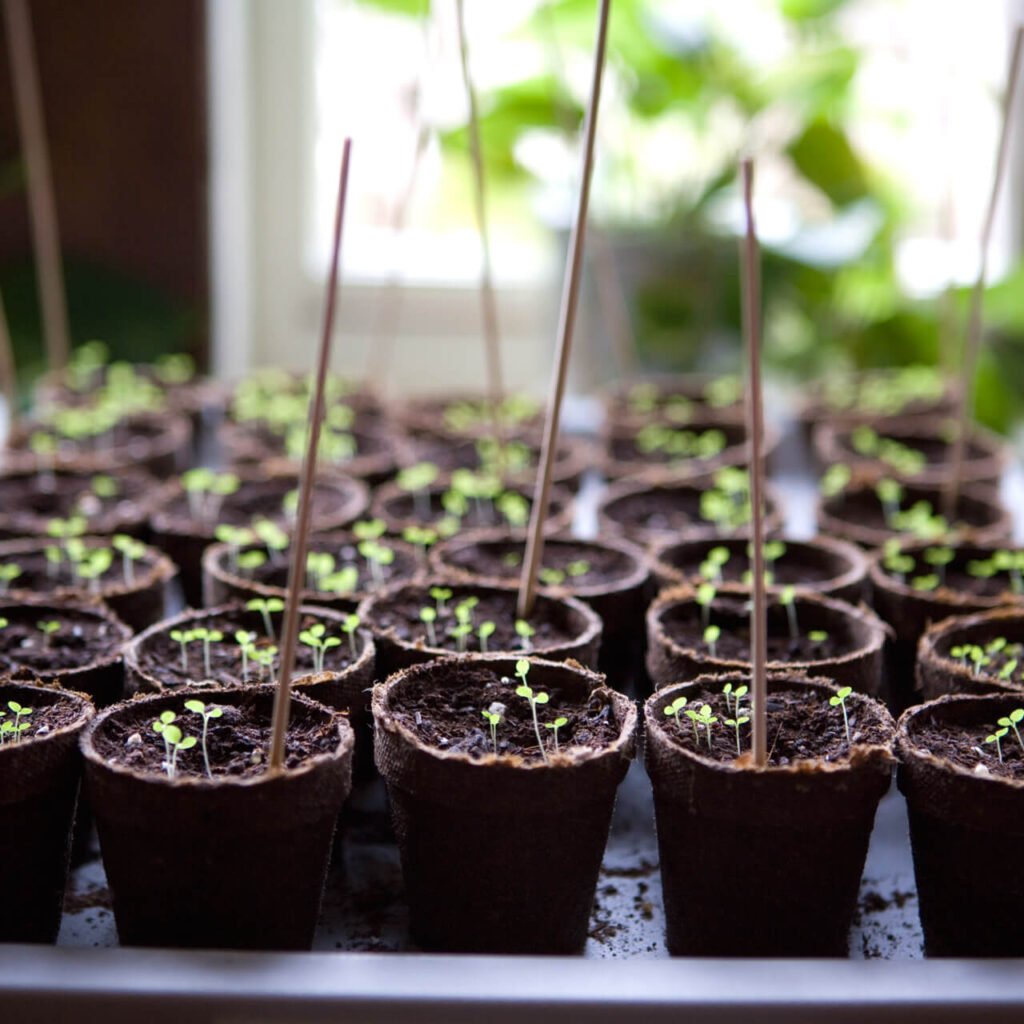
4. Choosing Seed Trays or Containers

You can use:

Seedling trays

Small pots
Plastic cups (with holes)
Recycled containers
Ice cube trays
Egg cartons

The key requirement:
Good drainage holes at the bottom.


5. How to Sow Flower Seeds Correctly

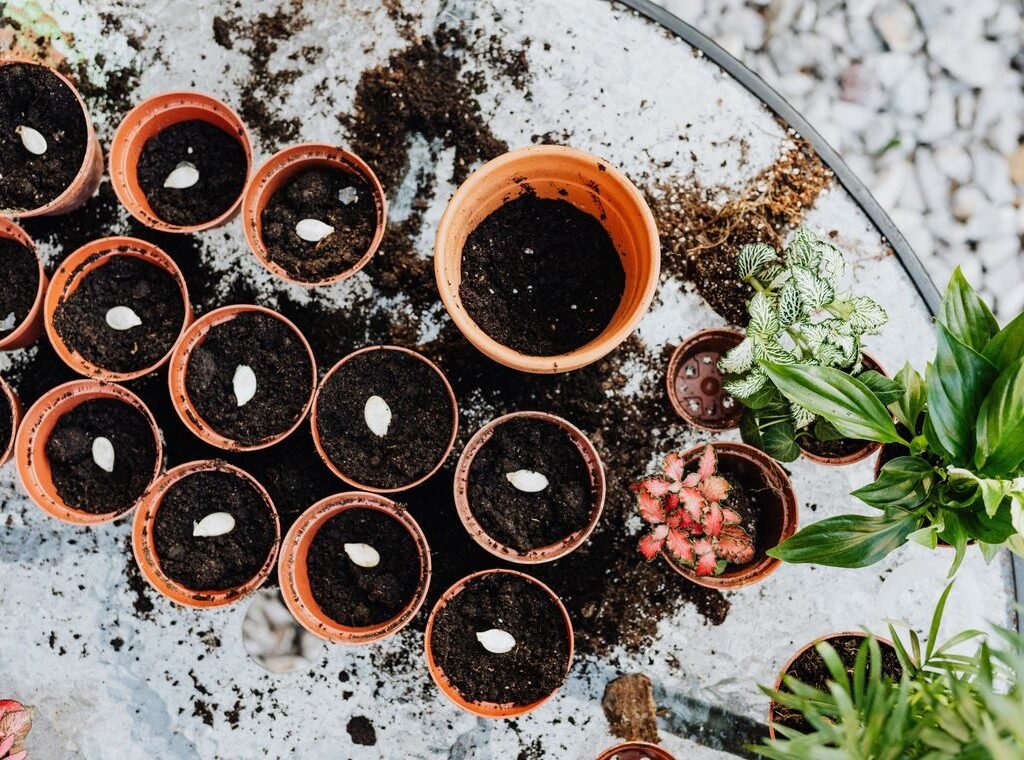
Different seeds require different sowing depths.

General Rule:

  • Large seeds → Sow ½ inch deep
  • Medium seeds → Sow ¼ inch deep
  • Tiny seeds → Sprinkle on soil and do NOT cover completely

Step-by-Step Sowing Process:

  1. Fill your tray/pot with the seed mix.
  2. Tap gently to remove air gaps.
  3. Sprinkle seeds evenly.
  4. Cover lightly with a thin layer of soil (except tiny seeds).
  5. Spray water gently using a spray bottle.
  6. Place tray in bright but indirect sunlight.

Germination Time (Approx):

FlowerDays to Germinate
Marigold4–7 days
Zinnia5–10 days
Petunia7–14 days
Cosmos4–7 days
Sunflower3–5 days
Pansy10–20 days

6. Watering Flower Seeds the Right Way

Seedlings are delicate—overwatering kills them.

Best Watering Tips:

Always use a spray bottle
Keep soil moist but never soggy
Avoid pouring water directly—it displaces seeds
Check moisture daily
Reduce watering once seedlings develop leaves


7. Light Requirements for Seed Germination

Different flowers have different needs, but general rules are:

Before Germination:

Bright indirect light is best.

After Germination:

Seedlings need 4–6 hours of sunlight daily.

If seedlings become tall and weak (leggy), they need more light.


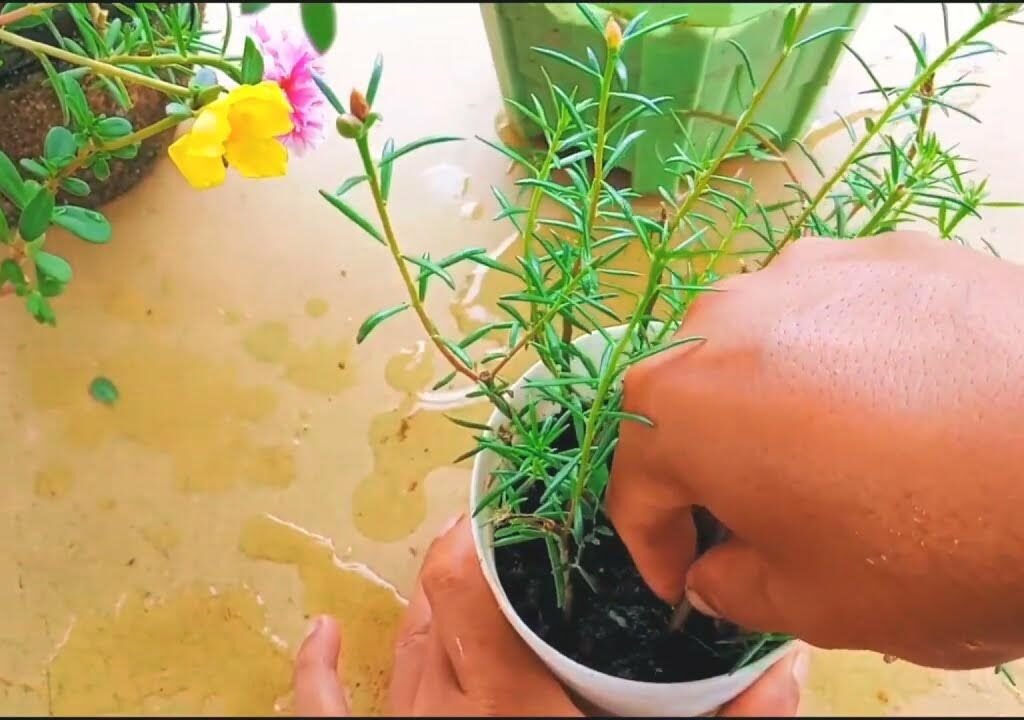
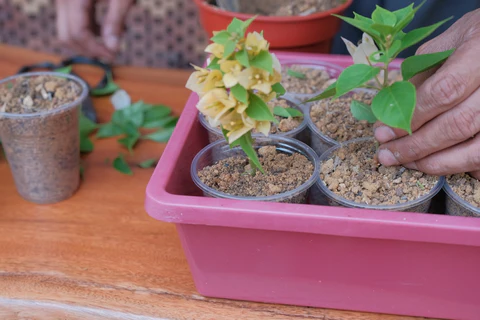
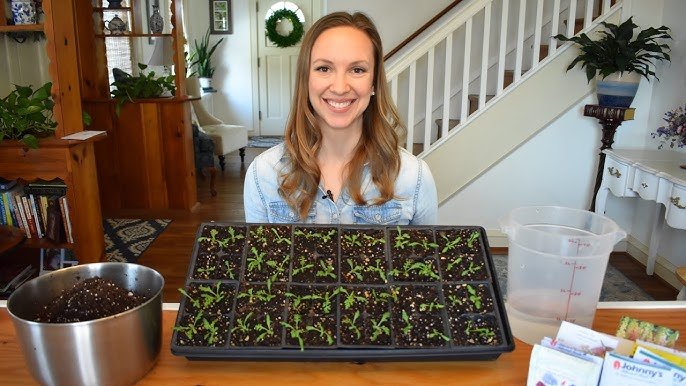
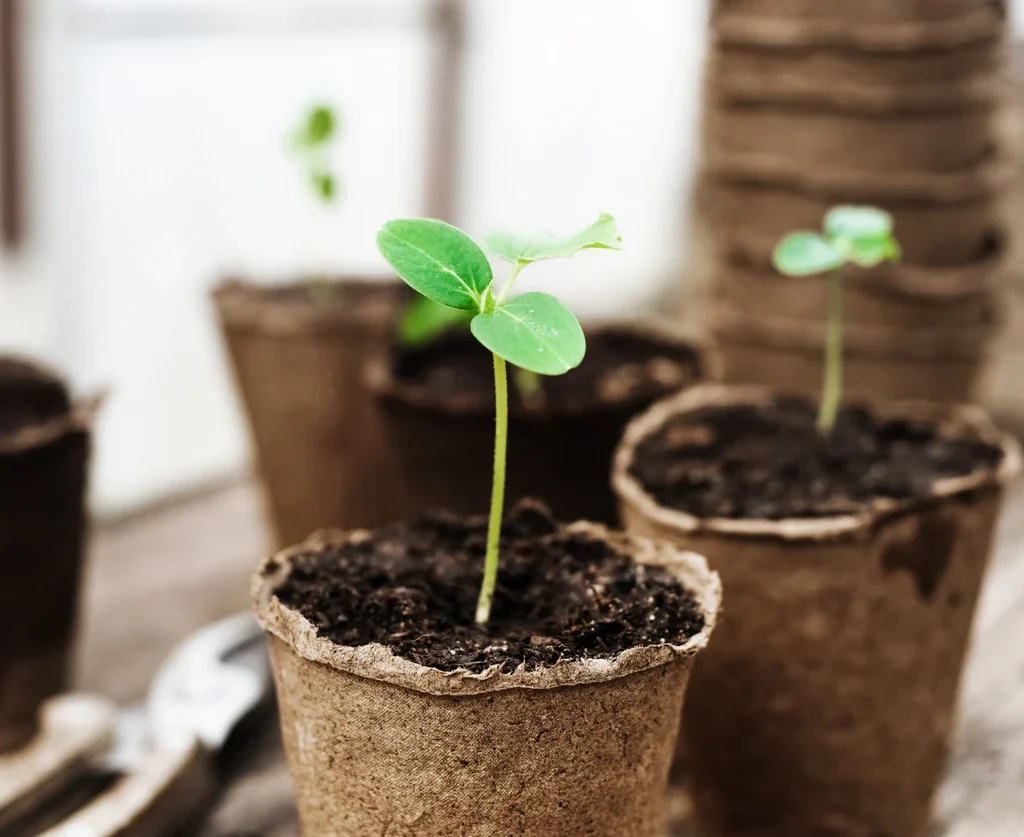
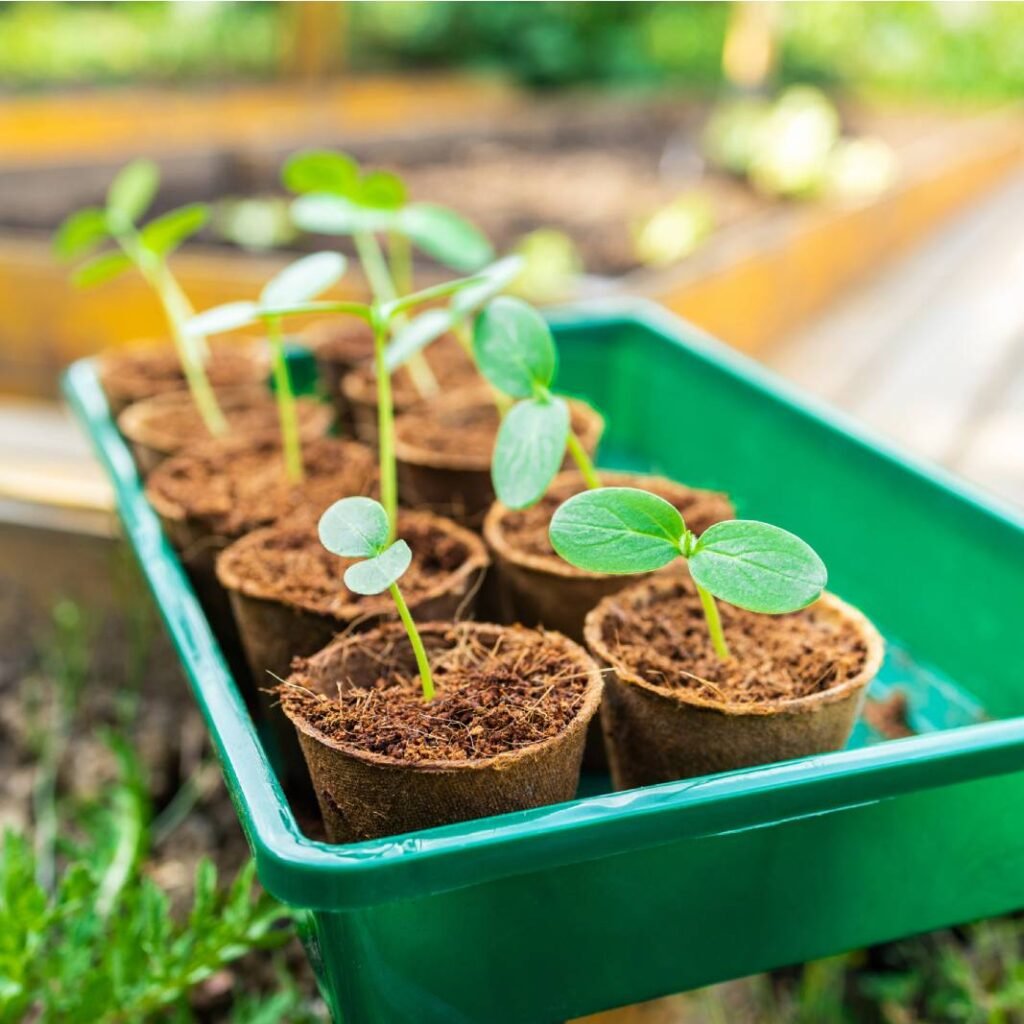
8. Transplanting Seedlings (FULL UPDATE STAGE)

Once seedlings grow 3–4 true leaves, they are ready for transplantation.

When to Transplant:

Usually 15–25 days after sowing, depending on the variety.

Transplanting Steps:

  1. Choose 8–10 inch pots for most flowering plants.
  2. Fill with rich potting mix:
    • 50% garden soil
    • 30% compost
    • 20% cocopeat
  3. Make a small hole.
  4. Gently lift the seedling using a small stick or spoon.
  5. Place it in the hole and cover it with soil.
  6. Water lightly.
  7. Keep in shade for 2–3 days until seedlings settle.

After that, place in full sunlight depending on the flower type.


9. Fertilizing Flower Plants for Heavy Blooms

Flowering plants need nutrients to produce vibrant blooms.

Best Organic Fertilizers:

  • Vermicompost
  • Cow dung compost
  • Mustard cake liquid
  • Banana peel fertilizer
  • Seaweed extract
  • Epsom salt (magnesium booster)

Fertilizing Schedule:

After Transplanting:
Add compost every 15–20 days.

Before Flowering:
Use phosphorus-rich fertilizers like bone meal or banana fertilizer.

During Flowering:
Liquid fertilizers work best—apply weekly.


10. Care Tips for Strong, Healthy Flowering Plants

Provide 4–6 hours of sunlight daily (more for heat-loving flowers)
Water only when top soil feels dry
Remove yellow or dead leaves
Pinch top growth to make bushy plants
Use stakes for tall flowers like sunflowers
Avoid overfertilizing—leads to leaves only


11. COMMON PROBLEMS & SOLUTIONS (FULL UPDATE GUIDE)

1. Seeds not germinating

Reason: Old seeds, too much water, no light
Solution: Use fresh seeds, keep soil moist, provide warmth.


2. Seedlings falling or dying (Damping off disease)

Solution:

  • Do not overwater
  • Ensure good air circulation
  • Sterilize soil before sowing
  • Spray diluted neem oil

3. Leggy seedlings (Tall, thin)

Cause: Insufficient light
Fix: Move to sunny area or use grow lights.


4. Yellow leaves

Reason: Lack of nutrients or overwatering
Fix: Add compost and reduce watering.


5. No flowers even after plant grows big

Reason: Too much nitrogen, low sunlight
Fix: Use phosphorus-potassium fertilizers, keep in sunlight.


12. Growth Stages (FULL UPDATES)

Stage 1: Seed Germination (Day 1–10)

Seeds sprout and produce baby leaves (cotyledons).


Stage 2: Seedling Growth (Day 10–25)

True leaves appear and roots strengthen.


Stage 3: Transplanting (Day 15–30)

Plants move to larger pots and start canopy growth.


Stage 4: Vegetative Growth (Day 30–45)

Plant becomes bushy, needs pruning and fertilizing.


Stage 5: Bud Formation (Day 45–60)

This stage needs phosphorus-rich food and full sun.


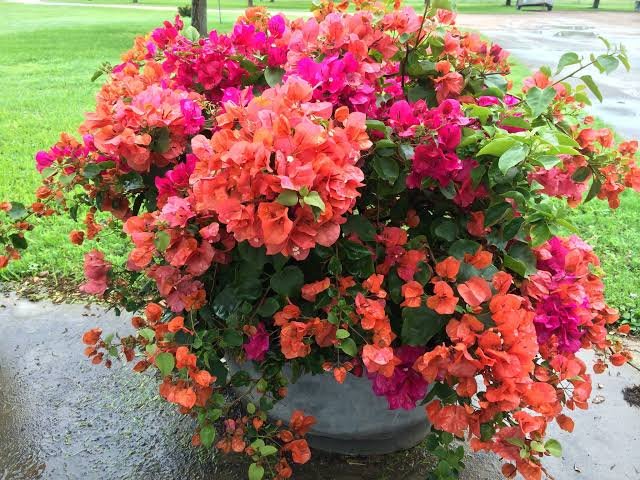
Stage 6: Flowering Stage (Day 60 onwards)

Beautiful blooms appear—continuous feeding maintains flower production.


13. Pro Tips for Maximum Blooms

Always sow seeds in soft germination mix
Do not overcrowd seedlings
Pinch top growth to make plants bushy
Remove first few buds to strengthen growth
Provide full sunlight for blooming varieties
Keep plants pest-free with weekly neem oil spray


Conclusion

Growing flower seeds at home is simple, exciting, and incredibly satisfying. With the right soil mix, proper sowing method, adequate sunlight, and consistent care, you can enjoy vibrant and abundant blooms throughout the season. Whether you’re gardening for beauty, hobby, or positivity, starting flowers from seeds is the best way to fill your home garden with colors and fragrance.

The Best Method to Grow Tomato Plants at Home: A Complete Guide for Big Harvests

The Best Method to Grow Tomato Plants at Home: A Complete Guide for Big Harvests

Tomatoes are one of the most rewarding and productive plants you can grow at home. Whether you have a small balcony, a terrace garden, or a backyard, tomato plants thrive wonderfully in pots, grow bags, and containers. They grow quickly, look beautiful, and provide delicious fresh tomatoes for your kitchen. But to get a healthy and heavy harvest, you need to follow the right method from seed germination to harvesting.

In this comprehensive guide, you will learn the best and easiest method to grow tomato plants at home—step-by-step. From selecting seeds to preparing soil, transplanting, caring, fertilizing, and harvesting, this guide covers everything you need to grow lush, productive tomato plants.


1. Why You Should Grow Tomatoes at Home

Tomatoes are one of the most popular home-grown vegetables because they offer:

Fresh, chemical-free fruits

Home-grown tomatoes taste sweeter, juicier, and richer.

Low maintenance but high yield

One healthy plant can produce dozens of tomatoes.

Grows well in containers

Perfect for small spaces like balconies and terraces.

Continuous harvest for months

Once fruiting starts, tomatoes keep producing for a long time.

If you follow the right method, tomatoes can grow almost anywhere.


2. Choosing the Best Tomato Variety

Before planting, choose the right type of tomato depending on your climate and space.

Cherry Tomatoes

Easy to grow, perfect for pots, high yield.

Desi Tomatoes (Round or slightly oval)

Most flavorful and ideal for home gardeners.

Roma or Plum Tomatoes

Great for cooking and sauces.

Hybrid Varieties

Disease-resistant and high-yielding.

For beginners, cherry tomatoes and desi tomatoes give the best results.


3. Best Soil Mix for Tomato Plants

Tomatoes grow best in nutrient-rich, light, and well-drained soil.

Ideal Soil Mix:

  • 40% garden soil
  • 30% compost or vermicompost
  • 20% cocopeat
  • 10% sand or perlite

Optional Additions (Highly Recommended):

  • A handful of neem cake powder (prevents soil pests)
  • 1 tablespoon bone meal or fish meal (boosts flowering)

Important Tips:

Avoid clay-heavy soil—it causes waterlogging.
Compost should be fully decomposed.
Soil must be airy to encourage strong root development.


4. Seed Sowing: The Best Way to Start Tomato Plants

Although you can grow tomatoes from nursery saplings, growing from seeds gives stronger plants.

Seed Sowing Steps:

  1. Take a small tray or pot.
  2. Fill with light soil mix (more cocopeat).
  3. Sow seeds ½ inch deep.
  4. Cover them lightly with soil.
  5. Water gently with a spray bottle.
  6. Place in bright indirect light.

Germination Time:

Tomato seeds sprout in 5–8 days.

Once seedlings grow 3–4 true leaves, they are ready for transplanting.


5. Choosing the Right Container for Tomato Plants

Tomato roots grow deep and wide. Using the right container is crucial.

Recommended Container Size:

  • Minimum depth: 12–15 inches
  • Width: 12–16 inches
  • For cherry tomatoes: Grow bags of 12×12 inches are perfect
  • For bigger varieties: Use 16×16 inch pots

Always ensure your container has good drainage holes to prevent root rot.


6. Transplanting Tomato Seedlings Properly (Very Important)

Once your seedlings are 15–20 days old, transplant them.

Steps to Transplant:

  1. Fill the larger pot with your prepared soil mix.
  2. Make a hole deep enough to bury the seedling up to its first leaves.
  3. Place the seedling gently inside.
  4. Cover with soil and press lightly.
  5. Water thoroughly.

Why Plant Deeper?

Tomato stems grow new roots when buried, making the plant stronger and more productive.


7. Providing Support: Tomato Plants Need Staking

Large metal container planted with French marigolds, chilli peppers and the dwarf bush cherry tomato ‘Maskotka’.

Tomatoes cannot stand upright on their own. They need support.

Types of Support:

  • A bamboo stick
  • Tomato cage
  • Trellis net
  • Rope support

Tie the plant loosely with a soft cloth or plastic tie.


8. Watering Tomatoes the Right Way

Watering incorrectly is the biggest reason tomato plants fail.

Best Watering Method:

Water only the soil, not the leaves
Keep soil moist but not soggy
Water daily in summer, every alternate day in winter

Avoid overwatering—tomatoes hate wet roots.


9. Fertilizing Tomato Plants for Heavy Fruit Production

Tomatoes are heavy feeders and need proper nutrition.

Fertilizing Schedule:

1. After 10 Days of Transplanting:

  • Add 2 handfuls of compost.

2. After 25 Days:

Use any of the following:

  • Banana peel fertilizer
  • Seaweed solution
  • Mustard cake liquid fertilizer (diluted)

3. When Flowering Starts:

Tomatoes need more phosphorus and potassium. Use:

  • Bone meal
  • Wood ash
  • Fish amino
  • Organic tomato fertilizer mix

Feed every 15–20 days for best results.


10. Pruning & Pinching for Bigger Harvests

Pruning ensures good airflow and increases production.

Pinching Suckers:

Tomato plants grow small shoots between the main stem and branches.
Remove these suckers when they are small.

Remove Lower Leaves:

As the plant grows, cut old leaves near the soil to prevent fungal infections.


11. Sunlight Requirement for Tomato Plants

Tomatoes love sunlight.

Needed:

6–8 hours of direct sunlight every day.

More sunlight = more flowers = more tomatoes.


12. Common Problems in Tomato Plants & Solutions

1. Yellow Leaves

Cause: Overwatering or nutrient deficiency
Fix: Reduce watering, add compost.

2. Flowers Falling Off

Cause: Extreme heat or nitrogen-heavy fertilizer
Fix: Use phosphorus-rich fertilizer, provide shade in peak summer.

3. Pests (Aphids, Mealybugs, Caterpillars)

Solution:

  • Use neem oil spray (5 ml per liter) weekly
  • Keep plants clean and weed-free

4. Fruit Cracking

Reason: Irregular watering
Fix: Keep soil moisture consistent.

5. Tomato Blight (Common Disease)

Fix:

  • Remove infected leaves
  • Avoid wetting foliage
  • Improve air circulation

13. Pollination Tips for More Tomatoes

Tomatoes are self-pollinating, but you can boost fruit set:

  • Shake the plant gently in the morning
  • Encourage bees and butterflies
  • Keep the plant in a sunny, airy area

14. Harvesting Home-Grown Tomatoes

Depending on the variety, tomatoes take 60–90 days to start fruiting.

How to Harvest:

  • Pick tomatoes when they turn deep red or golden yellow (depending on type)
  • Slight orange tomatoes will ripen indoors
  • Use scissors to avoid damaging the stem

A healthy tomato plant can give 2–5 kg of tomatoes.


15. Pro Tips for Growing Tomato Plants Successfully

Use a wide, deep container
Plant seedlings deeply
Give strong support
Maintain consistent watering
Follow fertilizing schedule
Ensure 6–8 hours of sunlight
Keep removing old leaves
Protect from pests with neem oil


Conclusion

Growing tomato plants at home is simple and extremely rewarding when you follow the right method. With proper soil, sunlight, watering, and care, your tomato plant can produce abundant delicious fruits for several months. Whether you’re gardening on a small balcony or a spacious terrace, the techniques in this guide will help you grow strong, healthy tomato plants with a bumper harvest.

Grow Beautiful Lotus at Home: Step-by-Step Guide for Pots, Buckets & Small Garden Spaces

Grow Beautiful Lotus at Home: Step-by-Step Guide for Pots, Buckets & Small Garden Spaces

The lotus is one of the most beautiful, sacred, and calming plants you can grow at home. Many people assume it needs a large pond or plenty of space, but the truth is—you can grow stunning lotus flowers right on your balcony, terrace, or small garden using simple containers. Lotus plants are surprisingly easy to grow when you understand their basic needs: sunlight, still water, nutrient-rich soil, and a properly sized container.

In this complete step-by-step guide, you will learn everything about growing lotus at home—from selecting rhizomes, preparing soil, setting up containers, planting, caring, and encouraging flowering. Whether you’re a beginner or have some gardening experience, this guide will help you successfully grow your own beautiful lotus blooms.


1. Why Grow Lotus at Home?

Growing lotus at home offers more benefits than just beauty.

Stunning Flowers

Lotus blooms are elegant, vibrant, and instantly uplift any space.

Easy to Grow in Containers

You don’t need a pond—lotus thrives in tubs, buckets, barrels, and even large plastic bowls.

Low Maintenance

Once established, lotus needs very little care.

Air-Purifying & Positive Energy Plant

Lotus is considered a symbol of purity, peace, and prosperity.

Edible & Medicinal Parts

Seeds, roots, and petals are often used in food and traditional remedies.


2. Choosing the Right Lotus Variety for Home Growing

Selecting the right type is essential because lotus plants vary greatly in size.

Mini & Dwarf Varieties (Best for Pots):

  • Momo Botan
  • Pigmy Red
  • White Fairy
  • Baby Doll Lotus

These produce flowers even in small pots.

Medium Varieties:

Need medium-sized tubs

  • Chawan Basu
  • Red Sacred Lotus

Large Varieties:

Best for big ponds

  • Nelumbo nucifera
  • Giant Sacred Lotus

For home gardeners, dwarf or medium lotus are ideal.


3. What You Need to Grow Lotus at Home

Growing lotus is simple. You need:

Container

A wide and shallow container works best.
Recommended size:

  • Depth: 10–15 inches
  • Width: 18–24 inches

Avoid containers with drainage holes—lotus needs water to stay.

Soil

Lotus grows best in heavy, clay-like soil.

Best soil mix:

  • 70% clay or garden soil
  • 20% decomposed cow dung
  • 10% sand

Avoid:
Potting mix
Cocopeat
Compost-only soils
These will float and make the water dirty.

Lotus Rhizome (Root)

Buy a healthy rhizome with at least:

  • 2–3 growing tips
  • Firm, unbroken body

Water

Use clean water. Rainwater or stored tank water is ideal.


4. Preparing the Container

Before planting lotus, setup is important.

Steps:

  1. Choose a wide container (no drainage hole).
  2. Add 4–5 inches of heavy soil at the bottom.
  3. Mix cow dung manure into the soil.
  4. Gently flatten the soil to remove air pockets.
  5. Slowly add water until the soil becomes muddy and submerged by 2–3 inches of water.

Let the setup settle for 24 hours before planting the rhizome.


5. How to Plant Lotus Rhizome Correctly

This is the most important step to ensure the lotus grows well.

Step-by-Step Planting Process:

  1. Place the rhizome horizontally on the soil surface.
  2. Slightly press it into the mud—but do not bury the growing tips.
  3. Cover only the middle portion of the rhizome lightly with soil.
  4. Ensure the growing tips remain outside and are not damaged.
  5. Add water so the rhizome stays under 3–4 inches of water.

Important Tips:

Never forcefully insert the rhizome into the soil.
Growing tips are delicate—avoid touching them.
Keep water still—no fountains or pumps.


6. Best Growing Conditions for Lotus

Lotus loves warm weather and bright sunlight.

Sunlight Requirement

Lotus needs 6–8 hours of direct sunlight daily.
More sunlight = more flowers.

Temperature

Ideal temperature: 25–35°C
Lotus thrives in summer.

Water Level Maintenance

Keep water level between 4–8 inches, depending on plant height.

Water Quality

  • Use clean, pesticide-free water
  • Avoid chlorinated tap water (let it sit 24 hours to remove chlorine)

7. Lotus Care: How to Maintain Healthy Growth

Once lotus is planted, it needs minimal care.

Fertilizing Lotus

Lotus is a heavy feeder, mainly during active growing months.

Do not fertilize immediately after planting.
Start feeding after 4–6 weeks when leaves float on water.

Best fertilizers:

  • Cow dung compost balls
  • Slow-release tablets
  • Organic pond fertilizer

Frequency:
Every 20–25 days during growing season.

Water Maintenance

  • Keep water clean
  • Add fresh water once a week
  • Remove fallen leaves to prevent rotting

Leaf Management

Lotus leaves come in three stages:

  1. Underwater leaves
  2. Floating leaves
  3. Aerial leaves (upright leaves)

More aerial leaves = higher chances of flowering.


8. Promoting Flowering in Lotus

To encourage blooming:

Ensure full sunlight

Lotus won’t flower in shade.

Use a wide container

The wider the container, the more space for roots, leading to more blooms.

Fertilize during active growth

Lack of nutrients reduces flowers.

Maintain warm water

Lotus flowers more in warm weather.

Avoid moving the pot

Lotus dislikes disturbance during bud formation.


9. Common Problems and Solutions

Even though lotus is easy to grow, beginners may face a few issues.


1. Rhizome rotting

Reason:

  • Over-buried rhizome
  • Damaged growing tips
  • Cold water

Solution:
Plant correctly and grow only in warm seasons.


2. Leaves turning yellow

Reason:

  • Lack of nutrients
  • Low sunlight

Fix:
Add fertilizer & ensure minimum 6 hours sunlight.


3. Water turning green or dirty

Reason:
Algae growth.

Fix:

  • Add little freshwater weekly
  • Keep container in sunlight
  • Do not over-fertilize

4. No flowers even after 3–4 months

Reason:

  • Small container
  • Insufficient sun
  • Poor soil
  • Weak rhizome

Fix:
Upgrade pot size, improve sunlight, add organic fertilizer.


10. Harvesting Lotus Seeds & Roots (Optional)

If you grow large lotus varieties, you can harvest:

Seeds

Use dry seed pods for decorative or planting purposes.

Roots (Kamal Kakdi)

Edible roots are tasty and nutritious.

However, dwarf varieties are mainly for flowers, not edible parts.


11. Growing Lotus from Seeds (Optional Method)

Growing lotus from seeds takes longer but is interesting.

Steps:

  1. File the seed coat slightly to expose inner layer.
  2. Soak in warm water.
  3. Seeds swell and sprout in 4–7 days.
  4. Transfer seedlings to soil with shallow water.
  5. Slowly increase water level as plants grow.

This method takes 6–12 months to flower, so rhizome growing is faster.


12. Seasonal Care for Lotus

Summer:

Peak growth—lots of leaves and flowers.

Monsoon:

Normal growth. Replace water frequently.

Winter:

Lotus goes dormant.

  • Stop fertilizing
  • Keep rhizome in container
  • Allow leaves to die naturally
  • Reduce water level slightly

Next summer, the lotus will sprout again.


Conclusion

Growing lotus at home is a peaceful, rewarding experience. With the right container, proper soil, warm sunlight, and simple care, anyone can enjoy beautiful lotus blooms in their home garden. Whether you place them on your balcony, terrace, or backyard, lotus plants add beauty, positivity, and charm to your surroundings.

If you want, I can also create:

Grow Crisp, Juicy Radishes at Home: A Complete Beginner-Friendly Guide for Fast Harvests

Grow Crisp, Juicy Radishes at Home: A Complete Beginner-Friendly Guide for Fast Harvests

Radish is one of the fastest and easiest vegetables you can grow at home. Whether you have a backyard, terrace garden, balcony space, or just a few pots, radishes thrive almost anywhere. They grow quickly, require very little maintenance, and reward you with crisp, juicy roots in as little as 25–35 days. For beginners and busy gardeners, radish is the perfect crop to start your home vegetable journey.

In this comprehensive guide, we’ll walk you through every step—from choosing the right seeds, preparing soil, sowing techniques, to harvesting delicious radishes. Let’s dive into how you can grow a plentiful radish harvest at home!


1. Why You Should Grow Radish at Home

Radish is more than just a quick-growing vegetable. Here are a few reasons why it’s ideal for home gardeners:

Fast-growing crop

It matures in less than a month, giving you quick results and boosting gardening confidence.

Perfect for small spaces

You can grow radishes in pots, grow bags, plastic containers, or even recycled buckets.

Low maintenance

They don’t need complicated care or heavy fertilizing.

Nutritious and fresh

Home-grown radishes are crisp, juicy, and packed with vitamins, minerals, and antioxidants.

Great for continuous harvest

You can sow seeds every 10–12 days for an endless supply.


2. Best Radish Varieties for Home Gardening

Choosing the right variety ensures a successful harvest. Here are some home-gardener-friendly options:

• Cherry Belle

Round, red, fast-growing, and widely grown.

• White Icicle Radish

Slender, mildly spicy, and grows well in loose soil.

• Daikon / White Radish

Long, tender roots—popular in Indian households.

• Scarlet Globe

Crisp and ideal for salads.

Select varieties depending on your pot size and climate. Most radishes thrive in cool weather, but many modern hybrids grow well even in warmer regions.


3. Ideal Growing Conditions

Radish grows best when the right environmental conditions are met.

Temperature

Radish prefers cool weather (10–25°C).
Grow in winter months in India (October–February).
In warmer climates, choose heat-tolerant varieties.

Sunlight

Radish needs 4–6 hours of direct sunlight daily.
Insufficient sunlight leads to leafy growth but small roots.

Growing duration

Most varieties mature in 25–45 days, depending on the type.


4. Preparing Soil for Radish (The Most Important Step)

The secret to growing perfect radishes lies in the soil. Radishes are root vegetables, so they need loose, airy soil to expand.

Best Soil Mix for Radish in Pots:

  • 40% garden soil
  • 30% compost/vermicompost
  • 20% cocopeat
  • 10% sand (for looseness)

Tips for Perfect Soil:

Avoid heavy clay soil—it prevents root development.
Add compost but avoid too much nitrogen as it promotes leafy growth.
Ensure good drainage to avoid root rot.
Sift the soil to remove stones, sticks, or lumps.


5. Choosing the Right Pot or Container

Radish doesn’t require deep pots for round varieties, but long varieties like Daikon need more depth.

Container size guidelines:

  • Small, round radishes: 6–8 inches deep pot
  • Long radishes (Daikon): 12–18 inch deep container
  • Use wide containers to grow more plants in a single pot.

Always choose containers with drainage holes at the bottom.


6. How to Sow Radish Seeds Correctly

Growing radish from seeds is extremely simple.

Step-by-step seed sowing:

  1. Fill the pot with prepared soil mix.
  2. Make shallow furrows about ½ inch deep.
  3. Sow seeds 1 inch apart.
  4. Cover lightly with soil.
  5. Water gently using a sprayer.
  6. Keep the pot in a sunny location.

Germination time:

Radish seeds germinate in 3–5 days in ideal conditions.

Tip:

Do not overcrowd the seeds. Crowding leads to small, deformed radishes.


7. Caring for Radish Plants (Very Low Maintenance)

Radish plants don’t need heavy feeding or constant attention. But a few simple care steps ensure a great harvest.


Watering

Radish needs consistent moisture for crisp roots.

  • Water every 1–2 days, depending on weather.
  • Never let the soil dry completely.
  • Avoid waterlogging.

Thinning the Plants

This is crucial for large, healthy radishes.

  • When seedlings are 2–3 inches tall, remove extra plants.
  • Maintain 2 inches spacing between each plant.

Fertilizing

Radish doesn’t need heavy fertilization.

  • Add a handful of compost after 15 days (only once).
  • Avoid nitrogen-rich fertilizers like urea (promotes leaves, not roots).

Mulching

Adding dried leaves or straw on soil surface helps:

  • Retain moisture
  • Prevent crack formation
  • Reduce weeds

8. Common Problems and How to Avoid Them

Even though radish is easy to grow, some issues can arise.


1. Radish grows leaves but no roots

Reason: Too much nitrogen, poor sunlight, overcrowding.
Fix: Increase sunlight, thin plants, avoid nitrogen fertilizers.


2. Cracked radishes

Reason: Irregular watering.
Fix: Keep soil evenly moist.


3. Radishes are too spicy or woody

Reason: Over-maturity or hot weather.
Fix: Harvest on time; grow during cooler months.


4. Pests

Aphids and flea beetles may attack.

Solution:

  • Spray neem oil (5 ml per liter) weekly.
  • Maintain cleanliness around the pot.

9. Harvesting: The Most Exciting Part!

Radishes grow fast, and it’s easy to know when they’re ready.

How to check readiness:

  • Gently move the soil near the base.
  • If you see the top of the radish root popping out, it’s ready.
  • Round varieties: 25–30 days
  • Long varieties: 35–45 days

Harvesting technique:

  • Water lightly before harvesting—it loosens the soil.
  • Hold the plant base and pull gently upward.
  • Wash roots in clean water.

Tip:

Do not leave radishes in soil after maturity—they become woody and lose taste.


10. How to Re-sow for Continuous Harvest

To enjoy radishes all season:

  • Sow a new batch of seeds every 10–12 days.
  • This ensures a regular supply throughout the winter.

11. Using Homegrown Radishes

Radishes can be used in many delicious ways:

  • Fresh salads
  • Parathas
  • Stir fry
  • Pickles
  • Soups
  • Garnishing

The leaves can be used in Sabzi or Dal—they’re packed with nutrients too!


12. Final Tips for Growing Perfect Radishes

  • Grow them in cool months for best flavor.
  • Keep soil loose and well-drained.
  • Avoid chemical fertilizers.
  • Harvest on time.
  • Maintain consistent moisture.

Conclusion

Growing radishes at home is one of the most rewarding gardening experiences. They are fast-growing, easy to care for, and require minimal space. With just a pot, some loose soil, and a handful of seeds, you can enjoy fresh, crunchy, home-grown radishes in a few weeks. Whether you’re a beginner or an experienced gardener, radish is a must-have crop in every home garden.

Grow Your Own Saffron: The Complete At-Home Kesar Cultivation Guide (Full Updates & Simple Steps)

Grow Your Own Saffron: The Complete At-Home Kesar Cultivation Guide (Full Updates & Simple Steps)

Saffron—also known as Kesar—is one of the most precious spices in the world. Known for its rich aroma, deep golden color, and immense medicinal value, saffron often seems too exotic or difficult to grow at home. But the truth is surprising: you can successfully grow saffron in pots, containers, or even small backyard spaces, as long as you follow the correct methods.

In this full, step-by-step guide with detailed updates, you will learn exactly how to grow saffron at home—from choosing bulbs to planting, care, flowering, harvesting, and long-term maintenance.


Why Grow Saffron at Home?

Growing saffron at home has several benefits:

  • Pure, chemical-free saffron for daily use
  • Saves money—market saffron is extremely expensive
  • Easy to grow even in small spaces
  • Requires minimal water and care
  • Adds beauty—purple flowers look stunning
  • Provides your own organic family-grown spice

Once you understand the simple cycle of saffron bulbs, you’ll realize it is easier than growing many common vegetables!


Understanding the Saffron Plant

Saffron comes from the Crocus sativus flower. Each flower contains only three red stigmas, which are dried to become saffron threads. Because each bulb produces only a few threads, saffron is rare and costly.

Key Characteristics:

  • Grows from bulbs (corms)
  • Flowers once a year, usually October–November
  • Loves cold winters and dry summers
  • Needs well-draining soil
  • Does not tolerate waterlogging

If your climate has hot summers and cool winters (like many parts of India), saffron can grow wonderfully.


Step 1: Choosing the Best Saffron Bulbs (Corms)

The most important part of growing saffron is choosing the right size and quality of bulbs.

Recommended Bulb Size:

  • Larger bulbs (14/15 or 16+ mm)
  • Bigger bulbs = more flowers = more saffron

Ensure the bulbs are:

  • Firm and healthy
  • Free from mold
  • Not sprouting heavily
  • Imported from Kashmir, Iran, or Europe (if purchasing online)

Good-quality saffron bulbs will reward you with more flowers in the first year itself.


Step 2: Best Pots & Containers for Growing Saffron

Saffron loves space and depth.

Best Container Options:

  • 8–12 inch deep pots
  • Grow bags (10–15 inches deep)
  • Raised beds
  • Large trays for mass planting

Good drainage holes are essential.
Never plant saffron in containers without holes.


Step 3: Preparing the Perfect Soil Mix

Saffron needs loose, well-draining, mildly fertile soil.

Ideal Soil Mix:

  • 40% garden soil
  • 30% river sand
  • 20% compost (vermicompost or cow manure)
  • 10% cocopeat (optional)

Soil Tips:

  • Soil should be dry and airy, not sticky
  • Adjust sand ratio depending on drainage
  • Avoid chemical fertilizers

Saffron naturally grows in rocky, dry soils—so don’t overfeed the plant.


Step 4: Planting Saffron Bulbs

Plant bulbs in late July to September, depending on your climate.

Planting Method:

  • Keep bulbs pointed side upward
  • Plant 3–4 inches deep
  • Maintain 2–3 inches spacing
  • Cover with loose soil
  • Do not press soil too hard

First Watering:

Water lightly only once after planting.
After that, avoid watering until shoots appear.


Step 5: First Growth Update (Week 2–4)

After 2–4 weeks, you will see:

  • Thin green shoots
  • Multiple leaves from each bulb
  • No flowers yet

Do not worry—this is normal.
Saffron flowers appear only when night temperatures drop.


Step 6: Flowering Update (October–November)

This is the most exciting stage!

Flowering Signs:

  • Purple buds appear close to the soil
  • Flowers emerge early morning
  • Each flower lasts only 2–3 days

Tips During Flowering:

  • Do not water until flowers finish blooming
  • Pick flowers early morning before sun becomes strong
  • Keep soil dry for best flowering

In the first year, expect 2–6 flowers per 10 bulbs depending on bulb size.


Step 7: Harvesting Your Saffron (Kesar)

Carefully open each flower.

Inside, you’ll find:

  • 3 red stigmas (this is the saffron)
  • 3 yellow stamens (discard these—not edible saffron)

Harvesting Guide:

  • Use clean dry fingers or tweezers
  • Gently pull out the red stigmas
  • Place them on a clean paper towel to dry

Step 8: Drying Saffron Perfectly

Drying intensifies the aroma, color, and flavor.

Methods:

  • Keep stigmas on paper in a dry room for 2–3 days
  • OR warm them under sunlight for 1–2 hours
  • OR dry near a warm lamp or gas stove (not too close)

When completely dry, your saffron threads become stiff and light.


Step 9: Storing Saffron Properly

Store dried saffron in:

  • An airtight glass container
  • A dark, cool place
  • Away from moisture

Properly stored saffron remains usable for 2–3 years.


Step 10: Post-Flowering Update (December–February)

After flowering:

  • Leaves grow longer (up to 30 cm)
  • The plant starts storing energy in bulbs
  • This strengthens next year’s flowering

Care Tips:

  • Allow leaves to grow naturally
  • Light watering once every 12–15 days
  • Keep the pot in sunlight
  • Do not cut leaves

Leaves are essential for bulb development.


Step 11: Dormancy Period (March–June)

Saffron naturally goes dormant in summer.

What Happens:

  • Leaves turn yellow
  • Plant dries up completely
  • Soil becomes dry and plant appears dead
  • This is normal

Do Not:

  • Do not water
  • Do not disturb bulbs
  • Do not expose pot to rain

Let the bulbs “sleep” during summer.


Step 12: Bulb Multiplication Update (End of Summer)

By June–July, each original bulb produces:

  • 2–6 baby bulbs
  • Larger bulbs that will flower next season
  • Smaller bulbs that need 1–2 more years to flower

You may take bulbs out, separate them, and replant in fresh soil—or leave them in the same pot for 2–3 years.


Ideal Weather Conditions for Saffron

Saffron thrives in:

  • Cold winters
  • Dry summers
  • Temperatures between 5°C to 20°C during flowering

If your region has too much rainfall, keep pots under shade.


Watering Rules for Saffron (Very Important!)

Saffron hates too much water.

Watering Schedule:

  • Water lightly after planting
  • No watering until shoots appear
  • Water every 12–15 days during leaf growth
  • Stop watering after March

Overwatering = rotting bulbs.


Sunlight Requirement

  • 5–6 hours of sunlight daily
  • Avoid heavy rains and shade during flowering

Tips for Maximum Flowers

  • Use large bulbs
  • Ensure soil drains well
  • Give full sunlight
  • Avoid overwatering
  • Use wide pots for more bulbs
  • Allow leaves to complete their lifecycle

Final Update: Your Home-Grown Saffron

By following these steps, you will successfully harvest:

  • Pure red saffron threads
  • Beautiful purple flowers
  • Multiplying bulbs for next year
  • Chemical-free, organic Kesar from your own home

Growing saffron is incredibly satisfying and surprisingly easy when done correctly.

Grow Big, Harvest Bigger: How I Collected Tons of Onions from Just 2 Containers!

Grow Big, Harvest Bigger: How I Collected Tons of Onions from Just 2 Containers!

Growing onions at home may sound simple, but harvesting a huge amount of onions from only two containers feels nothing short of magical—especially for gardeners with limited space. Whether you live in a small apartment, have a modest balcony, or simply prefer container gardening for convenience, onion cultivation can reward you with a surprisingly large yield if done the right way.

In this detailed guide, I’ll walk you through the complete process—from choosing the right containers and soil to planting, caring, and finally harvesting a bumper crop of onions. Let’s dive into the step-by-step method that helped me grow tons of onions from just two containers!


Why Grow Onions in Containers?

Onions are one of the easiest vegetables to grow in containers. They don’t demand huge space, they’re low-maintenance, and they can thrive even in small pots if the soil and drainage are correct.

Here’s why container-grown onions perform so well:

  • Disease-free environment: Soil-borne diseases are less common in controlled containers.
  • Perfect water control: Onions hate overwatering; containers help regulate moisture.
  • Space-saving: Ideal for small homes, balconies, terraces, and patios.
  • Better root development: Container soil stays loose and airy.
  • No weeding hassle: Onions compete poorly with weeds, and containers minimize weed growth.

Choosing the Right Containers

Container selection is the foundation of a heavy onion harvest.

Depth & Size

For big onion bulbs, choose a container with:

  • Minimum depth: 10–12 inches
  • Width: The wider, the better
  • Material: Plastic, clay, buckets, grow bags—all work excellent

I used two 15-inch-wide containers, and they produced a surprisingly large harvest.

Drainage

Onions rot quickly in waterlogged soil.

  • Ensure plenty of drainage holes.
  • Place small stones or broken terracotta pieces at the bottom to improve drainage.

Best Soil Mix for Massive Onion Bulbs

Onions love light, loose, fertile soil.

Perfect Soil Recipe

Mix the following:

  • 40% garden soil
  • 30% compost (vermicompost/cow dung compost)
  • 20% cocopeat (for moisture balance)
  • 10% sand/perlite (for aeration)

Also mix in:

  • A handful of neem cake powder (prevents soil pests)
  • 1 tbsp bone meal or DAP (optional but boosts bulb formation)

A fluffy, fertile mix allows onion bulbs to expand easily, leading to huge yields.


Choosing Planting Material: Seeds, Seedlings, or Onion Sets?

You can grow onions using:

  1. Seeds
  2. Seedlings
  3. Onion sets (baby onions)

Best Option for Fast, Huge Harvest

Onion sets produce bigger bulbs faster and require less care.

If you’re aiming for maximum yield like I did—choose onion sets.


Planting Onions the Right Way

Spacing

This is crucial.

  • Keep 8–10 cm (3–4 inches) distance between bulbs.
  • If spacing is closer, bulbs stay small.

In a 15-inch container, you can plant around:

  • 12–15 onion sets per container

Planting Depth

  • Place each bulb 1 inch deep with the pointed side facing upward.
  • Cover lightly with soil, don’t bury too deep—onions develop better when bulb tops get sunlight later.

Watering: The Make-or-Break Step

Onions need consistent but controlled watering.

How to Water

  • Water deeply after planting.
  • Keep soil slightly moist—never soggy.
  • Reduce watering when bulbs begin to swell.
  • Stop watering completely 10–12 days before harvest to help bulbs harden and dry properly.

Symptoms of Overwatering

  • Yellow droopy leaves
  • Slimy bulbs
  • Foul smell

Overwatering is the biggest killer of onion plants in containers.


Sunlight Requirements for Huge Onion Bulbs

Onions LOVE sunlight.

  • Give them 6–8 hours of direct sunlight daily.
  • Without enough sunlight, bulbs are small and weak.

My containers were placed on a terrace where they got bright sunlight for most of the day. This played a huge role in achieving a massive harvest.


Feeding Your Onions for Explosive Growth

Onions are heavy feeders.

Best fertilizers

Use:

  • Vermicompost – Every 20–25 days
  • Mustard cake solution – Once every 15 days
  • Wood ash – Once a month (excellent for bulb formation)
  • Potash-rich fertilizers – Helps bulbs increase in size

Avoid too much nitrogen after the plants grow 5–6 inches tall. Excess nitrogen results in long leaves but very small bulbs.


Common Problems & Easy Solutions

1. Bulbs Not Forming

  • Lack of sunlight
  • Overcrowding
  • Excess nitrogen

Solution: Improve spacing and avoid excess fertilizer.

2. Leaves Turning Yellow

  • Normal during last growth stage
  • Or due to overwatering

Reduce watering and let soil dry.

3. Small Bulbs

  • Planting too deep
  • Poor soil aeration
  • Low potash levels

Add wood ash or potash once a month.


When and How to Harvest Onions

Signs Your Onions Are Ready

  • Leaves turn yellow and fall over naturally
  • Neck area near bulb becomes soft
  • Bulbs are clearly visible above the soil

Harvesting Technique

  1. Loosen the soil using hand or a small tool.
  2. Gently pull the bulbs from the base.
  3. Shake off extra soil—do NOT wash them.
  4. Keep them in shade for 3–4 days to dry.

Drying helps bulbs store longer and prevents fungal growth.

In my case, the bulbs were huge—some nearly the size of tennis balls—and the total yield from just 2 containers was astonishing.


How I Achieved a Massive Harvest from Only 2 Containers

Here’s the strategy that made all the difference:

Used Onion Sets Instead of Seeds

This alone increases yield by 40–50%.

Prepared Light, Fertile Soil

Loose soil = big bulbs.

Gave Full Sunlight Daily

Onions love heat and sun.

Maintained Perfect Spacing

Bulbs need room to grow.

Controlled Watering

No overwatering = no bulb rot.

Fed the Plants Every 15–20 Days

Balanced nutrients = massive harvest.

By following this simple system, I collected tons of fresh, shiny, flavorful onions from just two containers—enough for several weeks of cooking.


Final Thoughts: Anyone Can Grow Tons of Onions in Containers

If you’ve been hesitating to try container gardening, onions are the perfect crop to begin with. They require very little effort but reward you generously. With the right soil, sunlight, and watering schedule, you too can grow a huge onion harvest—even from a tiny balcony.

Trust me—once you taste your own homegrown onions, you’ll never want to buy them from the market again!

Grow Portulaca Like a Pro: Fast & Easy Guide to Propagating Moss Rose from Cuttings (With Update Videos)

Grow Portulaca Like a Pro: Fast & Easy Guide to Propagating Moss Rose from Cuttings (With Update Videos)

Portulaca, also known as Moss Rose or Sun Plant, is one of the most vibrant, heat-tolerant, and low-maintenance flowering plants you can grow at home. With its bright rose-like blooms and succulent leaves, the plant adds instant color to any balcony, terrace, or garden. While Portulaca easily grows from seeds, propagating it from cuttings is the fastest and most reliable method—and the best part is that anyone can do it, even if you’re a beginner.

In this detailed step-by-step guide, you’ll learn the simplest and quickest way to propagate Moss Rose from cuttings, the right soil mix, rooting methods, after-care tips, and common mistakes to avoid. This article also includes a timeline you can use for update videos to show progress.


Why Propagate Portulaca from Cuttings?

Portulaca is one of those magical plants that loves the sun, tolerates drought, and grows rapidly. Propagating it from cuttings offers several benefits:

Fast Growth

Cuttings root much faster than seeds. Within 7–10 days, you can see new roots forming.

True-to-Type Plants

Cuttings give you the exact same flower color and characteristics as the mother plant. Seeds may sometimes vary.

Cost-Effective

One mature plant can give you dozens of new plants absolutely free.

Perfect for Mass Planting

If you want to fill borders, hanging baskets, or terrace pots, cuttings provide quick multiplication.


Step 1: Selecting the Best Cuttings

Good-quality cuttings are the backbone of successful propagation. Here’s how to choose:

Ideal Stems for Cutting

  • Choose healthy, disease-free, non-flowering stems.
  • The stem should be 4–6 inches long.
  • Avoid weak or thin stems; pick firm, semi-hard ones.
  • Cut just below a node (joint).

Remove Flowers & Buds

Any flowers or buds must be removed because:

  • They drain energy
  • Slows down root formation

How to Cut

  • Use sterilized scissors or pruning shears.
  • Make a clean slanted cut for maximum rooting area.

Step 2: Preparing the Perfect Soil Mix

Portulaca loves dry, well-draining soil. A heavy or clay-rich mix may cause rot.

Here’s the ideal rooting mix:

Best Soil Mix for Portulaca Cuttings

  • 50% Cocopeat
  • 30% Sand
  • 20% Garden Soil
    OR
  • 60% Sand
  • 40% Compost

Why this works:

  • Fast drainage prevents rotting.
  • Aeration boosts root formation.
  • Light mix encourages faster rooting.

Optional (but beneficial):

  • Add 1 teaspoon Fungicide per kg soil to prevent fungal rot.
  • Add a little perlite if you have it.

Step 3: Rooting the Cuttings – Two Easy Methods

You can root Portulaca cuttings in soil or water. Both methods work well. Choose whichever is convenient.


Method 1: Rooting Moss Rose Cuttings in Soil (Highly Recommended)

Steps:

  1. Fill a small pot or tray with the prepared soil mix.
  2. Make small holes using a stick or pencil.
  3. Insert the cuttings 1 inch deep.
  4. Firm the soil gently around each cutting.
  5. Mist lightly with water.

Tips:

  • Keep spacing of 1–2 inches between cuttings.
  • Don’t press the soil too hard; roots need oxygen.
  • Keep the pot in bright shade, not direct sun, for the first 3–4 days.

Rooting Time:

  • Day 7–10: New roots start forming.
  • Day 10–14: New leaves appear, meaning successful rooting.

Method 2: Rooting Portulaca Cuttings in Water

This method is simple and great for beginners.

Steps:

  1. Take a clean glass or cup.
  2. Fill it halfway with water.
  3. Place the cuttings in it (remove bottom leaves).
  4. Keep in bright indirect light.

Notes:

  • Change water every 2 days.
  • Don’t submerge leaves; only the stem bottom should touch water.
  • Rooting is slower in water compared to soil.

Rooting Time:

  • Around 7–12 days.

Once roots are 1–2 inches long, transplant them into soil.


Step 4: After-Care Tips for Rapid Growth

Once your cuttings are planted, proper care ensures they grow fast and bloom soon.

Light

  • First 3–4 days: bright shade
  • After 4 days: full sunlight (Portulaca loves sun!)
  • For best flowering: 6–8 hours of direct sunlight

Watering

  • Water lightly during the first week.
  • After rooting: water every 2–3 days.
  • Avoid overwatering; Portulaca is drought-tolerant.

Fertilization

After 15–20 days, feed with:

  • Liquid seaweed
  • Organic NPK (1/2 strength)
  • Cow dung extract (weekly)

Avoid heavy nitrogen fertilizers—they reduce flowering.


Step 5: Transplanting the New Plants

Once your cuttings develop sufficient roots, they’re ready for transplantation.

When to Transplant?

  • 10–15 days after planting cuttings
  • When you see new growth

How to Transplant

  1. Select a pot with drainage holes.
  2. Use a light sandy soil mix.
  3. Plant 3–4 rooted cuttings in one pot for a bushy look.
  4. Water lightly after transplanting.

Update Video Timeline (Perfect for YouTube Creators!)

Here’s how you can record update videos to show progress:

Day 1: Cutting & Planting

  • Show how you take the cuttings.
  • Demonstrate soil preparation.
  • Plant cuttings in pots.

Day 4–5: First Check

  • Show that the cuttings are still fresh.
  • Light tug test to check rooting progress.

Day 8–10: Root Formation

  • Show new tiny roots (if water method).
  • Show new leaf growth (if soil method).

Day 12–15: Transplanting

  • Display the rooted cuttings.
  • Show how to plant them in bigger pots.

Day 20–25: Flowering Update

  • Beautiful blooms appear.
  • Show full results for viewers.

This timeline increases engagement and viewership.


Common Mistakes to Avoid

Even though Portulaca is an easy plant, many beginners make small mistakes. Avoid these:

Taking flowering stems

Use non-flowering stems for better success.

Overwatering

Causes stem rot quickly.

Keeping in low light

Portulaca needs full sun for rooting and blooming.

Heavy garden soil

Prevents drainage and kills cuttings.


Bonus Tip: How to Make Portulaca Super Bushy

To make your Moss Rose plant look fuller:

  • Pinch or trim the top growth every 20 days.
  • Plant 3–5 cuttings in one pot.
  • Use wide shallow pots—they spread beautifully.

Final Thoughts

Propagating Portulaca or Moss Rose from cuttings is one of the easiest and most rewarding gardening tasks. With just a few healthy stems and a simple sandy mix, you can multiply your plants quickly and enjoy continuous blooms throughout the summer. Whether you’re gardening for pleasure, decoration, or creating YouTube update videos, this method ensures fast rooting, strong plants, and vibrant flowers.

Give it a try—within just a couple of weeks, you’ll be amazed at how quickly your garden fills with colorful Moss Rose blooms!

Top 5 Summer-Ready Flowering Plants You MUST Grow This Season (Part–I)

Top 5 Summer-Ready Flowering Plants You MUST Grow This Season (Part–I)

Summer can be a challenging season for most plants, but fortunately, there are some stunning flowering plants that not only tolerate heat but thrive beautifully under the strong summer sun. These are the lifesavers for your garden—plants that give bright, colorful blooms even when temperatures soar.

In this detailed guide (Part–I of the series), we will explore the 5 best flowering plants for the summer season, perfect for Indian and tropical climates. If you want a beautiful, low-maintenance, and bloom-filled garden during hot months, these five blooms are must-haves!


1. Bougainvillea – The Queen of Summer Gardens

Bougainvillea is hands down the most popular summer flowering shrub. Its papery bracts in bright pinks, reds, whites, oranges, and purples can instantly make any space look vibrant.

Why It Thrives in Summer

Bougainvillea loves full sunlight, dry weather, and minimal water. The hotter it gets, the better it blooms.

Care Tips

  • Sunlight: 6–8 hours of direct sun.
  • Soil: Well-draining sandy or gritty mix.
  • Water: Only when the soil is fully dry.
  • Fertilizer: High-phosphorus fertilizer once a month.
  • Pruning: Light pruning after every flush enhances more blooms.

Blooming Season

Peak bloom: February–September, with heavy flowering in hottest months.

Bougainvillea is perfect for walls, fences, terraces, and large pots.


2. Portulaca (Moss Rose) – The Cutest Sun-Loving Groundcover

Portulaca, also called Moss Rose or Sun Rose, is one of the most heat-loving and drought-tolerant flowering plants. Their tiny, bright, cheerful flowers open in sunlight and come in multiple shades.

Why It Thrives in Summer

Portulaca stores water in its leaves, allowing it to withstand extreme heat.

Care Tips

  • Sunlight: Minimum 6 hours direct sun.
  • Soil: Sandy or porous soil; avoid heavy watering.
  • Water: Very low—overwatering kills the plant.
  • Fertilizer: Not compulsory, but a mild fertilizer once in 30 days helps.

Blooming Season

Flowers daily through the summer—March to October.

Portulaca is great for borders, hanging pots, and balcony railings.


3. Hibiscus – The Tropical Beauty That Loves Heat

Hibiscus (Gudhal) is a classic Indian summer flowering plant. The large, showy flowers in red, yellow, pink, orange, and white look stunning and bring a tropical feel to any garden.

Why It Thrives in Summer

Hibiscus enjoys warm, sunny weather and grows more vigorously in the heat.

Care Tips

  • Sunlight: 4–6 hours of direct light.
  • Soil: Loose, fertile soil rich in organic matter.
  • Water: Frequent watering in summer; don’t let soil dry out completely.
  • Fertilizer: Heavy feeders—use NPK 19:19:19, seaweed liquid, or cow dung every 15 days.

Blooming Season

Year-round in tropical climates; peak blooms in summer.

Hibiscus grows well in pots, terraces, and garden beds.


4. Vinca / Periwinkle (Sadabahar) – The Easiest Summer Flower

Vinca or Periwinkle is the most low-maintenance summer flowering plant. It blooms continuously even in the hottest months when other plants struggle to survive.

Why It Thrives in Summer

It tolerates heat, drought, poor soil, and still blooms fully.

Care Tips

  • Sunlight: 3–5 hours of good sunlight.
  • Soil: Draining soil; avoid heavy clay soil.
  • Water: Very little—water only when soil is dry.
  • Fertilizer: A mild liquid feed every 20 days is enough.

Blooming Season

Blooms all 12 months in tropical climates.

Perfect for beginners—once planted, it takes care of itself!


5. Sunflower – The Icon of Summer

Sunflowers thrive in the harsh summer sun and brighten your garden with their cheerful yellow heads. Kids love them, and they attract beneficial pollinators.

Why It Thrives in Summer

Sunflowers need long, hot days to grow tall and produce healthy blooms.

Care Tips

  • Sunlight: 6–8 hours of strong sun.
  • Soil: Slightly sandy, nutrient-rich soil.
  • Water: Regular watering during growth; avoid overwatering.
  • Fertilizer: Compost + NPK 10:10:10 once a month.

Blooming Season

Summer to early monsoon.

Sunflowers look great in garden beds and large terrace pots.


Bonus Mentions (More Summer Plants You Can Try)

Although this is Part–I, here are some quick suggestions for later additions:

  • Zinnia
  • Marigold
  • Gaillardia
  • Gomphrena
  • Cosmos Flower

These will appear in Part–II.


How to Make Your Summer Garden Thrive – Quick Tips

Use Light, Draining Soil

Avoid garden soil alone—mix sand, cocopeat, and compost.

Mulch Your Plants

Mulching helps retain moisture and keeps roots cool.

Water Smartly

Water in early morning or late evening.

Add Monthly Fertilizer

Heat drains nutrients, so feed your plants regularly.

Prune Dead Branches

Pruning encourages new branches and more flowers.


Final Thoughts

Summer gardening doesn’t need to be a challenge. If you choose the right heat-tolerant flowering plants, your garden will stay lush, colorful, and cheerful even during peak summer. In this Part–I guide, we covered five of the best summer bloomers—Bougainvillea, Portulaca, Hibiscus, Vinca, and Sunflower.

How to Propagate Succulents Fast and Easy: Step-by-Step Guide for a Thriving Indoor Garden

How to Propagate Succulents Fast and Easy: Step-by-Step Guide for a Thriving Indoor Garden

Succulents are among the most popular plants for indoor and outdoor gardens due to their low-maintenance nature, unique shapes, and vibrant colors. One of the best things about succulents is that they are extremely easy to propagate, allowing gardeners to multiply their collection quickly and inexpensively. Propagation is perfect for beginners, enthusiasts, or anyone looking to expand their green space. This guide will take you through everything you need to know to propagate succulents fast and easy, from selecting the right cuttings to caring for new plants.


Why Propagate Succulents?

  1. Cost-Effective: Multiply your plants without buying new ones.
  2. Fast Growth: Succulents root quickly under the right conditions.
  3. Easy for Beginners: Minimal equipment and simple techniques are needed.
  4. Versatile Decor: Propagated succulents can be used for pots, terrariums, or vertical gardens.
  5. Gift Idea: Share plants with friends and family once propagation is successful.

Tip: With proper care, a single succulent can give rise to dozens of new plants in a few months.


Materials Needed for Propagation

  • Healthy parent succulent plant
  • Sharp, sterilized knife or scissors
  • Small pots or trays with drainage holes
  • Well-draining succulent soil mix (sand, perlite, or cactus mix)
  • Watering can or spray bottle
  • Optional: rooting hormone or powdered charcoal
  • Optional: labels for different types of succulents

Update Tip: Use gloves for spiny or thorny varieties to protect your hands.


Step 1: Choosing the Right Succulent for Propagation

  • Select healthy, mature plants free from pests or diseases.
  • Leaf, stem, and offsets (pups) are the most common parts for propagation.
  • Avoid weak, stressed, or damaged plants as cuttings may fail.

Tip: Fast-growing succulent varieties like Echeveria, Sedum, and Crassula root easily and are ideal for beginners.


Step 2: Methods of Succulent Propagation

A. Leaf Cuttings

  1. Gently twist or cut a healthy leaf from the parent plant.
  2. Ensure the leaf is intact, with no tears.
  3. Allow the leaf to callus for 2–3 days in a dry, shaded area.
  4. Place the leaf on top of well-draining soil; do not bury it.

B. Stem Cuttings

  1. Cut a healthy stem (3–6 inches) using sterilized scissors.
  2. Remove the lower leaves to expose a portion of the stem.
  3. Allow the cutting to dry and callus for 3–5 days before planting.

C. Offsets or Pups

  1. Many succulents produce small offsets at the base.
  2. Gently separate the offset with roots attached.
  3. Plant in fresh soil immediately or let small roots dry slightly.

Update Tip: Callusing prevents rot and increases the success rate for all propagation methods.


Step 3: Preparing the Potting Medium

  • Use a well-draining succulent or cactus mix.
  • You can make your own by mixing potting soil with sand, perlite, or pumice in equal parts.
  • Fill pots or trays with the soil, leaving enough space for cuttings or offsets.

Tip: Avoid dense or moisture-retaining soils, as succulents are highly susceptible to rot.


Step 4: Planting the Cuttings

  • Leaf cuttings: Place on top of soil; do not bury. Roots will grow from the base.
  • Stem cuttings: Insert 1–2 inches into soil; firm gently.
  • Offsets: Plant at the same depth as the parent plant.
  • Keep the newly planted cuttings in a bright, indirect sunlight location.

Update Tip: Avoid direct sunlight until the cuttings are established to prevent sunburn.


Step 5: Watering and Care During Propagation

  • Water sparingly; overwatering is the main cause of failure.
  • Mist lightly every few days or when soil is completely dry.
  • Stem cuttings may be watered lightly after 7–10 days, once roots start forming.
  • Leaf cuttings do not require water initially; they absorb moisture from the air.

Tip: Ensure good airflow around cuttings to prevent mold and fungal growth.


Step 6: Encouraging Fast Root Growth

  • Rooting usually occurs in 2–4 weeks, depending on succulent type and environment.
  • Maintain bright, indirect light and warm temperatures (20–25°C / 68–77°F).
  • Using a rooting hormone can accelerate root formation.
  • Avoid disturbing cuttings during the initial rooting phase.

Update Tip: Once small roots appear, reduce humidity gradually to acclimate the plant to normal conditions.


Step 7: Transplanting New Succulents

  1. Once roots are established, transplant cuttings into individual pots with well-draining soil.
  2. Water lightly after transplanting to settle the soil.
  3. Gradually introduce the plant to direct sunlight, increasing exposure over a few days.

Tip: Use slightly larger pots than the cutting to give roots space to expand but avoid oversized pots, which may retain excess moisture.


Step 8: Fertilizing Propagated Succulents

  • Fertilize after 3–4 weeks once the plant is established.
  • Use a diluted, balanced fertilizer (low nitrogen) to promote growth without softening stems.
  • Fertilize every 4–6 weeks during the growing season (spring and summer).

Tip: Avoid fertilizing during winter when succulents are dormant.


Step 9: Common Problems and Troubleshooting

  1. Cuttings Rotting: Usually due to overwatering or poor drainage.
    • Solution: Reduce watering, repot in dry, well-draining soil.
  2. Leaves Drying Out or Shriveling: Caused by underwatering or extreme heat.
    • Solution: Mist lightly or water once the soil is dry.
  3. Slow Growth: May result from insufficient light or nutrients.
    • Solution: Move cuttings to brighter areas and fertilize gently.
  4. Pests: Mealybugs or aphids may appear.
    • Solution: Wipe leaves with alcohol or use neem oil spray.

Update Tip: Early intervention prevents minor issues from becoming serious.


Step 10: Advantages of Propagating Succulents

  • Cost-Effective: Expand your plant collection without purchasing new plants.
  • Fast and Easy: Many succulents root in just a few weeks.
  • Versatile: Use propagated succulents for pots, terrariums, or gifts.
  • Low Maintenance: Perfect for beginners or busy individuals.
  • Eco-Friendly: Share cuttings with friends and family or create new plant arrangements.

Tip: Succulent propagation is an excellent way to experiment with creative garden designs like vertical gardens, mixed pots, or decorative arrangements.


Conclusion

Propagating succulents is a fast, easy, and rewarding process that allows gardeners to multiply their plants quickly while creating a thriving indoor or outdoor garden. By selecting healthy leaves, stems, or offsets, using well-draining soil, maintaining proper humidity, and providing bright, indirect light, you can enjoy successful propagation in just a few weeks.

Whether you are a beginner or an experienced gardener, this method ensures healthy, vibrant new plants for your home or garden. With patience, consistent care, and the right techniques, you can create a lush succulent collection, decorate your space creatively, and even share plants with friends and family.

How to Propagate Bougainvillea from Cuttings: Fast and Easy Guide for Vibrant Garden Colors

How to Propagate Bougainvillea from Cuttings: Fast and Easy Guide for Vibrant Garden Colors

Bougainvillea is a stunning flowering plant celebrated for its vibrant bracts and ability to transform gardens, balconies, and terraces with color. While buying mature plants is an option, propagating Bougainvillea from cuttings is an easy, cost-effective, and rewarding method to multiply these beauties. With the right techniques, you can quickly grow healthy Bougainvillea plants that will bloom year after year. This guide provides step-by-step instructions, tips, and troubleshooting advice for successful propagation.


Why Propagate Bougainvillea from Cuttings?

  1. Cost-Effective: Multiply plants without buying new ones.
  2. Fast Growth: Bougainvillea cuttings root and grow quickly under ideal conditions.
  3. Maintain Plant Traits: Cuttings produce genetically identical plants, keeping the same bract color and growth habit.
  4. Easy for Beginners: With proper care, even novice gardeners can succeed.
  5. Decorative Potential: Propagating cuttings allows you to create vibrant hedges, trellises, or potted arrangements.

Tip: Bougainvillea grows well in containers, making it ideal for patios, terraces, and balconies.


Materials Needed for Propagation

  • Healthy Bougainvillea plant (source for cuttings)
  • Sharp, sterilized pruning shears
  • Rooting hormone (optional but recommended)
  • Small pots or containers with drainage holes
  • Well-draining soil (sandy soil, garden soil, and compost mix)
  • Watering can or spray bottle
  • Clear plastic bag or propagator (optional for humidity)

Update Tip: Choose mature stems for cuttings, ideally woody but not too old, to ensure faster rooting.


Step 1: Choosing and Preparing Cuttings

  1. Select healthy, disease-free stems that are semi-hardwood (mature but flexible).
  2. Take cuttings 6–8 inches long, making a clean cut just below a leaf node.
  3. Remove leaves from the bottom half of the cutting to reduce water loss and promote root growth.
  4. Optional: Dip the cut end in rooting hormone to increase the chances of successful rooting.

Tip: Avoid cuttings from very young shoots, as they may rot before rooting, and avoid old woody stems, which root slowly.


Step 2: Preparing the Potting Medium

  • Use a well-draining soil mix: equal parts sandy soil, compost, and perlite or coarse sand.
  • Fill pots with soil, leaving space for the cutting.
  • Moisten the soil slightly, but it should not be soggy, as excessive moisture can cause rotting.

Update Tip: Adding a thin layer of gravel at the bottom of the pot improves drainage and prevents water accumulation.


Step 3: Planting the Cuttings

  1. Make a small hole in the soil and insert the cutting 2–3 inches deep.
  2. Firmly press the soil around the base to eliminate air pockets.
  3. Place the cutting in a bright, indirect light location.
  4. Water lightly after planting to settle the soil.

Tip: Avoid direct sunlight at this stage, as it may stress the cutting and hinder rooting.


Step 4: Maintaining Proper Humidity and Temperature

  • Cover the pot with a clear plastic bag or use a propagator to maintain high humidity, which encourages root growth.
  • Keep the soil consistently moist but not soggy.
  • Ideal temperature for rooting is 20–30°C (68–86°F).

Update Tip: Remove the plastic cover occasionally to allow air circulation and prevent mold or fungal growth.


Step 5: Watering and Care During Rooting

  • Mist cuttings daily to maintain humidity.
  • Water lightly when the top inch of soil dries out.
  • Avoid overwatering, as Bougainvillea is prone to stem and root rot.

Tip: Watering from the base is ideal, as it reduces the risk of fungal infection on leaves and stems.


Step 6: Encouraging Root Growth

  • Bougainvillea cuttings typically root in 3–6 weeks, depending on environmental conditions and stem maturity.
  • Gentle tugging after a few weeks can indicate root formation; resistance means roots are developing.
  • Fertilization is not necessary until the roots establish fully.

Update Tip: Using rooting hormone significantly improves the success rate and accelerates root formation.


Step 7: Transplanting Rooted Cuttings

  1. Once roots are well-established, carefully transplant the cutting into a larger pot or garden bed.
  2. Use well-draining soil enriched with compost for healthy growth.
  3. Water lightly after transplanting and gradually introduce the plant to more sunlight.
  4. Avoid fertilizing immediately; wait 2–3 weeks until the plant adjusts to its new environment.

Tip: Harden off plants by gradually increasing sunlight exposure to prevent leaf burn.


Step 8: Fertilizing Bougainvillea for Fast Growth

  • Use a balanced fertilizer (NPK 10:10:10) every 4–6 weeks for young plants.
  • Once mature, apply a phosphorus-rich fertilizer to encourage flowering and vibrant bracts.
  • Avoid excessive nitrogen, which promotes leafy growth at the expense of flowers.

Update Tip: Fertilize early in the growing season for optimal bloom production.


Step 9: Pruning and Training

  • Prune young Bougainvillea to encourage branching and create a bushier plant.
  • Remove dead, weak, or diseased stems regularly to maintain plant health.
  • Train plants on trellises or fences if growing climbers.

Tip: Light pruning also stimulates flower production, giving more vibrant bracts during bloom.


Step 10: Common Problems and Troubleshooting

  1. Cutting Fails to Root: Often due to overwatering or low temperatures.
    • Solution: Adjust watering, maintain warmth, and use rooting hormone.
  2. Yellow Leaves: Caused by excessive moisture or nutrient deficiency.
    • Solution: Improve drainage and apply light fertilizer after rooting.
  3. Stem Rot or Mold: Caused by high humidity without ventilation.
    • Solution: Ensure proper air circulation and remove affected parts.
  4. Pests: Aphids or mealybugs may appear.
    • Solution: Spray with neem oil or insecticidal soap.

Update Tip: Early detection of problems increases success rates and keeps young plants healthy.


Advantages of Propagating Bougainvillea from Cuttings

  • Cost-Effective: Create multiple plants from one parent.
  • Fast Growth: Semi-hardwood cuttings root quickly and develop into flowering plants in months.
  • Genetic Consistency: Keeps the same flower color and growth habit.
  • Versatile Gardening: Perfect for pots, hedges, climbers, and garden beds.
  • Decorative Potential: Enhances outdoor and indoor spaces with vibrant colors.

Conclusion

Propagating Bougainvillea from cuttings is a fast, easy, and rewarding way to multiply these stunning plants. By selecting healthy stems, using well-draining soil, maintaining proper humidity, and providing adequate light and care, you can grow vibrant, flowering Bougainvillea plants that add color and charm to your garden.

Whether you are a beginner or an experienced gardener, this method allows you to expand your garden, save money, and enjoy faster growth. With patience, attention to watering, fertilization, and pruning, your propagated Bougainvillea will thrive, giving you lush foliage and spectacular bracts for years to come.