Homegrown Sprouts Made Easy: How to Turn Everyday Seeds into Nutritious Superfoods

Homegrown Sprouts Made Easy: How to Turn Everyday Seeds into Nutritious Superfoods

Sprouts are tiny powerhouses of nutrition, packed with vitamins, minerals, enzymes, and protein. They are easy to grow at home and can transform ordinary seeds into fresh, crunchy, and highly nutritious food in just a few days. Whether you want to boost your immunity, improve digestion, or add a fresh twist to salads and meals, making sprouts at home is a cost-effective and rewarding practice. In this guide, we’ll explore how to make the best sprouts using seeds commonly found in your kitchen.

Why Grow Sprouts at Home?

Homegrown sprouts have several benefits that make them superior to store-bought alternatives:

  1. Freshness: You control the entire process, ensuring sprouts are fresh and free from preservatives.
  2. Nutrition: Sprouting increases the bioavailability of nutrients, making vitamins and minerals easier for your body to absorb.
  3. Cost-Effective: You can grow large quantities of sprouts from small amounts of seeds.
  4. Variety: Experiment with different seeds like mung beans, lentils, chickpeas, radish, alfalfa, or fenugreek.
  5. Quick Growth: Most sprouts are ready to eat within 3–7 days, making them a fast and healthy food option.

Choosing the Right Seeds

Not all seeds are suitable for sprouting. Only seeds labeled for consumption should be used, as some may be treated with chemicals or may not germinate properly. Popular seeds for home sprouting include:

  • Mung Beans: Mild flavor, rich in protein and fiber.
  • Lentils: Red or green lentils sprout quickly and are highly nutritious.
  • Chickpeas: Take slightly longer to sprout but have a nutty flavor.
  • Fenugreek (Methi): Bitter when raw but adds flavor to salads and dishes.
  • Alfalfa: Small seeds that sprout quickly with delicate taste.
  • Radish: Spicy and crunchy, ideal for garnishes.

Preparing Seeds for Sprouting

Proper preparation ensures faster germination and healthier sprouts.

Steps:

  1. Select Seeds: Choose fresh, whole seeds without any signs of damage or mold.
  2. Rinse Thoroughly: Wash seeds in clean water to remove dust or debris.
  3. Soak Seeds: Place seeds in a bowl with water and soak for 6–12 hours (some seeds like chickpeas may require 12–24 hours). Soaking softens the seed coat and triggers germination.
  4. Drain Water: After soaking, drain seeds thoroughly using a fine mesh sieve or sprouting jar.

Methods for Sprouting at Home

There are several methods to grow sprouts at home. Choose one depending on your convenience and available tools.

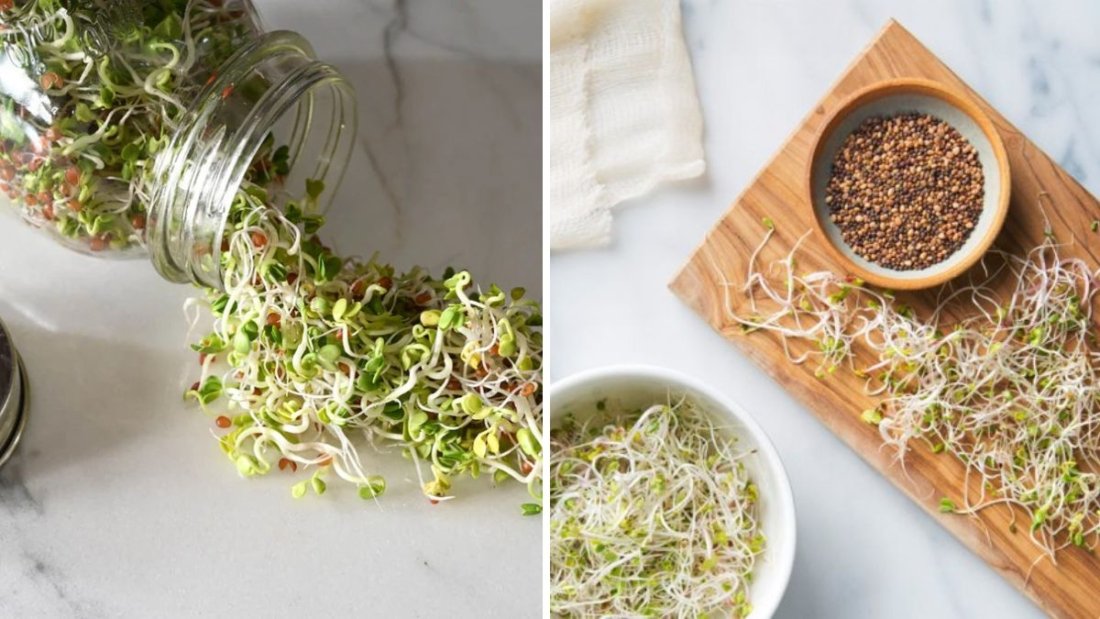
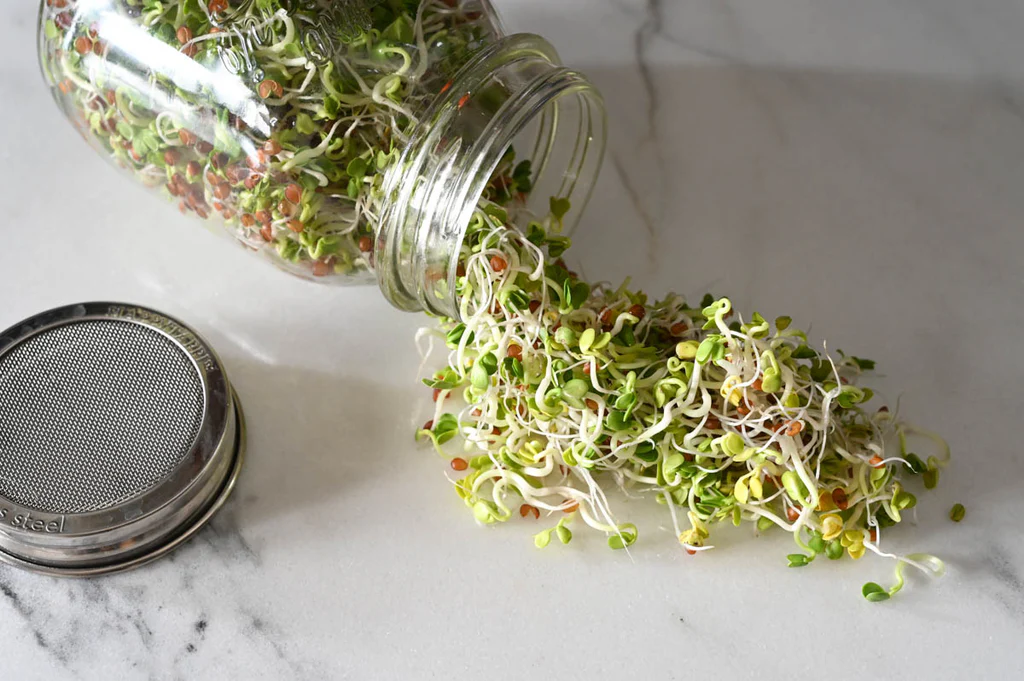
1. Sprouting Jar Method:

  • Use a glass jar with a breathable lid or cheesecloth secured with a rubber band.
  • Place soaked seeds in the jar and rinse twice daily with fresh water.
  • Keep the jar tilted at an angle to allow excess water to drain and air to circulate.
  • Seeds typically sprout within 2–5 days, depending on the variety.

2. Tray Method:

  • Spread soaked seeds evenly on a sprouting tray or shallow dish lined with a damp cloth.
  • Rinse and drain twice daily, ensuring seeds remain moist but not waterlogged.
  • Ideal for larger quantities or small seeds like alfalfa.

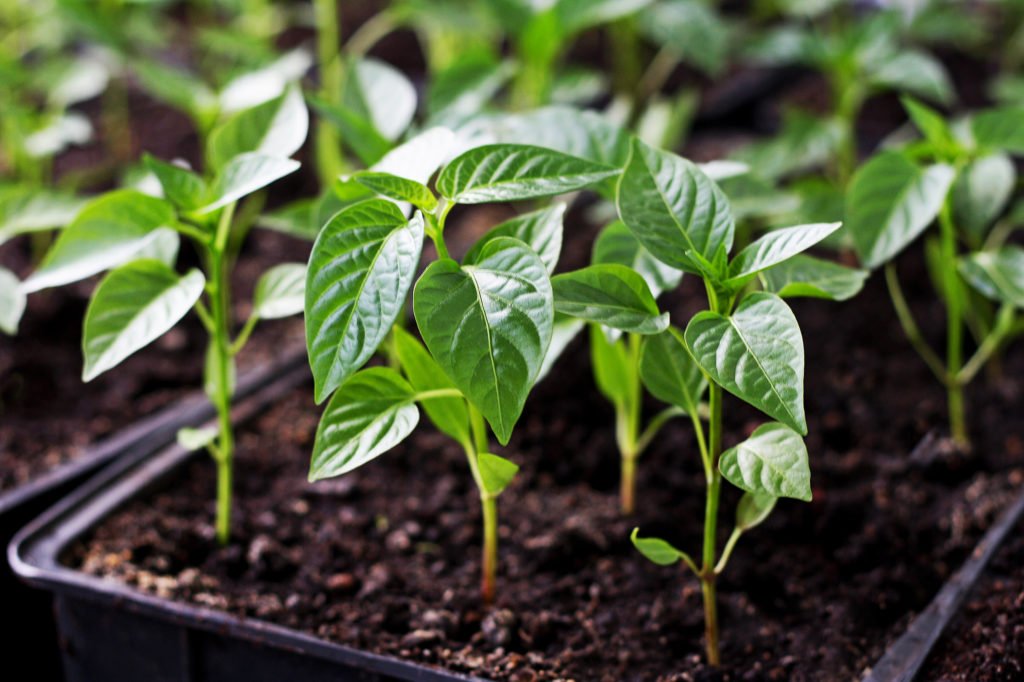
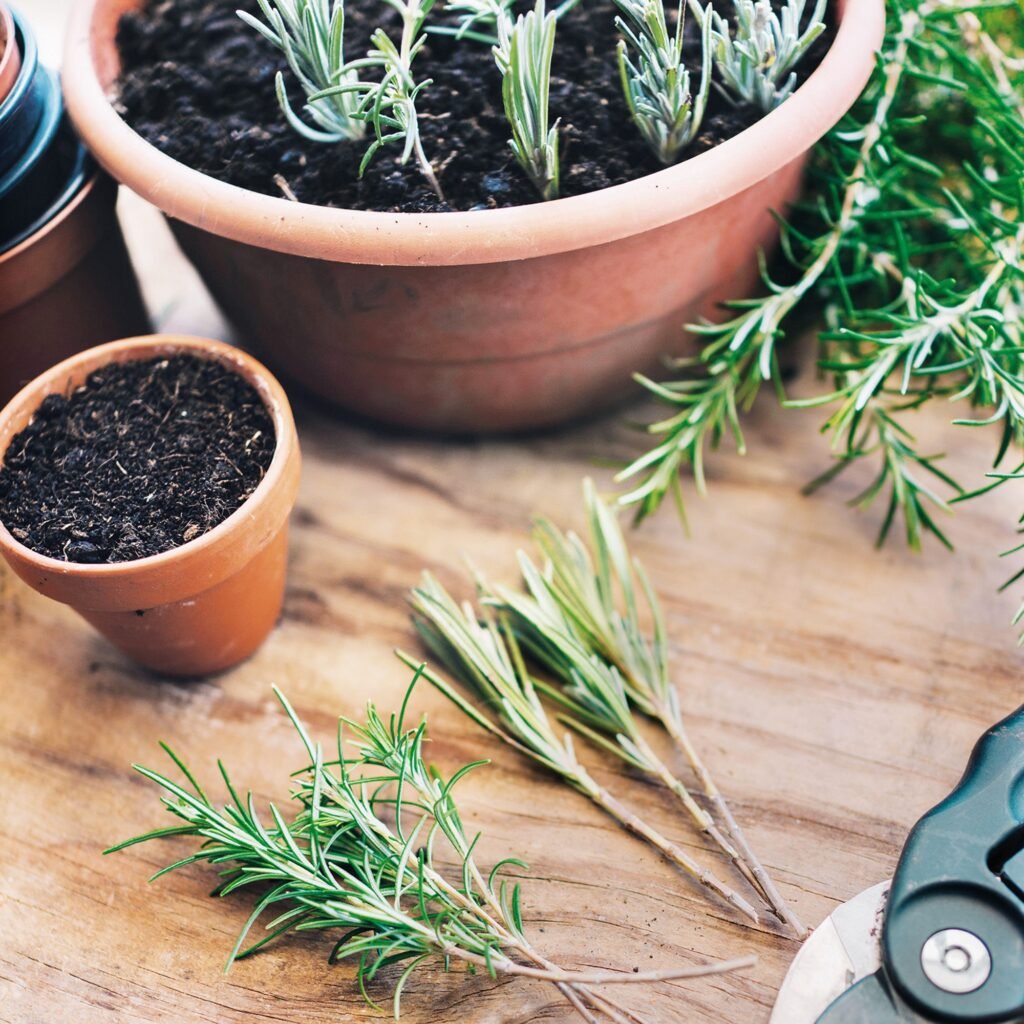
3. Soil or Coconut Coir Method (Optional):

  • Some seeds can sprout in moist soil or coconut coir for a natural, earthy flavor.
  • Keep soil damp and maintain proper light conditions.
  • Harvest when sprouts are 1–2 inches long.

Caring for Sprouts

To produce healthy, tasty sprouts, attention to cleanliness and moisture is essential:

  • Rinse Regularly: Rinse sprouts 2–3 times daily to prevent mold and bacteria growth.
  • Avoid Excess Water: Standing water causes rotting, so always drain thoroughly.
  • Keep in Darkness: Most sprouts grow better in dark or indirect light initially. Once they begin to grow, exposure to indirect light helps develop chlorophyll.
  • Maintain Temperature: Sprouts thrive in room temperature conditions (20–25°C / 68–77°F). Avoid extreme heat or cold.

Harvesting and Storing Sprouts

Sprouts are typically ready in 3–7 days depending on the seed variety:

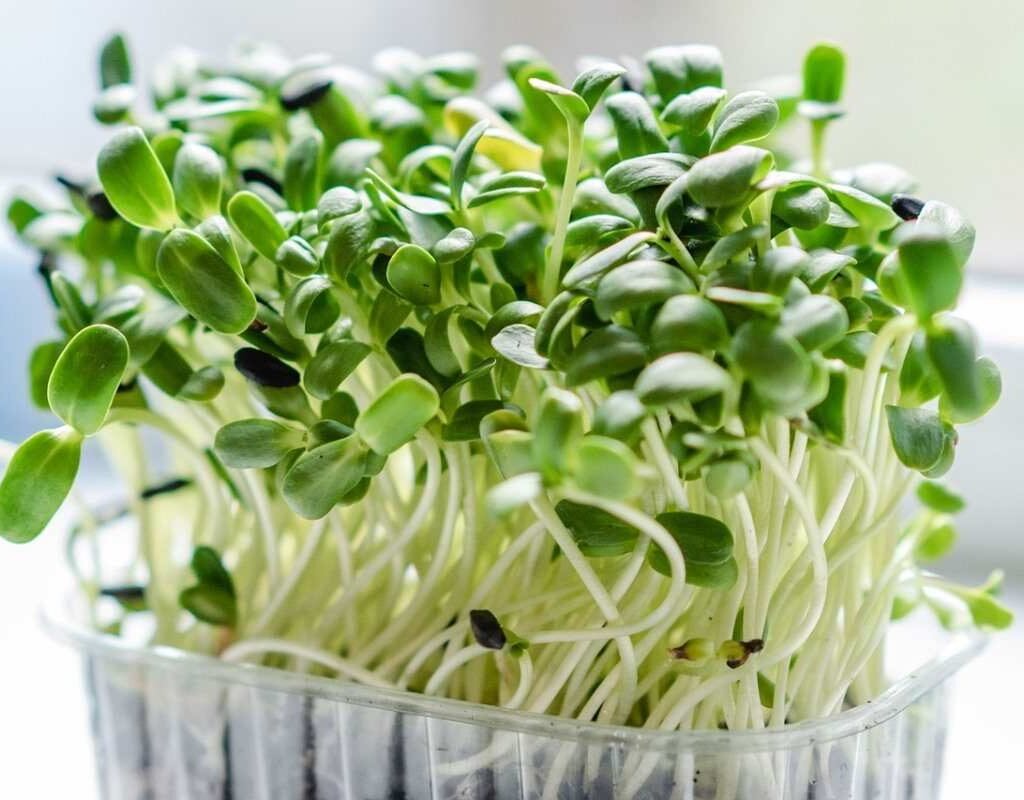
  • Check Growth: Look for roots about 1–2 inches long and tender green shoots.
  • Rinse Well: Wash sprouts thoroughly before consuming to remove seed coats.
  • Storage: Keep harvested sprouts in an airtight container in the refrigerator. They can last up to 4–5 days but are best eaten fresh for maximum nutrition.

Using Sprouts in Daily Meals

Sprouts are highly versatile and can be incorporated into many dishes:

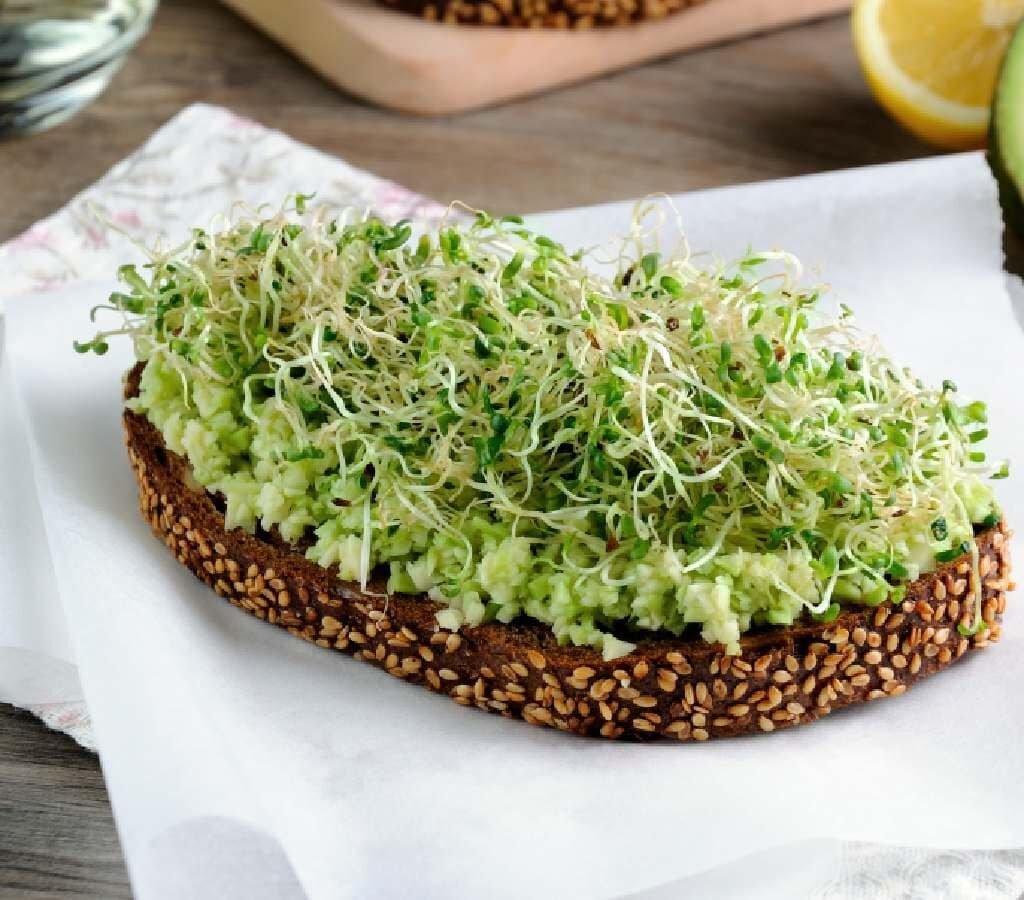
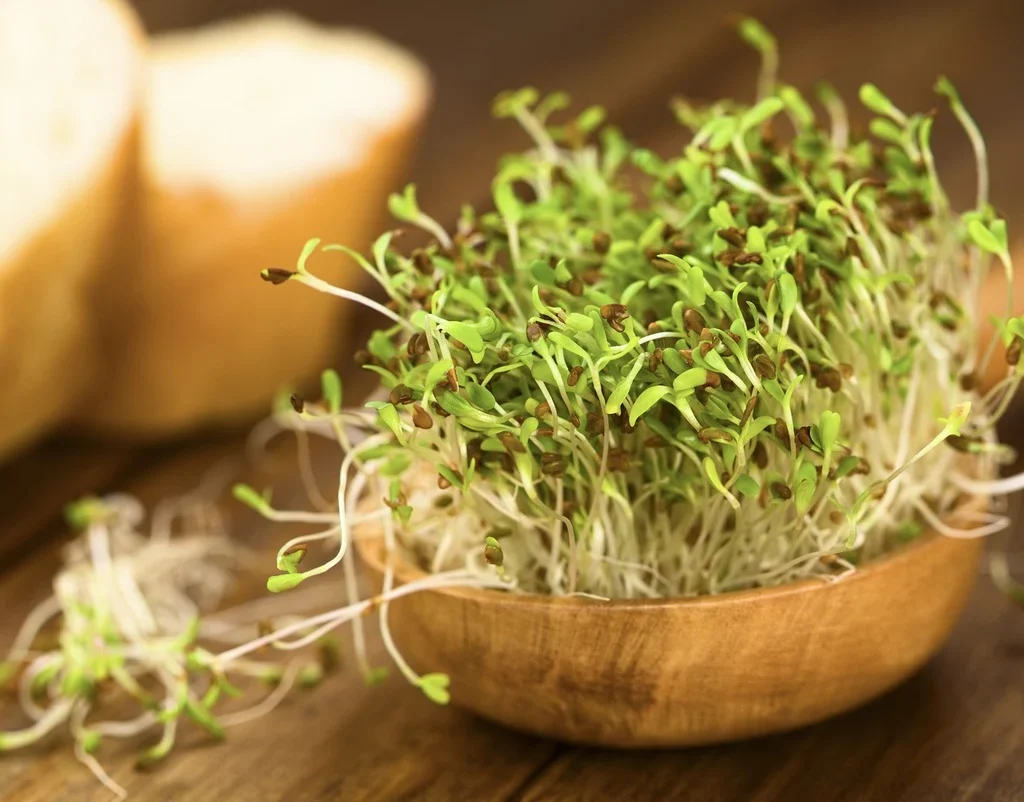
  • Salads: Mix sprouts with fresh vegetables, olive oil, and lemon juice for a healthy salad.
  • Sandwiches and Wraps: Add crunchy sprouts for texture and flavor.
  • Soups and Stir-Fries: Lightly sauté sprouts for soups or stir-fries while maintaining nutrients.
  • Smoothies: Blend tender sprouts like alfalfa or mung beans into green smoothies for a nutrition boost.
  • Snacking: Eat sprouts raw with a pinch of salt and pepper as a crunchy snack.

Health Benefits of Sprouts

Sprouts are considered a superfood because of their dense nutritional profile:

  • Rich in Protein: Excellent for vegetarians and vegans.
  • High in Vitamins: Contain vitamins A, C, K, and B-complex.
  • Boost Digestion: Enzymes in sprouts help improve digestion and nutrient absorption.
  • Strengthen Immunity: Antioxidants in sprouts protect against cellular damage.
  • Support Weight Management: Low in calories and high in fiber, making them filling and nutritious.

Tips for the Best Sprouts

  • Use Fresh Seeds: Older seeds may take longer to sprout or fail to germinate.
  • Rinse Carefully: Always use clean water and clean containers to prevent bacterial growth.
  • Rotate Seeds: Experiment with different seeds to enjoy a variety of flavors and nutrients.
  • Sprout Small Quantities: Grow what you can consume in a few days to ensure freshness.
  • Avoid Mold: If you notice moldy sprouts, discard them immediately.

Common Mistakes to Avoid

  • Overwatering: Can lead to rotting seeds and foul odor.
  • Poor Hygiene: Unclean containers can breed bacteria.
  • Using Untreated Seeds: Some seeds may be chemically treated and unsafe to eat raw.
  • Excess Light: Direct sunlight can dry out sprouts or make them bitter.

Final Thoughts

Growing sprouts at home is a simple, economical, and rewarding way to add fresh nutrition to your diet. With a few easy steps—choosing quality seeds, soaking, sprouting, and proper care—you can turn ordinary kitchen seeds into vibrant, crunchy, and healthy sprouts. Whether eaten raw in salads, blended in smoothies, or lightly cooked in dishes, homegrown sprouts offer unmatched freshness and nutritional benefits.

Sprouts are more than just a healthy food—they are a lifestyle choice. They connect you to the natural growth process, reduce dependence on packaged foods, and provide a fun, engaging way to involve the whole family in healthy eating habits. Start sprouting today, and enjoy a continuous supply of fresh, nutrient-packed greens from the comfort of your home.

Ultimate Guide to Growing Peppers: Planting, Transplanting, Fertilization, and Maximizing Yield

Ultimate Guide to Growing Peppers: Planting, Transplanting, Fertilization, and Maximizing Yield

Peppers are among the most versatile and rewarding plants to grow, whether you’re cultivating them in a backyard garden, balcony containers, or a small urban plot. From sweet bell peppers to fiery chili varieties, these plants can thrive with proper care and management. Understanding how to plant, transplant, fertilize, and increase production is key to achieving healthy, high-yielding pepper plants. This comprehensive guide will walk you through everything you need to know to grow peppers successfully.

Choosing the Right Pepper Variety

Before planting, it’s essential to select the pepper variety that best suits your climate, taste, and space:

  • Bell Peppers: Sweet and mild, perfect for salads and cooking.
  • Chili Peppers: Spicy varieties for those who love heat in their dishes.
  • Compact Varieties: Ideal for container gardening or small spaces.

Consider your region’s climate and growing season when selecting varieties, as some peppers require long, warm seasons to produce fruit effectively.

Preparing Seeds and Seedlings

Peppers are usually started from seeds indoors 8–10 weeks before the last frost. Proper seed starting ensures healthy, vigorous seedlings ready for transplanting.

Steps to Prepare Seeds:

  1. Soak Seeds: Soaking seeds in warm water for a few hours can speed up germination.
  2. Use a Seed Tray: Fill a tray or small pots with a well-draining seed-starting mix.
  3. Planting Depth: Sow seeds about 1/4 inch deep and gently cover them with soil.
  4. Watering: Keep the soil consistently moist but not waterlogged.
  5. Light: Place the tray in a warm, bright area or under grow lights. Peppers need 12–16 hours of light daily for strong seedlings.
  6. Temperature: Maintain 20–25°C (68–77°F) for optimal germination.

Seeds usually sprout in 7–14 days, depending on the variety. Once seedlings develop 2–3 true leaves, they are ready for transplanting into larger pots to strengthen their root system.

Transplanting Peppers

Transplanting is a critical stage that ensures your pepper plants establish well in the garden or larger containers.

Steps for Successful Transplanting:

  1. Harden Off Seedlings: Before moving seedlings outdoors, gradually expose them to outdoor conditions over 7–10 days to prevent transplant shock.
  2. Choose the Right Location: Peppers require full sun, ideally 6–8 hours daily. Soil should be well-draining and rich in organic matter.
  3. Spacing: Plant peppers 18–24 inches apart to allow airflow and reduce disease risk.
  4. Dig Proper Holes: Make a hole slightly larger than the seedling’s root ball.
  5. Plant Deep: Set seedlings slightly deeper than they were in their pots to encourage strong root development.
  6. Watering: Water immediately after transplanting to settle the soil and eliminate air pockets.

Soil Preparation and Fertilization

Peppers thrive in nutrient-rich, slightly acidic to neutral soil (pH 6.0–7.0). Proper soil preparation and fertilization promote vigorous growth and fruit production.

Soil Preparation Tips:

  • Organic Matter: Incorporate compost, well-rotted manure, or peat moss to improve fertility and drainage.
  • Loosen Soil: Loosen soil to a depth of 12–18 inches to help roots penetrate easily.
  • Mulching: Apply organic mulch around the base of plants to retain moisture and suppress weeds.

Fertilization Schedule:

  • At Planting: Use a balanced fertilizer (10-10-10) or organic alternatives like compost tea.
  • Early Growth Stage: Apply nitrogen-rich fertilizer to encourage leafy growth.
  • Flowering and Fruiting Stage: Switch to a phosphorus- and potassium-rich fertilizer (5-10-10) to boost flowering and fruit set.
  • Foliar Feeding: A foliar spray of seaweed extract or liquid fertilizer can enhance nutrient uptake and stress resistance.

Watering and Care

Consistent watering is crucial for healthy peppers, but overwatering can lead to root rot or disease.

Watering Guidelines:

  • Keep soil evenly moist, especially during flowering and fruit development.
  • Avoid wetting the leaves to reduce the risk of fungal infections.
  • Drip irrigation or soaker hoses work best for maintaining consistent soil moisture.

Additional Care:

  • Staking: Taller varieties may require support to prevent bending under the weight of fruits.
  • Pruning: Remove lower leaves and suckers to improve airflow and focus energy on fruit production.
  • Pest Control: Watch for aphids, thrips, and caterpillars. Neem oil or insecticidal soap works well for control.
  • Disease Prevention: Rotate crops annually and avoid planting peppers in the same soil as tomatoes, eggplants, or potatoes to prevent soil-borne diseases.

Maximizing Pepper Production

Increasing yield requires attention to plant health, pollination, and nutrient management.

Tips to Boost Production:

  1. Proper Spacing and Sunlight: Ensure plants receive adequate sunlight and air circulation.
  2. Consistent Fertilization: Adjust fertilizer based on growth stage to promote flowering and fruit set.
  3. Pollination Assistance: Encourage pollinators like bees or hand-pollinate using a soft brush for indoor or greenhouse plants.
  4. Pruning and Training: Remove excessive foliage and non-fruiting branches to channel energy into fruiting.
  5. Temperature Management: Peppers thrive in temperatures between 21–29°C (70–85°F). Protect plants from extreme heat or cold.
  6. Regular Harvesting: Pick mature peppers promptly to stimulate continuous flowering and fruiting.

Troubleshooting Common Problems

Even with the best care, peppers may face challenges:

  • Blossom End Rot: Often caused by calcium deficiency and inconsistent watering. Apply calcium-rich fertilizer and maintain even moisture.
  • Yellowing Leaves: Could indicate nitrogen deficiency or overwatering. Adjust fertilization and drainage accordingly.
  • Poor Flowering: May result from low temperatures, insufficient sunlight, or excess nitrogen. Correct environmental conditions and reduce nitrogen input.
  • Pests: Aphids, whiteflies, and spider mites are common. Regular inspection and organic pest control can prevent damage.

Container Gardening for Peppers

For gardeners with limited space, peppers grow well in containers:

  • Use pots at least 12 inches deep with good drainage.
  • Fill with high-quality potting mix enriched with compost.
  • Fertilize regularly, as container plants deplete nutrients faster.
  • Ensure the pot receives full sun and water consistently.

Final Thoughts

Growing peppers successfully requires careful attention to planting, transplanting, fertilization, and ongoing care. By selecting the right varieties, preparing healthy seedlings, and providing optimal soil, water, and nutrients, you can enjoy abundant harvests of flavorful peppers. Regular pruning, pest management, and proper harvesting practices ensure your plants remain productive throughout the season.

Whether you aim to grow sweet bell peppers for salads or hot chili peppers for culinary adventures, mastering these techniques will help you achieve a bountiful and rewarding pepper garden. Start with quality seeds, follow the steps outlined, and watch your peppers flourish from tiny seedlings into vibrant, fruit-bearing plants that enhance your meals and garden alike.

Rooting Bougainvillea at Home Made Easy: Step-by-Step Guide to Growing Vibrant Plants from Cuttings

Rooting Bougainvillea at Home Made Easy: Step-by-Step Guide to Growing Vibrant Plants from Cuttings

Bougainvillea is one of the most vibrant and resilient flowering plants, known for its stunning colors and ability to brighten any garden or balcony. While many gardeners enjoy buying mature bougainvillea plants, propagating them at home from cuttings is both rewarding and cost-effective. With the right technique, even beginners can root bougainvillea branches successfully and enjoy a thriving plant in no time. This article will guide you step-by-step through the process of rooting bougainvillea at home with ease.

Why Propagate Bougainvillea from Cuttings?

Propagating bougainvillea from cuttings has several advantages:

  1. Cost-Effective: You can grow new plants without spending money on mature ones.
  2. Faster Flowering: Plants grown from cuttings often flower sooner than seedlings.
  3. Cloning Favorite Varieties: Cuttings allow you to replicate your favorite bougainvillea plants exactly.
  4. Control Over Growth: You can choose healthy branches and control the shape and size of your plant.

Choosing the Right Branch

The first step in successful propagation is selecting the right branch. Here’s what to look for:

  • Healthy Stem: Choose a branch that is healthy, free from disease or pests, and has a vibrant green or reddish color.
  • Semi-Hardwood: The best cuttings come from semi-hardwood branches. These are neither too young nor too old—mature enough to support growth but not so woody that they resist rooting.
  • Length: Cuttings should be approximately 6–8 inches long, with at least 3–4 nodes. Nodes are the points where leaves grow and are critical for root development.
  • Avoid Flowering Branches: Branches with flowers or buds focus energy on blooms rather than rooting, so select non-flowering branches.

Preparing the Cuttings

Once you have selected the branch, proper preparation is crucial:

  1. Make a Clean Cut: Use sterilized pruning shears to cut the branch at a 45-degree angle just below a node. Clean cuts prevent infection and increase rooting chances.
  2. Remove Lower Leaves: Strip off leaves from the bottom half of the cutting. This reduces water loss and directs the plant’s energy toward root formation.
  3. Optional – Use Rooting Hormone: Dipping the cut end in rooting hormone powder or gel can boost the chances of success. Rooting hormones stimulate root growth and reduce the risk of rotting.

Choosing the Right Medium

Bougainvillea cuttings need a medium that supports root growth while preventing waterlogging. Popular options include:

  • Sandy Soil: Well-drained sandy soil allows excess water to drain, preventing rot.
  • Coco Peat or Peat Moss: Retains moisture while providing good aeration.
  • Perlite or Vermiculite: Often mixed with soil to improve drainage.

A mix of sand and coco peat or a combination of perlite and soil works perfectly for bougainvillea propagation.

Planting the Cuttings

Follow these steps to plant the cuttings correctly:

  1. Prepare the Pot: Fill a small pot or tray with the chosen soil medium. Ensure it is well-draining to prevent waterlogging.
  2. Insert the Cutting: Push the cut end of the branch into the soil about 2–3 inches deep, making sure at least one node is buried.
  3. Firm the Soil: Gently press the soil around the cutting to remove air pockets.
  4. Water Lightly: Moisten the soil with a fine spray of water. Avoid overwatering, as soggy soil can cause cuttings to rot.

Creating the Ideal Environment

Bougainvillea cuttings need warmth, humidity, and light to root successfully:

  • Temperature: Maintain a warm environment around 20–30°C (68–86°F). Avoid placing cuttings in cold or drafty areas.
  • Humidity: Covering the cuttings with a plastic bag or transparent dome can maintain humidity, which encourages rooting. Ensure some airflow to prevent mold.
  • Light: Place the pot in bright, indirect sunlight. Direct sunlight can scorch delicate cuttings, while too little light slows rooting.

Caring for Cuttings

Once planted, caring for bougainvillea cuttings is critical:

  • Watering: Keep the soil lightly moist but not soggy. Overwatering is the most common cause of failure.
  • Check for Roots: After 3–4 weeks, gently tug the cutting to check for resistance, which indicates root development. Avoid disturbing the soil too frequently.
  • Patience: Bougainvillea cuttings may take 4–6 weeks to develop roots. Patience is key.

Transplanting Rooted Cuttings

Once roots are well-established, it’s time to transplant:

  1. Choose a Larger Pot or Garden Spot: Use a pot with good drainage or a prepared garden bed.
  2. Prepare the Soil: Bougainvillea thrives in sandy, well-draining soil with a slightly acidic to neutral pH (5.5–7).
  3. Plant Carefully: Remove the cutting gently from the propagation medium, keeping roots intact.
  4. Water and Support: Water lightly after transplanting and provide a stake or support if necessary for young plants.

Tips for Thriving Bougainvillea

  • Sunlight: Bougainvillea loves sunlight. Ensure at least 5–6 hours of direct sunlight daily.
  • Pruning: Prune regularly to encourage bushy growth and more blooms.
  • Fertilization: Use a balanced fertilizer every 6–8 weeks. High-phosphorus fertilizers can enhance flowering.
  • Pest Control: Watch for aphids, mealybugs, and caterpillars. Neem oil or insecticidal soap can help.

Common Mistakes to Avoid

  • Overwatering: This leads to root rot and is the most common mistake.
  • Choosing Weak Cuttings: Only select healthy, semi-hardwood branches.
  • Planting Too Deep: Burying the cutting too deep can suffocate nodes.
  • Exposing to Harsh Sun: Too much direct sunlight on young cuttings can cause wilting.

Final Thoughts

Rooting bougainvillea branches at home is an enjoyable and rewarding gardening project. With a bit of patience and proper care, you can turn a simple branch into a flourishing, colorful plant that will brighten your garden or balcony for years. By following the steps above—choosing the right branch, preparing it carefully, planting in an ideal medium, and maintaining proper care—you can successfully propagate bougainvillea at home, even as a beginner.

Whether you want to expand your garden or share vibrant plants with friends, mastering the technique of rooting bougainvillea is a fulfilling skill that brings beauty and joy to any space. Start with one cutting today, and watch your garden bloom like never before!

Garden in a Bottle: Growing Tomatoes in a Small Space

Garden in a Bottle: Growing Tomatoes in a Small Space

Tomatoes are among the most satisfying plants to grow at home. With their bright red color, juicy texture, and refreshing flavor, nothing compares to the taste of a freshly picked homegrown tomato. But what if you don’t have a large garden, big pots, or an open terrace? Can you still grow tomatoes successfully?

The answer is a big, juicy YES!
With the clever “Garden in a Bottle” method, you can grow healthy, productive tomato plants in the smallest spaces—even in small balconies, window corners, or kitchen shelves. This technique is perfect for urban gardeners and anyone who loves the idea of growing food in creative, space-saving ways.

In this complete guide, you’ll learn how to grow tomatoes inside plastic bottles, glass bottles, or any compact container. We’ll cover setup, soil, watering, sunlight, fertilizing, and how to keep your tiny tomato garden thriving with minimal effort.


What Is “Garden in a Bottle”?

The concept is simple:
You grow a tomato plant inside a bottle—either vertically or horizontally—creating a micro-garden that requires almost no space. This method works wonderfully because tomatoes adapt well to containers and respond beautifully when their roots have good moisture and nutrients.

Benefits of Growing Tomatoes in a Bottle

  • Requires almost zero space
  • Very low cost
  • Great for balconies, windows, small apartments
  • Easy to maintain
  • Fun and educational for kids
  • Perfect recycling idea
  • Produces real, edible tomatoes—cherry, mini, or even regular varieties

If you’re someone who always thought gardening needs space, this method will change your mind completely!


Best Tomato Varieties for Bottle Gardening

While many types of tomatoes can grow in bottles, some varieties perform much better.

Recommended Varieties:

  • Cherry tomatoes (best for small spaces)
  • Miniature tomatoes
  • Dwarf or micro-dwarf varieties
  • Grape tomatoes
  • Pear tomatoes

These produce small, sweet fruits and require less root space.

Avoid large, heavy varieties like big beef or roma unless using a bigger bottle or container.


Choosing the Right Bottle

You can use any of these:

1. Plastic Bottles (1–5 liters)

  • Lightweight
  • Easy to cut
  • Easy to hang or mount

2. Glass Bottles (wide-mouth)

  • Look classy
  • Great for decorative indoor setups

3. Large Water Cans (10–20 liters)

  • Ideal for growing bigger tomato types
  • More soil, more yield

Vertical vs. Horizontal Gardening

  • Vertical Bottles save space and look neat
  • Horizontal Bottles offer more soil area and better root spread

Both work well—choose based on your available space and style preference.


Preparing the Bottle for Planting

Step 1: Clean the Bottle

Remove labels and rinse thoroughly.
Dirty bottles can carry fungi or bacteria.

Step 2: Create Drainage Holes

Use a hot knife, screwdriver, or drill to make:

  • 4–6 holes at the bottom
  • 2–3 holes on the sides for airflow

Drainage is critical—tomatoes hate standing water.

Step 3: Add a Layer of Stones

A 1-inch layer of:

  • Gravel
  • Pebbles
  • Broken clay pieces

This improves drainage and prevents root rot.


Soil Mixture for Bottle Tomatoes

Tomatoes grow best in light, airy, nutrient-rich soil.

Perfect Soil Mix:

  • 40% garden soil
  • 30% compost or cow dung
  • 20% cocopeat
  • 10% sand or perlite

Add:

  • 2 tablespoons neem cake (prevents pests)
  • 1 teaspoon bone meal or rock phosphate (for fruiting)

Avoid heavy clay soil—it suffocates roots inside a bottle.


Planting Tomatoes in a Bottle

You can start with seeds or seedlings.


Planting Seeds

  1. Make small holes in the soil (1 cm deep).
  2. Drop 2–3 seeds per bottle.
  3. Cover lightly with soil.
  4. Mist gently with water.
  5. Keep in a warm, sunny spot.

Seedlings emerge within 5–10 days.
Once they are 3 inches tall, keep the healthiest one and remove the rest (called thinning).


Planting Seedlings

If you prefer faster results:

  1. Buy a healthy seedling (4–6 inches tall).
  2. Make a hole in the center of the bottle.
  3. Place the seedling and press the soil gently around it.

Tomatoes adapt to bottle environments easily.


Sunlight Requirements

Tomatoes need at least 6 hours of direct sunlight.

The more sun they get, the:

  • faster they grow
  • more flowers they produce
  • tastier the tomatoes become

If your space is indoors, place bottles near:

  • windows
  • balconies
  • terraces
  • sunlit kitchen shelves

Artificial grow lights also work for indoor tomato gardens.


Watering Your Bottle Tomato Garden

Watering is the most important part of bottle gardening.

Watering Tips:

  • Water when the top 1 inch of soil feels dry
  • Use a spray bottle or watering can
  • Avoid overwatering—bottles trap moisture
  • Morning watering is best

Tomatoes prefer consistent moisture but never soggy roots.

Self-Watering Bottle Hack

Create a wick system:

  • Fill bottom half with water
  • Insert cloth strip (wick) through the cap
  • Fill top half with soil
  • Plant your tomato

This keeps soil moist without daily watering.


Feeding (Fertilizing) Tomato Plants

Tomatoes are heavy feeders—they love nutrients.

Every 15–20 Days Add:

  • Compost
  • Liquid compost tea
  • Banana peel water (adds potassium)
  • Seaweed extract (boosts flowering)

During Flowering & Fruiting:

  • Add 1 tablespoon wood ash
  • Add 1 teaspoon bone meal

These help produce bigger, juicier tomatoes.

Avoid too much nitrogen—it causes leafy growth but fewer tomatoes.


Supporting Your Tomato Plant

As tomatoes grow taller, they need support.

Use:

  • A bamboo stick
  • Plastic rod
  • Thin PVC pipe
  • Twine tied to a balcony railing

Gently tie the plant as it grows.
This prevents stem breakage and increases yield.


Pests and How to Manage Them

Tomatoes in bottles face fewer pests, but some still appear:

Common Pests:

  • Aphids
  • Whiteflies
  • Worms
  • Mealybugs

Natural Remedies:

  • Neem oil spray
  • Soap water spray
  • Garlic + chili homemade spray
  • Keep leaves dry to prevent fungus

Bottle gardens stay cleaner than open soil gardens, reducing pest problems naturally.


Flowering and Fruiting Stage

When the plant reaches 12–15 inches, flowers begin to appear.

To increase fruiting:

  • Give more sunlight
  • Add potash-rich fertilizers
  • Gently shake the plant to help pollination
  • Keep soil slightly moist

Flowers turn into tiny green tomatoes, which grow and ripen over 20–35 days depending on variety.


Harvesting Your Bottle Tomatoes

You can start harvesting when tomatoes:

  • turn bright red (or yellow if using yellow varieties)
  • feel slightly soft
  • come off easily when twisted

Cherry tomatoes mature fastest—sometimes within 55–70 days.

Do not let them over-ripen on the plant, as this slows new fruit production.


Advantages of Growing Tomatoes in a Bottle

1. Perfect for Urban Living

No garden? No problem. Bottles fit anywhere.

2. Extremely Low Cost

Uses recycled materials and simple tools.

3. Water Efficient

Bottles help retain moisture.

4. Easy to Move Around

Shift to sunlight or indoors during rain.

5. Eco-Friendly

Reduces plastic waste and promotes green living.

6. Fun for Kids and Beginners

Great beginner gardening project.


Bottle vs Pot Tomato Growing (Quick Comparison)

FeatureBottlePot
SpaceVery smallMedium
CostAlmost freeModerate
Soil AmountLimitedMore soil
Fruit SizeSmallerLarger
WateringFrequentLess frequent
MaintenanceEasyModerate

Both methods work well—choose based on your needs.


Final Thoughts

Garden in a Bottle” is one of the most creative and practical ways to grow tomatoes in small spaces. Whether you’re a beginner or an experienced gardener, this method lets you enjoy fresh, juicy tomatoes without needing a garden, terrace, or large pots.

With the right soil mix, good sunlight, consistent watering, and a little love, your bottle garden will reward you with a surprising amount of delicious homegrown tomatoes.

So don’t wait—grab an empty bottle, fill it with soil, plant a tomato, and start your mini-garden today. Even the smallest space can produce big results!

Easy Eggplant Growing: A Complete Guide to Planting in Pots or Directly in the Garden

Easy Eggplant Growing: A Complete Guide to Planting in Pots or Directly in the Garden

Eggplant, also known as brinjal or aubergine, is one of the most versatile and rewarding vegetables you can grow at home. Its glossy purple fruits, soft texture, and rich flavor make it a favorite in kitchens worldwide—perfect for curries, fries, grilling, stuffing, and more. The best part? Eggplants are surprisingly easy to grow, whether you have a large backyard, a balcony corner, or just a small patio.

In this comprehensive 1200-word guide, you’ll learn how to successfully grow eggplants in pots or directly in your garden, the differences between both methods, and expert tips to ensure you get a continuous harvest all season.


Why Grow Eggplant at Home?

Before diving into the planting methods, here’s why eggplant deserves a place in your home garden:

1. It’s a Hardy, Heat-Loving Plant

Eggplants thrive in warm weather and can tolerate high temperatures better than many vegetables.

2. High Yield from a Single Plant

One healthy plant can produce 15–30 eggplants depending on the variety.

3. Grows Well in Both Pots and Soil

Whether you have space or not, eggplants adapt easily.

4. Long Harvest Season

You can harvest continuously for 3–5 months with proper care.

5. Aesthetic Appeal

Eggplant plants look beautiful with their purple stems, violet flowers, and shiny fruits.


Growing Eggplant in Pots

Growing eggplant in containers is ideal for balconies, terraces, or small spaces. Containers allow easy movement, good control over soil quality, and protection from pests.

1. Choosing the Right Pot

Eggplants have deep roots, so choosing the right pot is crucial.

  • Minimum depth: 14–16 inches
  • Width: 12–14 inches
  • Material: Terracotta, plastic, grow bags, or ceramic pots
    Grow bags of 20–30 liters work exceptionally well.

Larger pots support bigger plants and higher yields.


2. Best Soil Mix for Potted Eggplants

Eggplants grow best in loose, well-draining soil.

Recommended Mix:

  • 40% garden soil
  • 30% compost or cow dung
  • 20% cocopeat
  • 10% sand or perlite

Add-ons for nutrient boost:

  • Handful of neem cake (for pest protection)
  • 1 tablespoon bone meal or rock phosphate

Light soil prevents root rot and encourages the plant to grow faster.


3. Planting Eggplants in Pots

You can start with seeds or seedlings from a nursery.

If Using Seeds:

  1. Soak seeds for 6–8 hours.
  2. Sow them in seed trays or small pots.
  3. Keep in a warm place until germination (7–12 days).
  4. Transplant when 4–5 inches tall.

If Using Seedlings:

  • Buy healthy ones with thick stems and green leaves.
  • Plant one seedling per pot for best growth.

Make a hole in the center, place the plant, and gently press soil around it.


4. Sunlight Requirement

Eggplants need 6–8 hours of direct sunlight daily.
Place the pot where it receives full sun—balcony, terrace, or near a sunny window.


5. Watering Schedule

Eggplants love moisture but hate soggy soil.

Watering Tips:

  • Water deeply 3–4 times per week in summer.
  • Ensure the top inch of soil is dry before watering again.
  • Avoid wetting the leaves to prevent fungal disease.

6. Fertilizing Potted Eggplants

To keep your plant productive:

Every 20 Days Apply:

  • Compost or cow dung
  • Liquid fertilizers (banana peel tea, compost tea)
  • Fish emulsion or seaweed extract (optional)

During flowering and fruiting:

  • Add 1 tablespoon bone meal OR potash for bigger fruits.

7. Support for Plants

Eggplants become heavy with fruits.
Insert a bamboo stick or stake to support the main stem and prevent breakage.


8. Common Pests in Pots

Look out for:

  • Aphids
  • Mealybugs
  • Whiteflies
  • Spider mites

Natural Remedies:

  • Neem oil spray
  • Soap water spray
  • Garlic or ginger homemade pest repellent

Growing Eggplant Directly in the Garden

If you have backyard or ground space, growing eggplants in soil gives faster growth and larger fruit size.

1. Soil Preparation

Eggplants love rich, fertile, well-draining soil.

Ideal Soil Conditions:

  • pH level: 5.5–7.0
  • Add 5–6 kg compost per square meter
  • Mix in neem cake and some sand for drainage

Loosen the soil at least 12–15 inches deep before planting.


2. Planting in the Garden

Spacing:

  • Distance between plants: 18–24 inches
  • Distance between rows: 24–30 inches

Create small mounds and plant seedlings at the center.
This improves drainage and root expansion.


3. Watering in Garden Beds

Ground-grown eggplants need more consistent hydration.

Watering Guide:

  • Every 2–3 days in summer
  • Once a week during cooler months
    Mulching around the plant helps retain moisture and keeps weeds away.

4. Sunlight Needs

Choose a spot that receives:

  • Full sunlight all day
    The more sunlight, the better the flowering and fruiting.

5. Fertilization in Garden Soil

Garden-grown plants respond well to organic fertilizers.

Before Planting:

  • Add compost, cow dung, and wood ash.

During Growth:

  • Every 20–25 days apply compost.
  • Add potassium-rich fertilizers (banana peels, ash).
  • Add bone meal at flowering stage.

Healthy nutrition equals bigger, shinier eggplants.


Caring for Eggplant: Tips for Both Pots and Garden

1. Pruning

Remove lower leaves and suckers to allow air circulation.
This helps prevent disease and encourages fruiting.

2. Mulching

Use:

  • Dry leaves
  • Straw
  • Coconut husk pieces

Mulching keeps soil cool and moist.

3. Pollination

Eggplants self-pollinate but gently shaking the plant boosts fruit formation.

4. Disease Prevention

To avoid fungal issues:

  • Keep leaves dry
  • Ensure airflow
  • Never overcrowd plants

Harvesting Your Eggplants

When to Harvest:

  • 60–80 days after transplanting
  • Fruit should be glossy, firm, and medium size
  • Press lightly—if the skin springs back, it’s ready

Do not wait too long, as overripe eggplants turn dull and bitter.

Use scissors or pruning shears to cut the stem—never pull the fruit.


Growing Eggplants: Pots vs Garden (Quick Comparison)

FeaturePotsGarden
Space NeededSmallLarge
Growth SpeedMediumFast
Fruit SizeMediumLarge
WateringFrequentModerately frequent
Pest ResistanceHigher riskModerate risk
Soil ControlExcellentModerate

Both methods work beautifully—as long as you follow the right steps.


Final Thoughts

Growing eggplants in pots or directly in the garden is not only easy but incredibly rewarding. With the right soil, sunlight, watering, and nutrition, your plants will thrive and produce delicious, healthy eggplants for months. Whether you’re gardening on a balcony or in a large outdoor plot, eggplants adapt easily and offer generous yields with minimal care.

Start your eggplant-growing journey today, and soon you’ll enjoy fresh, chemical-free harvests straight from your home garden!

Supercharge Your Citrus Growth: Easy, Proven Tips to Grow Lemon, Orange & Other Citrus Trees Faster at Home!

Supercharge Your Citrus Growth: Easy, Proven Tips to Grow Lemon, Orange & Other Citrus Trees Faster at Home!

Citrus trees—whether lemon, orange, tangerine, lime, or kinnow—are among the most rewarding fruit plants for home gardeners. They are fragrant, beautiful, and extremely productive when grown correctly. But many gardeners struggle with slow growth, yellowing leaves, poor flowering, and delayed fruiting. The good news is that with the right techniques, you can grow citrus trees much faster, healthier, and more productive—even in pots.

This 1200-word guide covers the best-tested tips used by expert gardeners to boost citrus growth and ensure strong root development, lush green foliage, early flowering, and heavy fruit production. If you want your citrus plants to thrive faster at home, these simple yet powerful tips will transform your gardening experience.


Understanding Citrus Growth: Why Your Plant May Be Growing Slowly

Before we jump into the tips, it’s important to understand why citrus trees often grow slowly.

Common Reasons for Slow Citrus Growth

  • Poor-quality soil
  • Overwatering or underwatering
  • Lack of nutrients (especially nitrogen, zinc, and magnesium)
  • Wrong pot size
  • Insufficient sunlight
  • Root-bound plants
  • Pest attacks like aphids, leaf miners, or whitefly
  • Poor drainage

Once you identify and fix these issues, your citrus plant will naturally begin growing faster.


1. Start with the Right Pot and Soil

Whether you’re growing citrus in the ground or in containers, the foundation must be strong.

Choose the Right Pot Size

If growing in containers:

  • Young plants: Start with an 8–12 inch pot
  • Once the plant grows 2–3 feet: Shift to a 16–18 inch pot
  • Mature citrus plants: Need at least a 20–24 inch deep container

Why pot size matters:

Citrus trees have deep, spreading root systems. Small pots restrict root expansion, slowing plant growth.


Best Soil Mix for Fast Growth

Citrus needs loose, well-draining, nutrient-rich soil.
Use this highly effective mix:

  • 40% garden soil
  • 30% compost or vermicompost
  • 20% sand
  • 10% cocopeat

Add-ons for best results:

  • A handful of neem cake (prevents root pests)
  • A handful of bone meal (promotes strong root growth)

This mix supports fast growth, prevents waterlogging, and improves nutrient availability.


2. Give Your Citrus Plants 6–8 Hours of Full Sun

Citrus trees LOVE sunlight.
If your plant isn’t growing fast, sunlight is often the main reason.

Sunlight Tips

  • Keep the pot in full sun
  • Balcony growers should choose the brightest corner
  • In winters, shift pots to receive more sunlight
  • Citrus will not grow properly indoors

More sunlight = faster photosynthesis = faster growth.


3. Water Smartly — Not Too Much, Not Too Little

Citrus plants hate soggy soil. Overwatering causes root rot, dropping leaves, and slow growth.

Watering Rule

Water only when:

  • top 2 inches of soil feel dry

Summer: Water daily or on alternate days

Winter: Water once every 4–6 days

Always ensure drainage holes are open.

Pro Tip:

Mulching with dry leaves helps retain moisture and keeps soil healthy.


4. Feed Your Citrus Trees the Right Nutrients

Fast-growing citrus trees depend on regular feeding. They are heavy feeders and need nutrients frequently.

Best Fertilizers for Fast Citrus Growth

1. Nitrogen-Rich Fertilizer

Helps in green growth and new shoots.
Use monthly:

  • Vermicompost
  • Cow dung compost
  • Mustard cake powder (soak before use)

2. Potassium and Phosphorus

Essential for strong roots and early flowering.
Use every 45 days:

  • Bone meal
  • Banana peel fertilizer
  • Onion peel fertilizer

3. Micronutrients (Very Important!)

Citrus plants quickly show deficiencies of:

  • Zinc
  • Magnesium
  • Iron
  • Manganese

Symptoms of deficiency:

  • Yellow leaves
  • Green veins (chlorosis)
  • Slow new growth

Solution:

Use a good-quality micronutrient mix or Epsom salt (once per month).
Epsom salt = Magnesium sulfate → boosts green growth and better fruits.


5. Prune Your Plant to Encourage New Growth

Many gardeners forget this, but pruning is crucial.
Pruning encourages new shoots, which later become branches and fruit-bearing stems.

How to Prune Citrus Trees

  • Remove dead or weak branches
  • Cut crossing branches
  • Trim 10–20% of top foliage during early spring

This redirects energy into producing fresh growth.

Benefits of Pruning

  • Better air circulation
  • Stronger stems
  • Faster growth
  • More flowers

6. Protect from Common Pests (Secret of Fast Growth)

Citrus plants often slow down due to hidden pests.

Common Citrus Pests

  • Aphids
  • Leaf miners
  • Whiteflies
  • Mealybugs
  • Spider mites

Natural Pest Control Spray

Use weekly:

Neem Oil Spray

  • 1 liter water
  • 1 teaspoon neem oil
  • 1 teaspoon liquid soap
    Spray on both sides of leaves.

For Leaf Miner:

Use neem spray every 5 days until cured.

Healthy, pest-free citrus = fast-growing citrus.


7. Encourage Strong Root Development

Fast growth above the soil depends on strong roots below the soil.

Best natural root boosters:

  • Bone meal
  • Seaweed extract
  • Compost tea
  • Jaggery water (use only once a month for microbes)

Root Growth Trick

Punch 4–5 holes around the plant (2–3 inches deep) and fill with compost.
This delivers nutrients directly to roots.


8. Repot Your Citrus Every 1–2 Years

Citrus roots expand rapidly. When roots become pot-bound, growth stops.

Signs Your Citrus Needs Repotting

  • Roots coming out of drainage holes
  • Soil dries too fast
  • Plant not growing despite feeding

Repotting Notes

  • Increase pot size by 2–4 inches
  • Refresh topsoil with fresh compost
  • Do not disturb roots too much

A fresh soil mix boosts growth instantly.


9. Improve Soil pH for Faster Citrus Growth

Citrus thrives in slightly acidic soil (pH 6–6.8).

If soil is too alkaline, plants show yellowing and slow growth.

How to Make Soil Slightly Acidic

  • Add coffee grounds
  • Add compost regularly
  • Use diluted vinegar spray (1 tbsp vinegar in 1 liter water, once every 3 months)

Healthy soil = fast citrus growth.


10. Use the “Flower Boosting Formula” for Faster Fruiting

Once your citrus plant grows 1–2 years old, use this formula to encourage early flowering.

Flower Booster Mix

  • 1 tablespoon bone meal
  • 1 tablespoon banana peel powder
  • 1 tablespoon wood ash

Mix with soil once every 45 days.

Benefits

  • Promotes early flower formation
  • Increases number of flowers
  • Strengthens fruit set
  • Reduces flower drop

This is one of the strongest natural tricks for faster citrus fruiting.


11. Seasonal Care Tips (Very Important)

Summer Care

  • Provide extra water
  • Mulch soil
  • Avoid heavy pruning

Monsoon Care

  • Reduce watering
  • Protect from fungal issues

Winter Care

  • Give maximum sunlight
  • Avoid nitrogen fertilizers
  • Apply phosphorus-rich fertilizers

Seasonal care ensures continuous growth throughout the year.


12. Bonus Tip: Don’t Let Citrus Plants Fruit Too Early

If your citrus plant is young (less than 1 year old):

  • Remove any flowers or tiny fruits.
    This helps the plant focus on growing faster instead of wasting energy on fruiting.

Conclusion

Growing citrus trees faster is not difficult—it’s all about giving the plant what it needs: proper sunlight, balanced nutrients, healthy soil, good watering habits, and protection from pests. With these simple yet powerful techniques, your citrus trees will grow lush, strong, and ready to fruit much earlier than expected.

Whether you’re growing lemons, oranges, kinnow, mosambi, or limes, these tips will help you achieve healthier and faster-growing citrus plants right at home or on your balcony.

DIY Natural Rooting Powder: The Cheapest and Most Effective Way to Multiply Plants at Home

DIY Natural Rooting Powder: The Cheapest and Most Effective Way to Multiply Plants at Home

Propagating plants is one of the most exciting parts of gardening. Whether you’re growing indoor plants, succulents, herbs, flowers, or fruit trees, the ability to multiply your plants for free is a huge advantage. Many gardeners use commercial rooting hormones to help cuttings develop strong roots, but these products can sometimes be expensive, synthetic, or hard to find.

But here’s the good news—you can make your own DIY plant rooting powder at home using simple, natural ingredients that are extremely cheap yet surprisingly effective. In this complete 1200-word guide, you’ll learn how to make homemade rooting powder, how to use it, and why it works so well. This natural method boosts success rates and helps cuttings root faster and stronger without chemicals.


Why Use a Rooting Powder?

When you take a cutting from a plant, it needs to develop new roots to survive. Some plants root easily, while others struggle. Rooting powders help in many ways:

Stimulates quick root growth

Protects the cutting from fungal infections

Increases the survival rate of new plants

Encourages strong, healthy root development

Helps difficult-to-root plants propagate successfully

Commercial rooting powders usually contain synthetic auxins (rooting hormones). But natural ingredients can provide similar benefits by disinfecting, protecting, and stimulating root cells.


Why Make Your Own Natural Rooting Powder?

Homemade rooting powder is popular among gardeners for several reasons:

100% natural and chemical-free

Perfect for organic gardening.

Cheap and easily available

All ingredients are already in your kitchen.

Safe for all plants

Houseplants, succulents, woody cuttings, flowers, herbs, fruit plants—everything!

Long shelf life

Your homemade powder can last up to one year if stored properly.

Better for the environment

No plastic packaging or synthetic chemicals.

Let’s dive into how you can make different types of rooting powders that work just as well as commercial products.


3 Best DIY Natural Rooting Powders You Can Make at Home

Below are the three most effective and easy-to-make natural rooting powders. Choose whichever is convenient—the results are amazing!


1. Cinnamon Rooting Powder (Most Popular & Highly Effective)

Cinnamon is not just a spice—it’s a powerful natural antifungal agent. It prevents infections and stimulates root formation.

Ingredients Needed

  • Ground cinnamon (any type)

How to Make It

  1. Put 2–3 tablespoons of ground cinnamon in a clean container.
  2. No mixing or processing needed—it’s ready to use!

How to Use Cinnamon as Rooting Powder

  1. Dip the cutting’s end in water.
  2. Roll it in powdered cinnamon.
  3. Shake off extra powder.
  4. Plant the cutting immediately in soil or cocopeat.

Why Cinnamon Works

  • Prevents fungal diseases
  • Speeds up callus formation
  • Helps root cells multiply
  • Safe for all plants

Cinnamon is the best and easiest rooting powder for beginners.


2. Turmeric Rooting Powder (Anti-Rot & Anti-Fungal Hero)

Turmeric contains curcumin, known for strong antiseptic properties. It keeps cuttings healthy and prevents decay.

Ingredients

  • Ground turmeric powder

How to Make It

  1. Add 2 tablespoons of turmeric in a clean glass jar.
  2. Close the lid tightly.
  3. Your rooting powder is ready in seconds.

How to Use Turmeric

  1. Dip cutting in water.
  2. Touch it lightly in turmeric powder.
  3. Plant in moist soil or potting mix.

Benefits

  • Prevents root rot
  • Keeps pests and fungi away
  • Excellent for soft-stem cuttings like mint, coleus, basil

Turmeric is particularly helpful in humid climates where fungal infections are common.


3. Willow Bark Rooting Powder (Contains Natural Rooting Hormones)

Willow bark (from willow trees) naturally contains salicylic acid and indolebutyric acid (IBA)—the same hormones found in commercial rooting gels.

If you want the strongest natural hormone-based rooting powder, this one is for you.

What You Need

  • Small twigs of willow tree
  • Knife
  • Sunlight or oven
  • Grinder/blender

How to Prepare It

  1. Collect thin green willow branches (finger-width).
  2. Peel the bark from the branches.
  3. Dry the bark under sunlight for 2–3 days.
  4. Once fully dry, grind into fine powder.
  5. Store in airtight container.

How to Use Willow Bark Powder

  • Simply dip the cut end of the cutting in the powder.
  • Plant it immediately.

Why Willow Bark Is Amazing

  • Natural source of IBA (rooting hormone)
  • Enhances fast and strong root growth
  • Great for hard-to-root plants like roses, bougainvillea, hibiscus

If you don’t have a willow tree nearby, cinnamon or turmeric works perfectly fine.


How to Use Homemade Rooting Powder Properly

Even the best rooting powder won’t work unless used correctly. Follow these steps for maximum success:

Step 1: Take Healthy Cuttings

  • Choose a disease-free stem
  • 4–6 inches long
  • At least 2–3 leaf nodes

Step 2: Make a Clean Cut

  • Cut at a 45-degree angle for maximum surface area.

Step 3: Dip into Water First

  • This helps the powder stick to the stem.

Step 4: Coat with Rooting Powder

  • Dip only the cut end.
  • Shake off extra powder.

Step 5: Plant in Moist Soil

  • Use well-draining soil or cocopeat.
  • Avoid planting too deep.

Step 6: Provide Proper Care

  • Keep the plant in bright, indirect light.
  • Maintain humidity.
  • Do not overwater.

Within 2–4 weeks, you’ll notice new roots developing.


Which Plants Can You Propagate Using Homemade Rooting Powder?

Your DIY rooting powder works for almost all plants, such as:

Indoor Plants

Pothos
Snake plant
ZZ plant
Dieffenbachia
Spider plant

Outdoor Plants

Rose
Hibiscus
Jasmine
Bougainvillea
Oleander

Herbs

Mint
Basil
Rosemary
Thyme

Succulents

Jade
Echeveria
Aloe (cuttings only)

Fruit & Flowering Shrubs

Lemon
Guava
Mulberry
Chili
Peperomia

Natural rooting powders work safely and effectively on every variety.


Tips to Improve Rooting Success

Here are expert-level tips to increase your propagation success rate:

Keep Soil Slightly Moist

Never let it dry out completely.

Provide Bright Indirect Sunlight

Direct sun can stress freshly planted cuttings.

High Humidity Speeds Rooting

You can cover the cutting with:

  • A plastic bottle dome
  • A clear plastic bag
    to maintain moisture.

Remove Extra Leaves

Too many leaves cause dehydration.

Be Patient

Some plants take 3–6 weeks to root. Woody plants may take even longer.

Use Clean Tools

Dirty scissors spread diseases.


How to Store Your Homemade Rooting Powder

To keep your powder effective for months:

  • Store in an airtight glass container
  • Keep in a cool, dry place
  • Avoid moisture exposure
  • Do not dip cuttings directly into the jar (use a spoon)

Stored properly, your rooting powder can last up to 12 months.


Frequently Asked Questions

1. Can we mix cinnamon and turmeric together?

Yes, mixing both increases antifungal protection. Many gardeners use a 50-50 mix.

2. Does this work as fast as commercial rooting hormone?

Natural rooting powders may take slightly longer, but they are very effective, safe, and cheap.

3. Can I use these powders on water propagations?

No. Rooting powders wash off in water. They are only for soil-based propagation.

4. Why are my cuttings rotting?

You might be:

  • overwatering
  • using heavy soil
  • exposing cuttings to direct sunlight

Try using cocopeat and keep moisture balanced.


Conclusion

Making your own DIY natural rooting powder is one of the simplest and most useful tricks every gardener should know. Not only is it cheap, organic, and safe for all plant types, but it also helps your cuttings root faster and healthier. Whether you choose cinnamon, turmeric, or willow bark, each method is effective and beginner-friendly.

With this homemade rooting powder, your garden will grow faster, fuller, and more beautiful—without spending a single extra rupee!

Grow Juicy Blackberries at Home: A Complete Guide to Planting Blackberries from Seeds

Grow Juicy Blackberries at Home: A Complete Guide to Planting Blackberries from Seeds

Blackberries are one of the most rewarding fruits you can grow right in your backyard or even in containers on a terrace or balcony. These sweet, slightly tangy berries are packed with antioxidants, vitamins, and flavor—perfect for fresh eating, smoothies, jams, and desserts. Most gardeners prefer growing blackberries from cuttings or nursery plants, but growing them from seeds is a fun, cost-effective, and satisfying method that lets you watch the entire plant life cycle from start to finish.

In this detailed guide, you’ll learn how to plant blackberries from seeds at home, from collecting or preparing seeds to germination, transplanting, and caring for your young berry plants. With patience and proper technique, you can enjoy fresh, homegrown blackberries straight from your garden.


Why Grow Blackberries from Seeds?

Growing from seeds requires some patience, but it also offers several benefits:

Cost Saving

Buying blackberry plants can be expensive. Seeds allow you to grow multiple plants at a very low cost.

Genetic Diversity

Plants grown from seeds may vary slightly, producing unique flavors and growth habits. Sometimes these variations are even better than the parent plant.

Educational & Fun

For home gardeners, especially beginners, seed propagation is a rewarding learning experience.

More Plants for Your Garden

A single blackberry fruit contains several seeds—you can grow many plants from just one berry.


Step 1: Collecting and Preparing Blackberry Seeds

You can either buy blackberry seeds or extract them from fresh fruits.

A. Extracting Seeds from Fresh Berries

If you want to extract seeds yourself:

  1. Choose fully ripe, dark-black, plump berries.
  2. Mash the berries gently in a bowl.
  3. Add water and stir.
    • Healthy seeds sink, while pulp and bad seeds float.
  4. Pour off the floating debris.
  5. Collect the seeds from the bottom.
  6. Spread them on tissue paper or a plate and let them dry for 2–3 days.

B. Buying Seeds

If you prefer consistent quality, go for packaged seeds, which are already cleaned but still require stratification.


Step 2: Stratification (Cold Treatment) — The Most Important Step!

Blackberry seeds won’t germinate unless they go through a cold period, just like they do naturally in winter. This process is called stratification.

How to Stratify Blackberry Seeds at Home

  1. Take a small zip-lock bag.
  2. Mix seeds with moist (not wet!) peat moss, cocopeat, or vermiculite.
  3. Seal the bag.
  4. Place it in the refrigerator (not freezer!) for 8–12 weeks at 2–5°C.

This cold treatment breaks seed dormancy and triggers germination.

Tip:

Mark the date on the bag so you can track the stratification time easily.


Step 3: Sowing the Seeds After Stratification

After 8–12 weeks, it’s time to sow the seeds.

Soil Mix for Sowing

Blackberry seeds prefer a light, well-draining mix:

  • 40% cocopeat or peat moss
  • 30% perlite or sand
  • 30% compost or vermicompost

How to Plant the Seeds

  1. Fill seed trays, cups, or small pots with the mixture.
  2. Sow seeds ¼ inch (0.5 cm) deep.
  3. Lightly cover with soil.
  4. Water gently using a spray bottle.
  5. Place the pots in a warm, bright spot but away from direct harsh sunlight.

Temperature for Germination

  • Ideal: 18–24°C
  • Germination takes 2 to 6 weeks depending on conditions.

Step 4: Caring for the Seedlings

Male Gardener mulching a planting blackberry, gardening and garden care of plants

Once seedlings appear, your baby blackberry plants need special care.

Light

  • Give them 4–6 hours of indirect sunlight.
  • After 3–4 weeks, expose them to morning sun for 1–2 hours.

Watering

  • Keep the soil slightly moist, not soggy.
    Overwatering can cause root rot.

Ventilation

  • Good airflow prevents fungal infections.

Feeding

  • After 4–5 weeks, apply a very mild liquid fertilizer once every 15 days.

Step 5: Transplanting the Seedlings

After the seedlings reach 4–6 inches in height and have strong roots, transplant them into bigger pots or ground.

For Container Growing

Choose a container:

  • 12–18 inch pot
  • Has good drainage holes

Ideal Soil Mix

  • Garden soil – 40%
  • Compost – 40%
  • Sand/perlite – 20%

Planting

  • Plant them 1–2 inches deeper than they were in the seed tray.
  • Water thoroughly after transplanting.

Step 6: Growing Blackberry Plants to Maturity

Blackberry plants are hardy but need proper care to grow vigorously.

1. Sunlight

Blackberries love sunlight.

  • Provide 6–8 hours of direct sunlight daily.

2. Watering

  • Keep soil moist during the first year.
  • Once established, blackberries become drought tolerant.

3. Feeding

Use an organic fertilizer:

  • Compost
  • Vermicompost
  • Cow dung manure
  • Or a balanced NPK 10-10-10

Feed your plants every 4–6 weeks during the growing season.

4. Mulching

Mulch helps retain moisture and control weeds.

Use:

  • Straw
  • Dry leaves
  • Wood chips

5. Support System

Some blackberry varieties grow tall; provide:

  • Stakes
  • Trellis
  • Wires

This keeps the plant off the ground and improves air circulation.


Step 7: Flowering and Fruiting

With good care, blackberry plants from seeds begin fruiting:

  • Typically in 2–3 years
  • Some may take up to 4 years

What to Expect

  • First-year growth is mostly vegetative.
  • Flowers form on second-year canes.
  • Berries change from green → red → black when ripe.

Step 8: Harvesting Your Homegrown Blackberries

Harvest only when:

  • The berries turn deep black
  • They come off easily with a gentle pull
  • They feel soft and juicy

Tip:

Blackberries don’t ripen after harvesting, so pick them only when fully ripe.


Common Problems & Solutions

Poor Germination

  • Caused by skipping stratification
    Solution: Always cold-stratify seeds.

Mold on Soil

  • Caused by overwatering
    Solution: Improve ventilation, reduce watering.

Seedlings Turning Yellow

  • Caused by nutrient deficiency
    Solution: Apply mild liquid fertilizer.

Slow Growth

  • Caused by low sunlight
    Solution: Provide at least 6 hours of direct sunlight after transplanting.

Final Tips for Successful Blackberry Growing

  • Be patient—seed-grown blackberries take longer than nursery plants.
  • Use organic fertilizers for the best fruit taste.
  • Keep pruning old canes to encourage new growth.
  • Protect young plants from extreme heat or frost.

Conclusion

Growing blackberries from seeds at home is a rewarding gardening project. From preparing seeds and stratifying them to nurturing the seedlings and finally harvesting juicy berries—every stage brings you closer to nature. With patience, proper care, and the right environment, you can enjoy fresh, organic blackberries grown right in your home garden or balcony.

Whether you’re a beginner or an experienced gardener, planting blackberries from seeds will give you a deeper appreciation for the process of growing fruit-bearing plants.

DIY Hydroponics Made Easy: A Complete Step-by-Step Guide to Building Your Own Home System

DIY Hydroponics Made Easy: A Complete Step-by-Step Guide to Building Your Own Home System

Hydroponics is transforming the way people grow food at home. Instead of relying on soil, hydroponic systems allow plants to grow in nutrient-rich water, producing faster growth, bigger harvests, and healthier plants. Whether you live in an apartment, have limited outdoor space, or simply want a modern and efficient way to garden, hydroponics is the perfect solution.

If you’ve ever wanted to grow fresh herbs, leafy greens, vegetables, or even fruit indoors, this guide will walk you through exactly how to build a hydroponic system at home—from choosing the right design to assembling it step-by-step. Even if you’re a beginner with zero experience, you can easily build a functional, high-yield hydroponic system using simple and affordable materials.

Let’s get started on your journey to a clean, soil-free, and highly productive garden!


What Is Hydroponics and Why Should You Try It?

Hydroponics is a method of growing plants in water instead of soil. The water is enriched with essential nutrients and oxygen, allowing plants to absorb everything they need directly through their roots.

Major Benefits of Hydroponics:

Faster Plant Growth

Plants grow 30–50% faster because nutrients are immediately available.

Uses Less Water

Hydroponic systems use up to 90% less water than traditional gardening.

Grow in Small Spaces

Perfect for balconies, kitchens, windowsills, basements, and small apartments.

No Soil Problems

No weeds, no pests hiding in soil, no messy dirt.

Clean, Healthy Plants

Hydroponic plants are cleaner, more nutritious, and pesticide-free.

Hydroponics is efficient, eco-friendly, and surprisingly easy to set up. You just need the right materials and a proper plan.


Choosing the Right Hydroponic System for Beginners

Before building your setup, it’s important to choose a simple and effective system. Here are the best beginner-friendly options:


1. Deep Water Culture (DWC) System

This is the easiest system to build at home.

  • Plants sit in net pots
  • Roots hang directly in nutrient solution
  • An air pump provides oxygen

Ideal for: lettuce, spinach, herbs, strawberries


2. Kratky Method (No Electricity Needed)

This passive hydroponic system requires no pump, making it beginner-friendly and silent.

  • Plants grow in jars, buckets, or containers
  • Nutrient solution stays still
  • Water level drops as roots grow

Ideal for: leafy greens, basil, green onions


3. Nutrient Film Technique (NFT)

A more advanced system where water flows continuously over roots.

  • Best for long-term setups
  • Requires a pump and PVC pipes

Ideal for: commercial-style indoor gardening


For this article, we’ll focus on the easiest system to build at home: the Deep Water Culture (DWC) System, along with a simpler version using the Kratky method.


Materials You Need to Build a Home Hydroponic System

Here’s what you need to build a DWC system using a bucket or container:

Tools & Supplies

  • 1 plastic bucket or storage container (10–20 liters)
  • Net pots (2-inch or 3-inch)
  • Hydroponic nutrient solution (liquid fertilizer)
  • Air pump + air stone (like aquarium type)
  • Flexible air tube
  • Growing medium (clay pebbles, coco chips, or rockwool)
  • Drill or sharp cutter to make holes
  • pH meter or pH strips
  • Measuring cup

These materials are inexpensive and available online or in gardening shops.


How to Build a DWC Hydroponic System at Home (Step-by-Step)

Follow these simple steps to create a strong and long-lasting hydroponic setup.


Step 1: Prepare the Container

Choose a dark-colored bucket or box. Light causes algae, so avoid transparent containers.

If using a lid:

  • Draw circles using net pot size
  • Drill or cut holes so net pots fit snugly

You can usually fit 3–6 plants depending on container size.


Step 2: Install the Air Pump

Plants need oxygen in the water to prevent root rot.

  • Place the air pump outside the container
  • Attach the air tube
  • Connect tube to the air stone
  • Place air stone inside the bucket

This will constantly oxygenate the nutrient solution.


Step 3: Add Nutrient Solution

Fill the container about 70% with water.

Add:

  • Hydroponic nutrients according to the label
  • Mix well until dissolved
  • Adjust pH to 5.5–6.5 (ideal for most plants)

pH too high? Add a little lemon juice.
pH too low? Add a few drops of baking soda.


Step 4: Prepare Your Plants

You can start with:

  • Seedlings in rockwool
  • Rooted cuttings
  • Small nursery plants washed free of soil

Place the seedling inside the net pot and fill around it with clay pebbles to keep it upright.


Step 5: Place Net Pots into the Lid

Make sure:

  • Bottom of net pot touches the water slightly
  • Roots should grow into the nutrient solution naturally
  • Water level can be adjusted weekly

Turn on the air pump.

Your hydroponic system is officially running!


How to Build a Hydroponic System Without Electricity (Kratky Method)

If you want an even simpler method, try the Kratky technique.

You Need:

  • A jar, bottle, or container
  • Net pot
  • Nutrient solution
  • Clay pebbles
  • Seedling

Steps:

  1. Fill container with nutrient water.
  2. Insert net pot with seedling.
  3. Leave an air gap of 2–3 cm for oxygen.
  4. Do not refill water until plant harvest.

This method is best for leafy greens and herbs.


Which Plants Grow Best in Hydroponic Systems?

Hydroponics can grow almost anything, but some plants perform exceptionally well:

Easy Plants:

  • Lettuce
  • Spinach
  • Kale
  • Basil
  • Mint
  • Coriander
  • Green onions

Intermediate:

  • Tomatoes
  • Peppers
  • Cucumbers
  • Strawberries

Advanced:

  • Melons
  • Root vegetables

Start with easy crops for guaranteed success.


Hydroponic System Maintenance Tips

To keep your system healthy and productive, follow these basic care instructions:


1. Check pH Regularly

Ideal range: 5.5–6.5
Incorrect pH can stop nutrient absorption.


2. Change Nutrient Water Every 2 Weeks

Fresh nutrients = faster growth and clean roots.


3. Keep Roots Oxygenated

Make sure the air pump runs 24/7 in DWC systems.


4. Keep the System Clean

Algae and bacteria can spread quickly. Clean containers with mild soap every month.


5. Provide Adequate Light

If growing indoors:

  • Use LED grow lights
  • Keep them 8–12 inches above plants
  • Provide 12–14 hours of light daily

Troubleshooting Common Hydroponic Problems

Yellow Leaves

Cause: Nutrient deficiency
Fix: Add fresh nutrients or adjust pH.

Slimy Roots (Root Rot)

Cause: Low oxygen
Fix: Increase aeration and clean water.

Algae Growth

Cause: Too much light in water
Fix: Use dark containers and keep roots shaded.

Slow Growth

Cause: Weak nutrients or low light
Fix: Increase nutrient concentration or improve lighting.


Why Hydroponics Is Perfect for Modern Homes

As cities become more crowded and outdoor space becomes limited, hydroponics offers a smart and sustainable way to grow fresh food. It combines science, creativity, and convenience—making gardening possible for anyone, anywhere.

You can turn a:

  • Kitchen countertop
  • Balcony
  • Window corner
  • Spare shelf
  • Small room

…into a thriving mini-garden that produces fresh vegetables year-round.

And the satisfaction of eating food you grew yourself—clean, organic, and pesticide-free—is unmatched.


Final Thoughts

Building a hydroponic system at home is one of the most rewarding and exciting projects for plant lovers. Whether you choose a simple Kratky jar setup or a more advanced Deep Water Culture system, hydroponics gives you the power to grow fresh food without soil, messy tools, or constant maintenance.

Once you set it up, the system practically runs on its own—and the results are fast, healthy, and impressive. This modern gardening method is perfect for beginners, families, students, or anyone dreaming of a green, productive home.

Multiply Your Aloe Plants Like a Pro: Two Foolproof Methods Anyone Can Try at Home

Multiply Your Aloe Plants Like a Pro: Two Foolproof Methods Anyone Can Try at Home

Aloe vera is one of the most loved houseplants—beautiful, low-maintenance, and incredibly useful. Whether you keep it for its medicinal gel, air-purifying qualities, or simply its aesthetic appeal, aloe is a plant that rewards you with fast growth and easy propagation. If you’ve ever wanted to multiply your aloe plants to create a fuller garden, share with friends, or expand your indoor greenery, you’ll be happy to know it can be done with very little effort.

In this guide, you’ll learn two super-easy methods to grow aloe at home and multiply your plants naturally. Both methods work perfectly for beginners and require minimal tools and time. Let’s dive into the world of aloe propagation and turn a single plant into many!


Why Aloe Is One of the Easiest Plants to Multiply

Before we get into the propagation methods, it’s important to understand why aloe multiplies so easily. Aloe is a succulent, meaning it stores water in its thick fleshy leaves. This adaptation helps the plant survive tough conditions, making it incredibly hardy.

Aloe has a natural habit of producing pups (baby plants) around the base. These babies grow from the mother plant’s root system and can be separated to create new, independent plants. Aloe also regrows well from leaf cuttings, although this method requires some patience.

The best part? Aloe propagation doesn’t require fertilizers, hormones, or special soil mixes. A sunny windowsill and well-draining soil are enough to help your new plants thrive.


METHOD 1: Growing Aloe from Offsets (Pups)

The Easiest and Most Successful Method for Beginners

If you want guaranteed results, propagating aloe from pups is hands down the most reliable method. These baby plants are already genetically identical to the mother plant and begin growing immediately once separated.


Step 1: Identify Healthy Aloe Pups

Look at the base of your aloe plant. You’ll often notice smaller aloe rosettes clustered around the main plant. These are pups.
Choose pups that meet the following criteria:

  • At least 3–5 inches tall
  • Have their own root system
  • Look firm, green, and healthy
  • Growing slightly away from the mother plant

If the pup has a few roots attached, it will adapt extremely fast after separation.


Step 2: Remove the Aloe Pup Safely

Here’s how to separate the pup without harming the mother plant:

  1. Water the plant lightly one day before, to soften the soil.
  2. Gently remove the entire aloe plant from its pot.
  3. Brush away soil from the roots.
  4. Locate the pup and carefully cut or pull it away from the mother plant.
  5. Make sure the pup has at least 1–2 inches of roots attached.

If it doesn’t have roots, don’t worry—you can still root it, but it will take a bit longer.


Step 3: Let the Pup Dry (Callusing)

Place the separated pup on a plate or tray in a dry, shaded place for 24–48 hours.
This allows the cut area to dry and prevents rot when planted.

Aloe plants are desert natives, so they naturally seal their wounds—like magic!


Step 4: Plant the Pup in the Right Soil

Use a well-draining soil mix. You can choose:

  • Cactus/succulent potting mix
    or
  • DIY mix: 50% sand + 25% garden soil + 25% compost

Plant the pup so its roots are covered but the rosette stays above the soil.


Step 5: Water Carefully

After planting:

  • Do not water immediately.
  • Wait for 5–7 days, then water lightly.

Aloe hates wet feet and prefers to settle in the soil before moisture is added.


RESULT:

Within 2–3 weeks, the pup will start growing new roots. In 1–2 months, you’ll see fresh leaves emerging—your new aloe is thriving!


METHOD 2: Growing Aloe from Leaf Cuttings

Perfect for Experimenters (Results Vary but Still Fun!)

While this method is a bit less reliable, it’s still possible to grow aloe from a single leaf. The process is slow but satisfying.


Step 1: Choose a Healthy Leaf

Pick a thick, mature leaf from the outer sections of the plant. Healthy leaves will feel plump and firm.

Cut it cleanly using:

  • A sharp knife or scissors
  • Sterilized blade (wiped with alcohol)

A clean cut reduces the chance of infection or rot.


Step 2: Dry the Leaf

Place the leaf in a shaded place for 4–7 days until the cut tip forms a hard callus.

This step is crucial—planting a fresh cut can cause the leaf to rot instantly.


Step 3: Plant the Leaf Vertically

Prepare a pot with sandy, well-draining soil.

Insert the callused end of the leaf 1–2 inches deep into the soil. Make sure the leaf stays upright.

Water lightly only once every 10–14 days because leaf cuttings rot easily.


Step 4: Be Patient

Leaf propagation takes time:

  • Roots may take 3–6 weeks to form
  • New baby aloe plants develop at the base slowly over 2–3 months

Not all leaves will root successfully, but the ones that do will reward you with beautiful new offspring.


Caring for Your Newly Propagated Aloe Plants

Whether you grow them from pups or leaf cuttings, follow these basic care tips to keep your aloe healthy:


Provide Plenty of Light

Aloe loves:

  • Bright, indirect sunlight
  • 4–6 hours of daily light
  • A sunny windowsill, balcony, or terrace

Avoid harsh midday sun for young plants—it may scorch the leaves.


Water Sparingly

Aloe is drought-tolerant. Overwatering is the number one killer.

Water only when:

  • The top 2 inches of soil are completely dry
  • Pot feels very light
  • Leaves are slightly wrinkled

Always drain excess water. Never let aloe sit in standing water.


Choose the Right Pot

Use:

  • Clay/terracotta pots (best for drainage)
  • Pots with several holes
  • Medium-sized pots—not too large

Aloe prefers slightly tight spaces and grows better in compact pots.


Use Occasional Fertilizer

Feed your aloe once every 2 months during the growing season (spring/summer) using:

  • Diluted seaweed fertilizer
  • Succulent fertilizer
  • Organic compost tea (very light)

Avoid heavy feeding—it can burn the roots.


Remove Dead Leaves

Trim off:

  • Brown leaves
  • Mushy or damaged parts
  • Dried pups

This helps the plant focus energy on new growth.


Common Problems and How to Avoid Them

Leaves Turning Brown or Yellow

Cause: Overwatering
Solution: Reduce watering, repot in dry soil.

Soft and Mushy Leaves

Cause: Root rot
Solution: Cut healthy sections and propagate again.

Slow Growth

Cause: Low light
Solution: Move plant to a brighter area.

No Roots on Pups

Cause: Too early separation
Solution: Let pup grow bigger before removing.


Final Thoughts

Multiplying your aloe plants at home is truly rewarding. Whether you choose the fast and reliable pup method or the experimental leaf method, you’ll find aloe propagation simple, fun, and beginner-friendly. Aloe is one of those plants that keeps giving—once you master these techniques, you’ll never need to buy aloe again.

With patience and care, your aloe collection will grow beautifully, bringing greenery, healing, and natural beauty into your home.