Create Your Own Hybrid Hibiscus at Home: Complete Guide to Making Hibiscus Seeds (FULL UPDATES)

Create Your Own Hybrid Hibiscus at Home: Complete Guide to Making Hibiscus Seeds (FULL UPDATES)

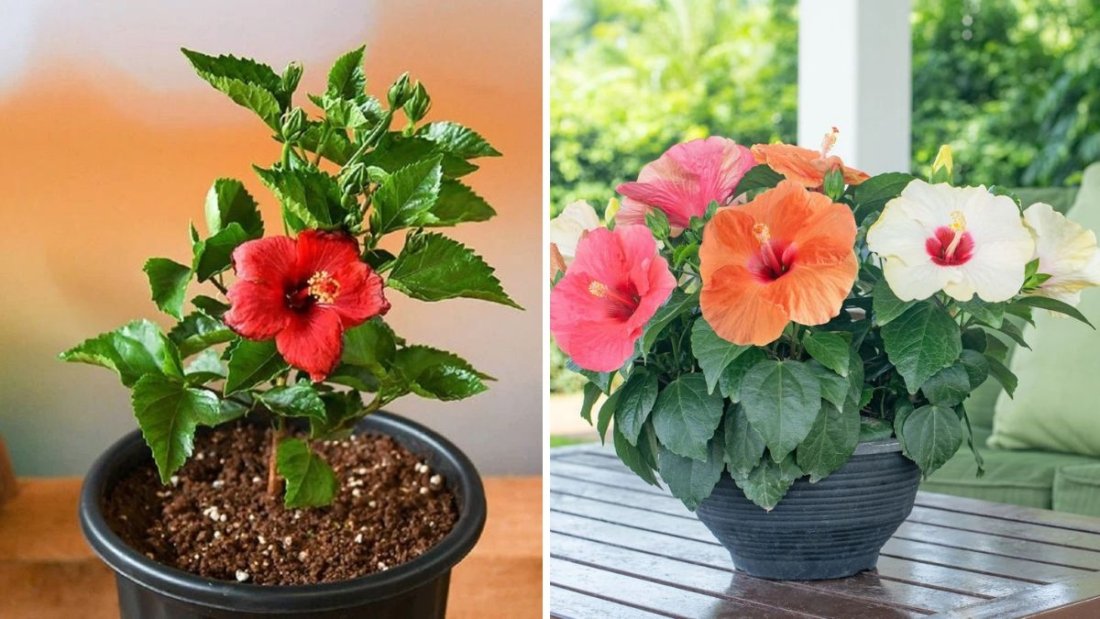
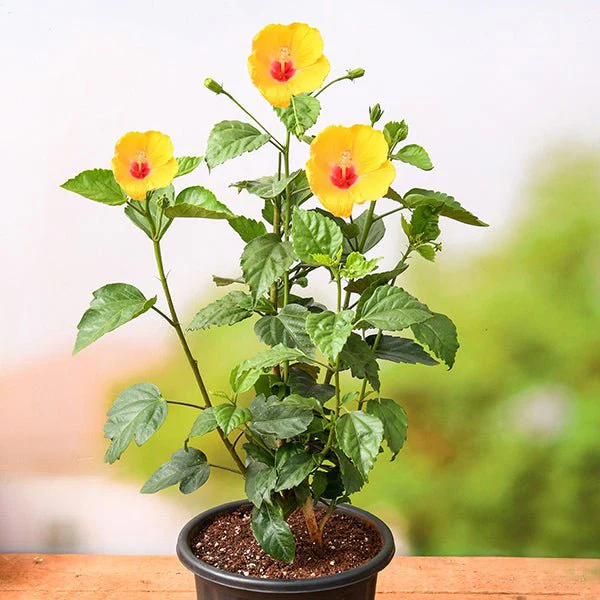
Hibiscus is one of the most stunning and diverse flowering plants in home gardens. From giant dinner-plate blooms to compact double-flowered varieties, hibiscus comes in thousands of colors and shapes. But did you know you can create your own unique hybrid hibiscus at home?

Yes! You can cross two hibiscus plants, create hybrid seeds, grow them, and enjoy completely new flowers—colors and patterns that nature hasn’t made yet but you will!

This complete guide teaches you, step-by-step, how to make hybrid hibiscus or hibiscus seeds at home, including full updates from pollination to seed harvest. Perfect for beginners and gardening enthusiasts!

Let’s begin your journey into hibiscus hybridization.


What Is a Hybrid Hibiscus?

A hybrid hibiscus is created when pollen from one hibiscus flower (male parent) is transferred to another hibiscus flower (female parent).
The seeds produced from this cross grow into plants with mixed traits.

You can create hybrids with:
New color combinations
Bigger flowers
Double petals
Different patterns or stripes
More compact plant structure
Better heat tolerance

Most hybrid hibiscus varieties around the world are created by simple hand pollination—something anyone can do at home!


What You Need Before Making Hybrid Hibiscus

To create hibiscus seeds, you need:

Two Healthy Hibiscus Plants

  • Choose two different varieties
  • Pick plants that bloom actively
  • Make sure they are pest-free and well-fed

These will be your Parent A and Parent B.

Basic Tools

  • A soft paintbrush or earbud
  • Small scissors or tweezers
  • Paper tags / small slips
  • A pen or marker
  • A small mesh bag or clean paper bag

That’s it—very simple and beginner-friendly!


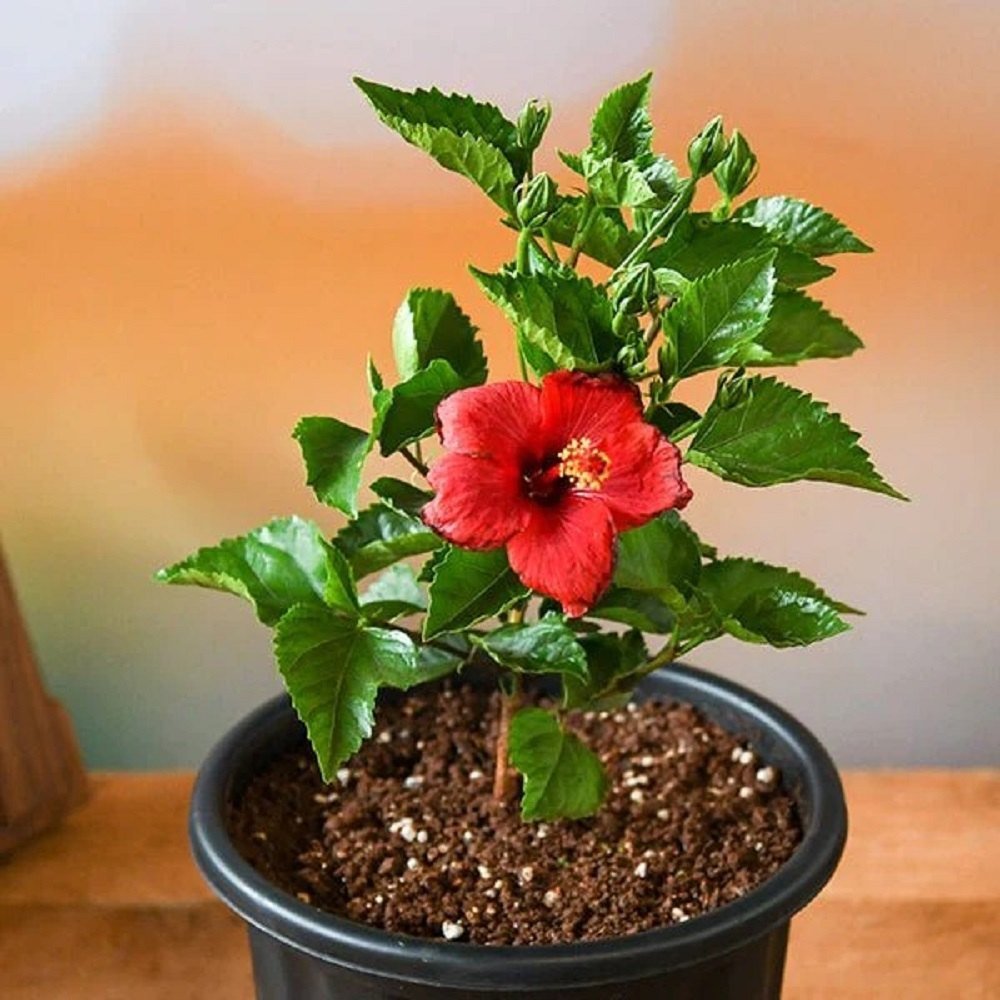
Choosing Parent Flowers

This step decides the future look of your hybrid flower. Choose wisely!

Female Parent (Mother)

Select a flower with:

  • Strong plant growth
  • Plenty of buds
  • Good resistance to heat/pests

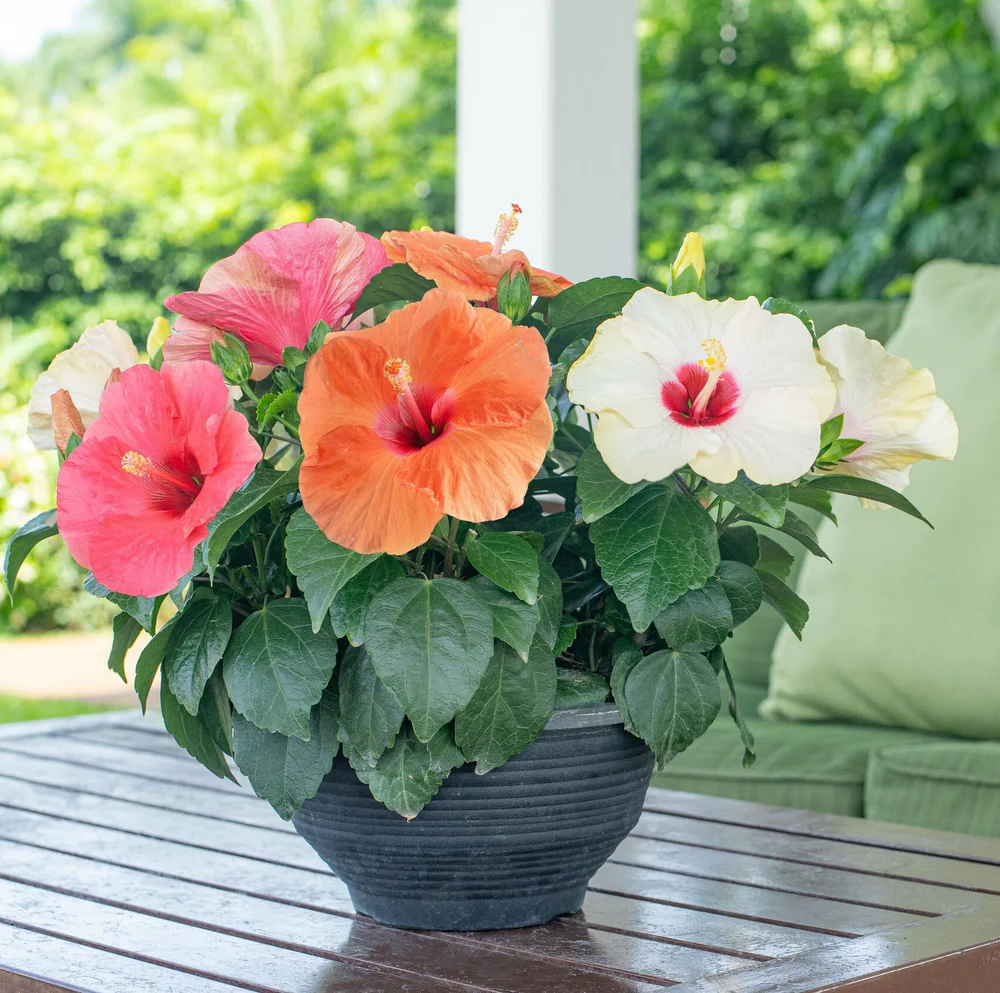
Male Parent (Father)

Choose a flower with:

  • Beautiful color or pattern
  • Larger bloom size
  • Unique shape (double, fringed, ruffled)

Example:
You like the color of one hibiscus but the size of another.
When you cross them → you may get large flowers with unique colors.


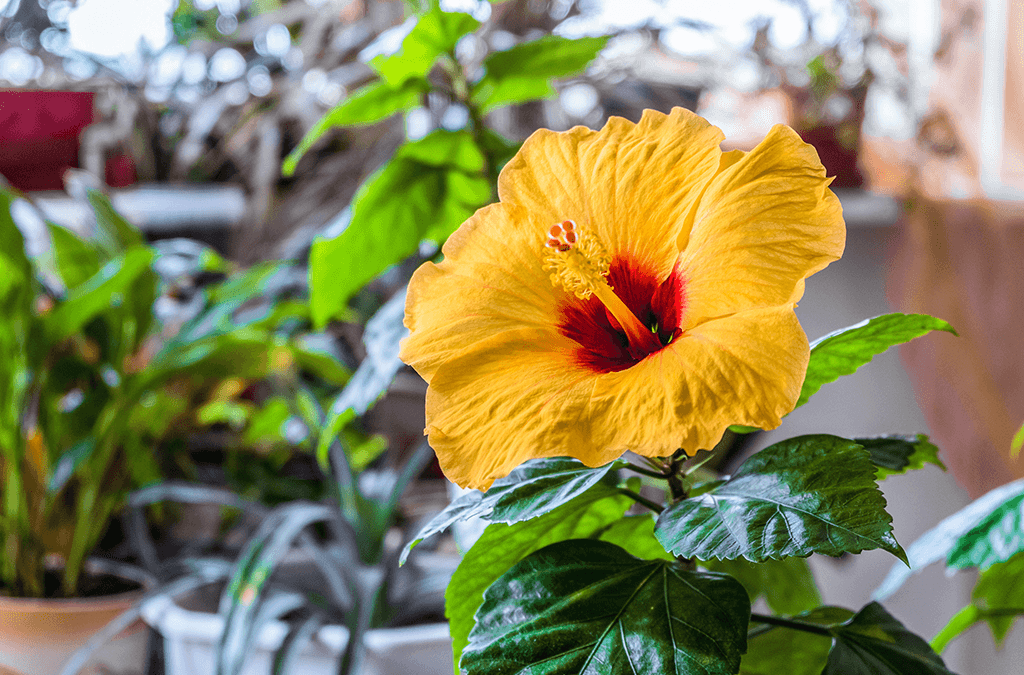
How Hibiscus Pollination Works

Each hibiscus flower has:

  • Stigma → female part (tip of the pistil)
  • Pollen → male part (yellow powder on the stamens)

Creating hybrids means placing pollen from Parent A onto the stigma of Parent B.
Mother plant = the one that forms the seed pod.


Step-by-Step: How to Make Hybrid Hibiscus Seeds at Home

Below is the complete, easy, and foolproof method.


Step 1: Prepare the Female Flower (Mother Flower)

Choose a fresh flower that will open the next morning.

At evening or early night:

  • Carefully remove all the stamens (the pollen-carrying part) using small scissors
  • Make sure you do NOT touch or damage the stigma
  • This prevents self-pollination

Now your flower is ready for hybridization.

Tag it with a small paper note:
“Mother: Variety Name – Date”


Step 2: Collect Pollen from the Male Flower

Early in the morning (between 6–9 AM):

  • Select a freshly opened flower from the father plant
  • Using a brush or earbud, collect yellow pollen
  • You can also remove the entire stamen and use it directly

Pollen should look fresh, dry, and powdery.


Step 3: Apply Pollen to the Female Flower

Now gently:

  • Touch the brush or stamen to the sticky stigma of the mother flower
  • Apply pollen thoroughly
  • Make sure the stigma tip gets coated

This is the moment when the hybrid is created!


Step 4: Protect the Pollinated Flower

To prevent bees, ants, or wind from disturbing the pollination:

  • Cover the flower lightly with a mesh bag
  • Tie gently with a thread or rubber band

Tag the plant again:
“Father: Variety Name – Date of Pollination”

This helps you keep track of the hybrid.


Step 5: Wait for Seed Pod Formation

This stage takes patience!
If pollination is successful:

  • The flower will wilt
  • But instead of falling off
  • The base of the flower (ovary) begins to swell

This is your seed pod!

If the flower falls off → pollination did NOT work.
Try again with timing adjustments.


FULL UPDATES: Seed Development Timeline

Here is the exact timeline from pollination to seed collection.


Week 1: Pollinated Flower Wilts

  • Flower dries
  • Petals fall off naturally
  • The swollen base remains

DO NOT touch the pod.


Week 2–3: Seed Pod Grows Larger

  • Pod becomes firm
  • Shape becomes round or oval
  • Color remains green

Water the plant normally.


Week 4–5: Pod Matures

  • Skin becomes lighter green
  • Surface starts drying
  • Small cracks may appear

This is a sign of seed maturity.


Week 6–7: Pod Dries Completely

  • Turns brown and dry
  • Cracks open naturally
  • Seeds inside turn dark brown or black

Your hybrid seeds are ready!

Collect gently in a clean tray or bowl.


How to Store Hibiscus Seeds

  • Dry them for 24–48 hours in shade
  • Store in a paper envelope
  • Label the hybrid combination
  • Keep in a cool, dry place

Seeds stay viable for 1–2 years.


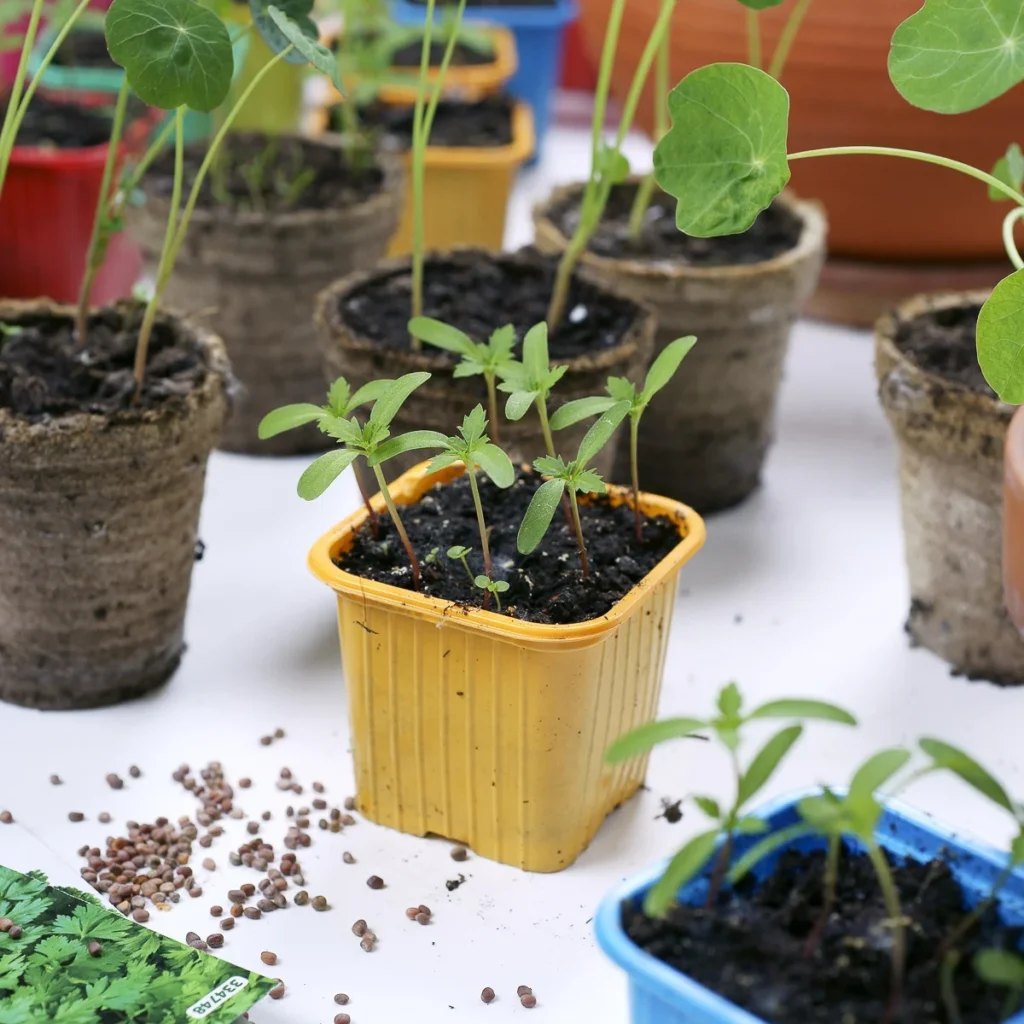
Growing Hybrid Hibiscus Seeds

Once you have your seeds, it’s time to grow the new hybrid baby plants!

Best Soil Mix

  • 50% cocopeat
  • 30% compost
  • 20% sand

Sowing

  • Sow seeds 0.5 cm deep
  • Keep moist
  • Germination takes 10–25 days

Seedling Care

  • Provide bright light
  • Do not overwater
  • Transplant when 4–5 true leaves appear

When Will the Hybrid Bloom?

Hybrid hibiscus plants take:

  • 6–12 months to grow well
  • 9–18 months to show first bloom

The first flower you see will be:
YOUR CREATION.
A flower that did not exist before.
A brand-new hybrid variety made by you!

This moment is magical for every hibiscus lover.


Tips for Successful Hybridization

Choose fresh, healthy flowers
Pollinate early morning
Use dry pollen
Avoid rainy/windy days
Protect the pollinated flower
Tag properly to avoid confusion
Be patient during pod development
Pollinate multiple flowers to increase success chances


Common Problems & Solutions

Flower Falls After Pollination

Cause: Wrong timing
Fix: Pollinate early morning when stigma is sticky

Pod Turns Yellow Early

Cause: Overwatering or fungal infection
Fix: Reduce watering, improve airflow

Seeds Are Pale or Soft

Cause: Pod harvested too early
Fix: Always wait for pod to dry fully

No Seeds Inside

Cause: Incomplete pollination
Fix: Apply pollen more thoroughly next time


Final Thoughts

Creating hybrid hibiscus at home is one of the most exciting and rewarding gardening projects. With just a little effort, you can produce completely new flower varieties that combine the beauty, color, and traits of both parent plants.

From selecting parents to hand-pollinating, watching the seed pod form, and finally growing a plant that blooms with your own unique flower—this journey is magical and unforgettable.

Hybridization teaches patience, creativity, and the joy of discovering something new every time.

So pick your favorite hibiscus flowers, grab a brush, and start creating your own stunning hybrids at home!

Grow Fresh Fenugreek/Methi in Containers: The Easiest Seed-to-Harvest Guide (FULL UPDATES)

Grow Fresh Fenugreek/Methi in Containers: The Easiest Seed-to-Harvest Guide (FULL UPDATES)

Fenugreek, popularly known as Methi, is one of the easiest and fastest-growing leafy vegetables you can grow at home. Whether you live in a flat, have a balcony garden, or simply want a small kitchen garden, growing methi in containers is the perfect choice. It grows quickly, needs very little space, requires almost no maintenance, and gives you fresh, aromatic, and chemical-free leaves within just 20–30 days!

In this complete guide, you will learn how to grow methi from seeds, what soil mix works best, how to harvest repeatedly, and full weekly updates—perfect for beginners and home gardeners. Let’s start growing!


Why Grow Methi in Containers?

Fenugreek is one of the most beginner-friendly leafy vegetables. Here’s why:

  • Grows in 20–30 days
  • Germinates fast (2–4 days)
  • Suitable for any climate
  • Does not need deep pots
  • Zero pest issues for most seasons
  • Regrows after cutting
  • High in nutrition

Even if you’ve never grown anything before, methi will make you feel like a successful gardener instantly!


Best Container for Growing Methi

Methi has shallow roots, so it does NOT need deep or large pots.

Ideal Containers

  • 6–8 inch deep trays
  • Wide plastic containers
  • Rectangular grow trays
  • 8–10 inch pots

Why Wide Containers Are Best

Because methi is a leafy plant, the more seeds you sow, the denser the leaves grow. A wide surface allows you to grow more methi in less space.

Always ensure there are good drainage holes at the bottom.


Perfect Soil Mix for Growing Methi

Fenugreek grows best in a light, airy, well-draining soil mix.

Best Soil Recipe

  • 40% garden soil
  • 30% compost (vermicompost or cow dung)
  • 20% cocopeat
  • 10% sand

Optional add-ons

  • 1 tbsp neem cake powder
  • A handful of leaf mold

This mix ensures:

  • Fast germination
  • Healthy leaf growth
  • Moisture retention without waterlogging
  • Protection from root issues

Sunlight Requirements

Methi is flexible and grows in many light conditions, but for best results:

Give 4–6 hours of direct sunlight

  • Morning sunlight is ideal
  • Avoid harsh afternoon heat in peak summer
  • In winter, keep in full sun

With good sunlight, methi grows greener, fuller, and more aromatic.


Watering Schedule

Methi LOVES moist soil—but not soggy soil.

Watering Routine

  • Water lightly every morning
  • Avoid overwatering
  • Ensure water drains out
  • Keep the soil moist during germination

Signs of Overwatering

  • Yellowing leaves
  • Slow growth
  • Foul smell in soil

Proper watering = lush green leaves + fast growth.


Seed to Harvest: FULL WEEKLY UPDATES

Below is the exact timeline methi follows when grown in containers.


Day 1: Sowing Seeds

You can use:

  • Store-bought methi seeds
  • Methi dana from your kitchen

Both work perfectly.

How to Sow

  • Soak seeds for 6–8 hours (optional but helps faster germination)
  • Sprinkle seeds evenly over the soil surface
  • Cover with a thin layer of soil
  • Water gently
  • Keep in bright shade for 1–2 days

Day 2–4: Germination Starts

Tiny green sprouts appear quickly!

  • Keep soil moist
  • Do NOT overwater
  • Move them gradually into sunlight

This stage shows the fastest growth.


Day 5–10: Seedlings Grow

You will see a dense green carpet.

  • Water lightly every morning
  • Give 4–5 hours sunlight
  • No fertilizer needed yet

Plants will grow 2–3 inches tall.


Day 10–15: Early Leaf Formation

Leaves become bigger and fuller.

  • If growth looks slow, add a handful of compost
  • Check soil moisture daily
  • Start trimming overcrowded areas (optional)

Plants reach 4–5 inches.


Day 15–20: Ready for First Harvest

Congratulations!
You can now start harvesting fresh methi.

How to Harvest Properly

Two methods:

Cut and Come Again

  • Cut leaves 1–2 inches above the soil
  • Roots remain intact
  • Leaves regrow in 7–10 days

This gives multiple harvests from one sowing.

Pull Out Entire Plants

  • Do this if you want full bunches
  • Great for cooking methi paratha, sabzi, or dal

But this method won’t allow regrowth.


Day 20–30: Regrowth & Second Harvest

With the cut-and-come-again method:

  • New shoots grow quickly
  • Leaves become fuller
  • You get another big harvest

You can get 2–3 harvests from one container easily.


Day 30–40: Final Growth Cycle

By this time, methi may start producing seeds or flowering.
If leaves become thin or bitter:

  • Remove old plants
  • Add fresh compost
  • Sow new seeds again

Methi grows so fast that you can repeat this cycle EVERY MONTH!


Fertilizer Guide for Methi

Fenugreek does not need heavy feeding. Light nutrition is enough.

Every 10–12 Days

Add:

  • 1 handful vermicompost
  • OR liquid compost tea
  • OR seaweed extract (optional)

Avoid

Too much nitrogen
Chemical fertilizers

These make methi bitter and reduce aroma.


Common Problems & Solutions

Methi is mostly pest-free, but sometimes issues appear.


1. Yellow Leaves

Cause: Overwatering or poor drainage
Fix: Reduce watering, improve soil aeration


2. Slow Growth

Cause: Low sunlight or nutrient deficiency
Fix: Move to sunnier spot, add compost


3. Fungus During Winter or Monsoon

Cause: Excess moisture
Fix: Neem oil spray every 7–10 days


4. Spindly, tall seedlings

Cause: Insufficient sunlight
Fix: Increase light exposure


Tips for Growing Thick, Bushy Methi

Follow these for dense, healthy leaves:
Scatter seeds evenly
Do not bury seeds too deep
Keep soil moist during germination
Give enough sunlight for greener leaves
Use cut-and-come-again harvesting
Add compost every 10–12 days
Avoid overwatering

These simple steps ensure lush, flavorful methi every time!


Harvesting & Using Fresh Methi

Fresh, homegrown methi tastes far better than store-bought. Use it for:

  • Methi paratha
  • Methi aloo
  • Dal with methi
  • Methi pulao
  • Methi thepla
  • Fresh salads
  • Smoothies for health

It’s packed with iron, calcium, fiber, and antioxidants—making it a perfect superfood.


Final Thoughts

Growing Fenugreek/Methi in containers is one of the simplest and quickest gardening projects you can start. With minimal care, a little sunlight, and regular watering, you can enjoy fresh, green methi throughout the year.

This leafy green not only grows fast but also offers multiple harvests, making it perfect for busy gardeners, beginners, urban homes, and anyone who loves fresh greens.

Grow Unlimited Chillies in Containers: The Ultimate Guide to ZERO Flower/Bud Drop (FULL UPDATES)

Grow Unlimited Chillies in Containers: The Ultimate Guide to ZERO Flower/Bud Drop (FULL UPDATES)

Growing chillies at home is one of the most rewarding experiences for any gardener. These vibrant, spicy plants grow beautifully in small spaces, making them perfect for balconies, terraces, windowsills, and small home gardens. But one common problem almost every gardener faces is flower dropping or buds falling off before turning into chillies.

This complete guide teaches you exactly how to grow chillies in containers—from seed to harvest—while completely preventing flower and bud drop using simple, natural, and effective methods. Whether you’re a beginner or an experienced grower, this article will help you achieve heavy flowering and maximum fruiting. Let’s start!


Why Chillies Are Perfect for Container Gardening

Chillies are hardy, compact, and forgiving plants. With just a little care, they can produce continuously for 8–10 months, and sometimes even longer. Container gardening makes them even easier to grow because:

  • You can move plants based on sunlight
  • Pest control becomes easier
  • Soil quality stays in your control
  • They grow well even in 10–12 inch pots
  • Harvesting is simple and fun

And best of all—home-grown chillies have more flavor, better aroma, and more heat than store-bought ones!


Best Container Size for Growing Chillies

Chillies don’t need huge containers, but they do need enough depth. Here’s the perfect size:

  • 10–12 inch pot (round or square)
  • 12–20L grow bag
  • 10–14 inch clay pots (excellent for hot climates)

Make sure your container has minimum 4–6 drainage holes. Chillies HATE sitting in soggy soil—this is one of the leading causes of flower drop.


Best Soil Mix for Chillies (Prevents Flower Drop)

Chillies thrive in nutrient-rich, loose, well-draining soil. Here’s the perfect recipe:

Chilli Soil Mix (Ideal for Containers)

  • 40% garden soil
  • 30% compost (vermicompost/cow dung)
  • 20% cocopeat
  • 10% sand/perlite
  • 1 tbsp neem cake powder

Why This Mix Works

  • Compost → slow, steady nutrition
  • Cocopeat → moisture retention without waterlogging
  • Sand/perlite → improves drainage
  • Neem cake → prevents root pests & fungal issues

This combination prevents overwatering stress, keeps the roots healthy, and supports heavy flowering.


Sunlight Requirements

Chillies are sun-loving plants. They need:

  • 6–8 hours of direct sunlight daily
  • Morning sunlight is best
  • Avoid keeping them in full-day harsh summer light without mulch

Without enough sunlight, chillies produce weak flowers that drop easily.


Watering Schedule (Critical for Zero Flower Drop)

Overwatering and underwatering are the MAIN reasons chillies drop buds.
Follow this simple rule:

Water only when the top 1 inch of soil looks dry

  • In summer: every 1–2 days
  • In winter/rainy season: every 2–3 days
  • Always water deeply until it drains from the bottom

NEVER Do This

Do not water daily without checking soil
Do not let water stand in the tray
Do not wet the flowers while watering

Proper watering = strong plants + no bud drop.


Seed to Harvest: FULL GROWTH UPDATES

Week 1: Sowing the Seeds

  • Choose good-quality chilli seeds
  • Sow them 0.5 cm deep in moist soil
  • Keep in bright shade
  • Germination starts in 6–10 days

Keep soil evenly moist—never soggy.


Week 2–3: Seedling Stage

  • Move seedlings to full sun
  • Water lightly
  • Start giving very mild nutrition:
    • 1 spoon seaweed extract in 1 liter water (optional)

Plants grow 2–3 inches tall.


Week 4–5: Transplanting

Once seedlings have 5–6 leaves:

  • Shift them to final 10–12 inch pots
  • Bury them slightly deeper to encourage stronger stem
  • Water immediately after transplanting
  • Provide partial shade for 2–3 days

Roots begin developing strongly.


Week 6–8: Bushy Growth Stage

  • Plants reach 10–12 inches
  • Add 2 handfuls compost
  • Pinch the top tip (optional) to make plant bushier
  • Give neem oil spray weekly

Healthy bushes support more fruit later.


Week 9–10: Flowering Begins

This is the MOST IMPORTANT PHASE.
To prevent flower drop:

  • Do NOT overwater
  • Do NOT apply too much nitrogen fertilizer
  • Ensure at least 6 hours sunlight

Add 1 tbsp bone meal or banana peel fertilizer to boost flowering.


Week 11–13: Fruit Development

Flowers now turn into tiny chilli pods.

  • Give potash-rich fertilizer
  • Support branches if needed
  • Remove yellow leaves

Plants look strong, full of buds, and ready to produce heavily.


Week 14 Onwards: Harvest Time

Chillies can be harvested:

  • Green: at 45–60 days after flowering
  • Red: at 80–90 days
  • Regular harvesting encourages more production

You can expect hundreds of chillies from each plant if maintained well!


The REAL REASON Chillies Drop Flowers (And Solutions)

Overwatering

The biggest cause!
Solution: Water only when soil dries 1 inch below surface.

Lack of Sunlight

Low light = weak flowers.
Solution: Minimum 6–8 hours sunlight.

High Nitrogen Fertilizer

Nitrogen grows leaves, not flowers.
Solution: After flowering starts, use potash-rich fertilizer.

Temperature Stress

Too hot or too cold can drop buds.
Solution:

  • Use mulch in summer
  • Avoid waterlogging in monsoon
  • Move pots to warmer spots in winter

Pests (Especially Thrips & Aphids)

They suck sap from buds and flowers.
Solution:

  • Spray neem oil every 7–10 days
  • For heavy attack: use soap water spray

Overcrowded Soil / Root Bound

Roots need space to grow.
Solution: Use minimum 10–12 inch containers.


Best Fertilizers for Heavy Fruiting (No Bud Drop)

Use these natural boosters:

During Flowering

  • Banana peel fertilizer
  • Bone meal
  • Seaweed extract
  • Wood ash (1 tbsp per plant)

During Fruiting

  • Vermicompost
  • Cow dung compost
  • Potassium-rich liquid fertilizer

Monthly Routine

  • Compost: every 20 days
  • Neem cake: every 30 days
  • Liquid fertilizer: every 10 days

Common Pests & Organic Solutions

Aphids / Thrips

  • Causes leaf curling & bud drop
  • Solution: Neem oil + soap spray weekly

Whiteflies

  • Stick to leaves, weaken plant
  • Solution: Yellow sticky traps (homemade possible)

Mealybugs

  • White cotton-like pests
  • Solution: Dab alcohol on a cotton swab and wipe

Caterpillars

  • Eat leaves and flowers
  • Solution: Handpick or use organic BT spray

Healthy plants = maximum yield + no flower drop.


Pro Tips for Zero Flower Drop

Keep soil slightly moist, never soggy
Ensure full sunlight
Give potash-rich fertilizer during flowering
Avoid nitrogen-heavy products
Prune lightly to promote bushy growth
Use neem oil weekly
Keep plants pest-free
Maintain good airflow around plants

Follow these and your chilli plant will be loaded with flowers AND fruits—no dropping at all!


Final Thoughts

Growing chillies in containers is easy, productive, and incredibly rewarding. With the right soil mix, sunlight, and a careful watering routine, you can grow healthy chilli plants that produce abundantly without losing flowers or buds.

Whether you’re gardening on a balcony, terrace, or small corner, chillies adapt beautifully and reward you with hundreds of fresh, glossy, home-grown chillies.

So grab your pots, prepare the soil, sow those seeds, and enjoy the magic of growing your own spicy harvest!

Grow Fresh Vegetables in Containers: The Ultimate Summer & Rainy Season Guide (FULL UPDATES)

Grow Fresh Vegetables in Containers: The Ultimate Summer & Rainy Season Guide (FULL UPDATES)

Growing vegetables at home doesn’t always require a backyard or a large farming space. With the right containers, soil mix, and seasonal planning, you can harvest fresh vegetables right from your balcony, terrace, or even a sunny window corner! Whether you’re dealing with scorching summer heat or the unpredictable rainy season, container gardening gives you control and flexibility.

In this complete guide, you’ll learn the best vegetables for summer and monsoon, the ideal container size, soil mix recipes, watering schedules, pest control tips, and full updates for every growth stage. Let’s get started!


Why Grow Vegetables in Containers?

Container gardening is becoming increasingly popular because it’s:

  • Space-friendly – Perfect for balconies and terraces
  • Portable – Move plants as per sunlight and weather
  • Clean and manageable – No digging or heavy tools
  • Pest-resistant – Easy to isolate plants during infestations
  • Beginner-friendly – Less soil, more control

Plus, harvesting vegetables grown with your own hands is one of the most satisfying experiences ever!


BEST VEGETABLES FOR SUMMER (HOT SEASON)

Summer can be harsh, but many vegetables LOVE the heat. These are perfect for May–July:

  • Okra/Lady Finger
  • Tomatoes
  • Chillies
  • Brinjals/Eggplants
  • Cucumbers
  • Bottle gourd, Bitter gourd, Ridge gourd
  • Beans
  • Spinach (heat-tolerant varieties)

BEST VEGETABLES FOR RAINY SEASON (MONSOON)

When the rain arrives, some crops grow exceptionally well:

  • Leafy greens (spinach, amaranthus, methi)
  • Cucurbits (gourds)
  • Beans
  • Green chillies
  • Coriander
  • Tomatoes (with care to avoid fungal issues)
  • Turmeric & ginger

Choosing the Right Containers

Different vegetables need different space. Here’s a guide:

Small containers (6–8 inches)

  • Methi
  • Coriander
  • Spinach
  • Spring onions

Medium containers (10–12 inches)

  • Chillies
  • Tomatoes (cherry type)
  • Brinjals
  • Beans

Large containers (15–18 inches or grow bags 20–30L)

  • All gourds
  • Cucumbers
  • Bush tomatoes
  • Big-size eggplants

Tip: Always use containers with drainage holes. Excess water during monsoon can cause root rot.


Perfect Soil Mix for Summer & Monsoon Vegetables

A good soil mix ensures healthy roots and faster growth. Use this recipe:

Grow Bag Soil Mix (Best All-Season):

  • 40% garden soil
  • 30% compost (cow dung/vermicompost)
  • 20% cocopeat
  • 10% sand or perlite

For SUMMER:

Add neem cake powder to prevent soil pests.

For MONSOON:

Mix in fungicide solutions like Trichoderma (organic) to prevent fungal attacks.


Watering Schedule

During Summer:

  • Water early morning & again in evening if soil feels dry.
  • Mulch the soil with dry leaves to retain moisture.
  • Avoid watering during peak heat hours (12–4 PM).

During Monsoon:

  • Water ONLY when the top layer feels dry.
  • Keep containers slightly elevated so water drains out easily.
  • Avoid wetting leaves—reduces fungal risk.

Full Updates: Seed to Harvest Guide

Below is a week-by-week growth update you can follow for most container vegetables:


Week 1: Sowing the Seeds

  • Choose quality seeds.
  • Moisten soil lightly before sowing.
  • Sow seeds 0.5–1 cm deep depending on type.
  • Keep the container in bright shade until germination.

Germination usually starts within 3–7 days.


Week 2: Seedlings Appear

  • Move seedlings to a sunny spot with 4–6 hours of light.
  • Mist the soil, don’t overwater.
  • Start giving mild nutrition:
    • 1 spoon seaweed liquid in 1 liter of water (optional).

Week 3–4: Early Growth Stage

  • Plants are now 3–6 inches tall.
  • Thin overcrowded seedlings.
  • Add a handful of compost around each plant.
  • For summer: give shade net during extreme heat.
  • For monsoon: keep plants sheltered from heavy rains.

Week 5–7: Vegetative Growth Boost

  • Plants start growing vigorously.
  • Support climbing vegetables with a trellis.
  • Give fertilizer every 10–12 days:
    • Compost
    • Banana peel fertilizer
    • Neem cake mix
  • Watch for pests like aphids, mealybugs, and caterpillars.

Organic pest control:

  • Spray neem oil every 7–10 days.
  • For fungus in monsoon, use buttermilk or baking soda spray.

Week 8–10: Flowering Stage

  • Plants need more sunlight during this stage.
  • Do NOT overwater—flower drop may occur.
  • Add potassium-rich fertilizer:
    • Wood ash (1 tbsp per plant)
    • Banana peel tea

Hand pollination helps in gourds and cucumbers when bees are less active.


Week 10–14: Fruit Formation

  • Small fruits begin to appear.
  • Keep plants tied to support.
  • Add compost once more.
  • Remove yellow or diseased leaves.

Summer Note: Plants may dry faster—check soil twice a day.
Monsoon Note: Avoid waterlogging at all costs.


Week 14 Onwards: Harvest Time!

Depending on the vegetable:

  • Leafy greens: 20–30 days
  • Chillies & tomatoes: 60–80 days
  • Gourds: 70–90 days
  • Eggplant: 75–100 days

Harvest regularly to encourage more production.

There’s nothing more exciting than cooking with vegetables you’ve grown yourself!


Common Pests & Easy Organic Solutions

Aphids

Spray neem oil + soap water once a week.

Mealybugs

Wipe with cotton dipped in alcohol.

Caterpillars

Handpick or use organic Bt spray.

Fungal infections (monsoon)

Use baking soda spray:

  • 1 tsp baking soda
  • 1 liter water
  • Few drops of soap

Spray every 5–7 days.


Tips for Success in SUMMER

  • Use light-colored containers to keep root zones cool.
  • Water twice daily.
  • Apply mulch.
  • Provide shade net during peak heat.

Tips for Success in MONSOON

  • Keep containers elevated.
  • Ensure maximum drainage holes.
  • Avoid overhead watering.
  • Use organic fungicides weekly.

Final Thoughts

Growing vegetables in containers is one of the easiest, healthiest, and most fulfilling hobbies you can practice at home. With the right container, soil mix, and seasonal adjustments, you can enjoy fresh, chemical-free vegetables all year round—whether it’s blazing hot or pouring rain!

Lush Green for Free: How to Grow Grass at Home on a Budget (Full Guide & Updates)

Lush Green for Free: How to Grow Grass at Home on a Budget (Full Guide & Updates)

Grass lawns add a refreshing, natural feel to any home — even if you don’t have a big yard. Whether it’s for a balcony patch, terrace, small yard, or indoor tray-garden, you can grow grass at home with minimal cost if you use seeds and a bit of effort. This guide gives you full information — from preparing soil, sowing seeds, nurturing sprouts to maintaining a soft carpet green — all without spending much.


Why Grow Grass at Home (Even Without a Lawn)

Growing grass at home is becoming very popular, especially for people living in cities. Here’s why:

  • Low cost: Grass seeds are extremely cheap compared to buying turf.
  • Space-efficient: You can grow grass in trays, pots, balcony boxes or small ground areas.
  • Eco-friendly DIY: Only soil, seeds, water and sunlight — no chemicals needed.
  • Quick greenery: You start seeing fresh green in just 7–10 days.
  • Easy maintenance: Once established, a homemade lawn survives with minimum care.

What You’ll Need: Seeds, Soil, Container & Prep

1. Choose Good Grass Seeds

Use fresh grass seeds for the best germination. Old seeds often fail or produce patchy growth. Choose seeds suitable for your climate (sunny, shady, or mixed).

2. Select a Container or Growing Space

You can grow grass in:

  • Trays
  • Wide balcony planters
  • Plastic tubs with holes
  • Wooden boxes
  • Any flat container with drainage

If you have ground space, simply clear weeds and level the soil.

3. Prepare the Soil

Grass grows best in nutrient-rich, moisture-holding soil. For best results:

  • Mix topsoil + compost (70:30 ratio).
  • Ensure soil is well-draining.
  • Level the surface before sowing.

Avoid sterile potting soil — it drains too fast and lacks nutrients for grass roots.


Important: Grass seeds need consistent moisture till germination. Never let the top layer dry out completely.


Sunlight, Watering & Early Growth

  • Grass needs 4–6 hours of direct sunlight or bright light.
  • For balconies or indoor spots, choose windows that get maximum sun.
  • After seeds sprout (usually 7–10 days), shift from daily light watering to deep watering 2–3 times a week.
  • Avoid waterlogging — it rots the seeds and roots.
  • Start in a mild season (avoid extreme heat or winter cold) for best results.

First Few Weeks: Growth Timeline

Days 5–10

Tiny green shoots appear. Soil must stay moist.

Week 2

Grass reaches 1 inch. Continue gentle watering.

Week 3

Grass thickens into a carpet. You can start trimming if needed.

Week 4–6

Roots become strong. Reduce watering frequency slightly.
The lawn now looks dense, green and soft.


Maintenance Tips for a Healthy Home Lawn

  • Trim regularly: Use scissors or a small cutter. Don’t cut more than 1/3 of height at once.
  • Fertilize organically: Sprinkle compost every 4–6 weeks for lush growth.
  • Remove weeds: Pull weeds early before they spread.
  • Avoid overwatering: Grass dislikes soggy soil.
  • Aerate soil: Poke holes occasionally using a stick to help air reach roots.
  • Use cut grass as mulch: Helps retain moisture.

How to Grow Grass in Different Spaces

Balcony Grass Patch

Use shallow trays or wide planters. Perfect for apartments. Offers a beautiful green corner even in limited space.

Terrace Grass Patch

Cover a section with soil and grow a full mini-lawn. Helps reduce heat and adds beauty to the terrace.

Backyard or Ground Patch

Clear soil, add compost, level it and sow seeds. Offers the most natural, uniform lawn.


FAQs & Troubleshooting

1. Seeds not germinating?

Possible reasons:

  • Soil drying out
  • Old seeds
  • Soil too cold/hot
  • Poor seed-to-soil contact

Keep soil moist and ensure proper coverage.

2. Grass turning yellow?

Usually due to:

  • Overwatering
  • Poor drainage
  • Lack of sunlight
  • Nutrient deficiency

Fix the above conditions for recovery.

3. Can grass grow indoors?

Yes — in trays near sunny windows. Use grow lights if sunlight is weak.

4. Why is grass patchy?

Uneven seed spreading or uneven watering.
Resow seeds in empty areas to fill gaps.


Final Thoughts: Grow a Mini Lawn for Free

You don’t need a big backyard, expensive turf, or gardening expertise to grow grass at home. With proper soil, fresh seeds, good sunlight, and regular care during the first 3–4 weeks, you can create your own fresh, clean, green patch — completely budget-friendly.

Grass is one of the easiest plants to grow, making it perfect for beginners. Once established, it becomes a soft, beautiful carpet that enhances any corner of your home.

If you want, I can also create a “Month-by-Month Grass Care Calendar” specially for Indian climate.

Double the Greens: How to Grow Coriander and Spinach Together in One Pot (With Full Updates)

Double the Greens: How to Grow Coriander and Spinach Together in One Pot (With Full Updates)

Growing fresh, nutritious greens at home is one of the most satisfying experiences for gardeners, even beginners. What if you could maximize space and harvest two healthy herbs in the same pot? Coriander and spinach are perfect companions—they share similar growing requirements, making them ideal for container gardening. This guide provides step-by-step instructions, tips, and full updates to grow coriander and spinach together successfully in a single pot, ensuring a continuous supply of fresh leaves for your kitchen.


1. Why Grow Coriander and Spinach Together?

There are several reasons to pair coriander and spinach in one pot:

  • Space-saving: Perfect for small gardens, balconies, or windowsills.
  • Nutrient synergy: Both plants thrive in nutrient-rich soil and benefit from similar watering and sunlight conditions.
  • Continuous harvest: Spinach grows quickly, while coriander takes slightly longer, allowing you to stagger harvesting.
  • Fresh, homegrown flavor: Enjoy fresh herbs for salads, soups, smoothies, and garnishes anytime.

Companion planting not only optimizes space but also makes gardening more efficient and enjoyable.


2. Selecting the Right Container

A suitable pot is crucial for healthy growth:

  • Size: A pot of at least 12–14 inches in diameter and 8–10 inches deep provides enough space for roots.
  • Material: Plastic, clay, or ceramic pots work well, as long as they have proper drainage.
  • Drainage: Ensure multiple drainage holes at the bottom to prevent waterlogging.

If you want a long-term supply, consider using a rectangular planter to allow more plants per container.


3. Preparing the Soil

Both coriander and spinach prefer rich, well-draining soil. Here’s what to do:

  • Mix: Combine garden soil, compost, and a little sand or perlite for aeration.
  • pH level: Aim for a slightly acidic to neutral soil (pH 6.0–7.0).
  • Nutrients: Add organic compost or a balanced fertilizer to support rapid leafy growth.

Good soil preparation ensures strong roots and healthy leaves for both plants.


4. Choosing Seeds

Selecting quality seeds increases the success rate:

  • Coriander: Choose fast-growing varieties like ‘Santo’ or ‘Desi’ for abundant leaves and seeds later.
  • Spinach: Varieties like ‘Bloomsdale’ or ‘Malabar’ are ideal for container growth.
  • Freshness: Always use fresh seeds for better germination rates.

Starting with good seeds ensures healthy seedlings and higher yields.


5. Planting Coriander and Spinach Together

Planting both greens in the same pot requires attention to spacing and depth:

  • Sowing depth: Sow coriander seeds about ¼ inch deep and spinach seeds about ½ inch deep.
  • Spacing: Maintain 2–3 inches between seeds. If using multiple rows in the pot, leave 4–5 inches between rows.
  • Layering: You can sow spinach closer to the edge and coriander in the center to make harvesting easier.
  • Watering: Lightly water the soil after sowing to keep it moist.

Both plants germinate quickly under proper conditions—spinach in 7–14 days and coriander in 10–15 days.


6. Light Requirements

Sunlight is essential for leafy growth:

  • Coriander: Prefers 4–5 hours of direct sunlight and partial shade in hot climates.
  • Spinach: Thrives in 4–6 hours of sunlight but can tolerate partial shade.
  • Indoor growth: Place the pot near a bright window or use LED grow lights for 12–16 hours daily.

Adequate light encourages strong, aromatic coriander and tender, nutritious spinach leaves.


7. Watering Tips

Proper watering is crucial for healthy greens:

  • Keep soil moist: Both coriander and spinach prefer consistent moisture, but avoid soggy soil.
  • Water at the base: Reduce wetting the leaves to prevent fungal growth.
  • Frequency: Water every 1–2 days during warm weather or when the soil feels dry.

Balanced watering ensures fast growth and prevents wilting or yellowing of leaves.


8. Fertilizing Coriander and Spinach

Feeding your plants helps them grow lush and flavorful:

  • Organic fertilizer: Use compost, vermicompost, or well-rotted manure every 3–4 weeks.
  • Liquid fertilizer: Apply diluted liquid fertilizer once every 2–3 weeks to boost growth.
  • Balanced nutrients: Both plants respond well to balanced NPK fertilizers, especially for leafy growth.

Over-fertilizing can lead to excessive foliage but less flavor, so moderation is key.


9. Thinning Seedlings

Once seedlings sprout, thinning ensures each plant has enough space to grow:

  • Coriander: Thin to 4–6 inches apart.
  • Spinach: Thin to 3–4 inches apart.
  • Method: Snip weaker seedlings at soil level instead of pulling to avoid disturbing roots.

Thinning improves airflow, reduces disease risk, and encourages stronger plants.


10. Pest and Disease Management

Even in containers, pests and diseases can affect growth:

  • Common pests: Aphids, leaf miners, and slugs. Spray neem oil or soapy water for natural control.
  • Diseases: Downy mildew and fungal spots can appear if leaves remain wet. Ensure proper spacing and ventilation.
  • Preventive care: Remove damaged leaves promptly and rotate soil annually for disease prevention.

With proper care, coriander and spinach can thrive with minimal pest problems.


11. Harvesting Guidelines

Harvesting at the right time ensures tender and flavorful leaves:

  • Spinach: Harvest 4–6 weeks after sowing when leaves are 4–6 inches long. Cut outer leaves first to allow new growth.
  • Coriander: Harvest leaves 6–8 weeks after sowing. Snip stems above the soil level, leaving smaller leaves to continue growing.
  • Continuous harvest: Regular trimming encourages bushy plants and a steady supply of greens.

Harvesting properly allows you to enjoy fresh, homegrown leaves throughout the growing season.


12. Companion Benefits

Growing coriander and spinach together offers additional advantages:

  • Mutual shading: Spinach can provide light shade to coriander in hotter climates, preventing bolting.
  • Space efficiency: Maximize small pots or balcony gardens with two crops in one container.
  • Soil health: Regular harvesting and organic feeding maintain nutrient balance in the soil.

These companion benefits make growing both plants together highly efficient and rewarding.


13. Tips for Beginners

  • Label your pot: Track sowing dates and varieties.
  • Rotate locations: Ensure both plants get adequate sunlight and avoid overly hot or cold spots.
  • Regular monitoring: Check soil moisture, pests, and diseases frequently.
  • Succession planting: Sow new seeds every 2–3 weeks for a continuous supply.

Even beginners can have a thriving pot of greens with consistent care and attention.


Conclusion

Growing coriander and spinach together in the same pot is an ideal solution for beginners and urban gardeners. With the right container, quality soil, proper watering, adequate sunlight, and regular harvesting, you can enjoy fresh, aromatic leaves all year long. This dual planting method not only saves space but also ensures a continuous supply of nutritious, homegrown greens for your kitchen.

By following these full updates and expert tips, your coriander and spinach pot will flourish, providing vibrant greenery and delicious, healthy leaves that elevate your meals. Start your container garden today and experience the joy of harvesting fresh, homegrown greens right at your fingertips!

Mint Magic: A Beginner’s Guide to Growing Fresh Mint at Home

Mint Magic: A Beginner’s Guide to Growing Fresh Mint at Home

Mint is one of the most fragrant and versatile herbs you can grow at home. Its refreshing aroma and vibrant green leaves make it a favorite for teas, salads, desserts, and even home remedies. The best part? Mint is incredibly easy to grow—even for beginners. With just a few simple steps, you can have a thriving mint plant in pots, gardens, or even indoors. In this guide, we’ll cover everything you need to know about growing mint at home, from selecting the right variety to harvesting and caring for your plants.


1. Why Grow Mint at Home?

Before diving into planting, let’s understand why mint is worth growing:

  • Fresh flavor anytime: No more buying wilted store-bought mint; enjoy fresh leaves whenever you need.
  • Aromatic and decorative: Its lush green foliage adds beauty to your garden, balcony, or kitchen windowsill.
  • Health benefits: Mint is packed with antioxidants and can help digestion, reduce stress, and boost immunity.
  • Easy to propagate: Mint grows quickly and spreads, giving you abundant harvests year-round.

Growing mint at home is not only practical but also therapeutic, as the scent alone can uplift your mood.


2. Choosing the Right Mint Variety

There are dozens of mint varieties, each with unique flavors and uses. Beginners can start with popular, easy-to-grow types:

  • Spearmint: Sweet and mild, ideal for teas, salads, and cocktails.
  • Peppermint: Strong and aromatic, perfect for desserts and medicinal use.
  • Chocolate mint: Has a subtle chocolate flavor, fun for drinks and desserts.
  • Apple mint: Mild and fruity, great for garnishes and salads.

Choose one or two varieties to start. Once comfortable, you can expand your mint garden with other types.


3. Selecting a Container or Garden Spot

Mint is a hardy plant, but it spreads rapidly. To prevent it from taking over your garden:

  • Containers: Pots, planters, or grow bags are perfect for controlling growth. A 10–12 inch deep pot works well.
  • Garden beds: If planting in the garden, use barriers or plant in isolated areas to contain its spread.
  • Indoor spaces: Mint thrives on windowsills with indirect sunlight or under grow lights.

Good drainage is key, as mint doesn’t like soggy soil. Make sure containers have drainage holes to prevent root rot.


4. Preparing Soil for Mint

Mint prefers rich, moist, and well-draining soil. Here’s what you need:

  • Soil mix: A mix of garden soil, compost, and sand or perlite works best.
  • pH level: Mint grows well in slightly acidic to neutral soil (pH 6.0–7.0).
  • Enrichment: Add organic compost or well-rotted manure to support vigorous growth.

Healthy soil ensures strong roots, rapid growth, and aromatic leaves.


5. Planting Mint

Mint can be grown from seeds, cuttings, or nursery plants. Here’s the beginner-friendly approach:

  • From seeds: Sow seeds 1/4 inch deep in a seed-starting tray or pot. Keep the soil moist and cover lightly. Seeds germinate in 10–15 days.
  • From cuttings: Take a 4–6 inch stem from a healthy mint plant. Remove lower leaves and place in water or moist soil. Roots develop in 1–2 weeks.
  • From nursery plants: Dig a hole in prepared soil and place the plant, covering roots with soil. Water immediately.

Cuttings and nursery plants are faster and easier for beginners than starting from seeds.


6. Watering and Light Requirements

Mint loves water but hates being waterlogged. Proper care is essential for fast growth:

  • Watering: Keep the soil consistently moist, especially during hot weather. Water the base of the plant to avoid wetting leaves.
  • Sunlight: Mint grows best in partial to full sunlight. 4–6 hours of indirect sunlight daily is ideal.
  • Indoor light: Place pots near a bright window or use grow lights for 12–16 hours daily.

Consistent watering and sufficient light encourage rapid growth and healthy leaves.


7. Fertilizing Mint

Mint is a fast-growing herb that benefits from light feeding:

  • Organic fertilizer: Use compost or worm castings every 3–4 weeks.
  • Liquid fertilizer: A diluted liquid fertilizer every 2–3 weeks supports leafy growth.
  • Avoid over-fertilizing: Too much nitrogen promotes leaf growth but reduces aroma and flavor.

Regular feeding ensures lush, flavorful leaves for your culinary and medicinal needs.


8. Pruning and Harvesting

Pruning is crucial to encourage bushy growth and prevent mint from becoming leggy:

  • Pinch tips regularly: Remove the top 2–3 inches of stems every few weeks. This stimulates side shoots.
  • Harvesting: Begin harvesting once the plant has 6–8 leaves. Harvest leaves in the morning when oils are most concentrated.
  • Cutting for propagation: Use cuttings from harvested stems to grow new plants.

Pruning and harvesting not only control growth but also improve flavor and aroma.


9. Pest and Disease Management

Mint is generally hardy but may face some pests or diseases:

  • Aphids and spider mites: Spray with a mild soap solution or neem oil.
  • Powdery mildew: Ensure good air circulation and avoid overhead watering.
  • Root rot: Avoid waterlogged soil and ensure proper drainage.

Healthy soil, proper spacing, and regular monitoring keep mint plants thriving and pest-free.


10. Tips for Growing Mint Indoors

Indoor mint gardening is rewarding and convenient:

  • Use a saucer: Place a tray under the pot to catch excess water.
  • Rotate pots: Rotate pots every few days for even light exposure.
  • Control growth: Trim regularly to keep the plant compact.
  • Hydroponics: Mint grows well in water-based systems. Place cuttings in water and refresh every 5–7 days.

Indoor mint ensures fresh leaves year-round, even during winter.


11. Propagating Mint for Continuous Supply

Mint grows rapidly and can be propagated easily:

  • Division: Dig up the plant, separate roots, and replant in new pots.
  • Cuttings: Place cuttings in water until roots form, then transplant.
  • Layering: Bury a stem in soil while it’s still attached to the parent plant. Roots form, and you can cut it later.

Propagation allows beginners to expand their mint garden without buying new plants.


12. Common Mistakes to Avoid

Even beginners can have success by avoiding common pitfalls:

  • Overcrowding: Mint spreads quickly, so give each plant enough space.
  • Neglecting pruning: Unpruned mint becomes leggy and loses flavor.
  • Waterlogging: Too much water causes root rot.
  • Ignoring pests: Regularly check leaves for pests or disease.

By following these simple rules, mint plants will thrive and provide endless harvests.


Conclusion

Growing mint at home is simple, fun, and highly rewarding. With minimal effort, beginners can enjoy a continuous supply of fresh, aromatic leaves for cooking, beverages, and home remedies. By selecting the right variety, planting in suitable soil, providing proper light and water, and practicing regular pruning and harvesting, your mint plants will flourish year-round.

Mint gardening not only adds freshness to your meals but also creates a fragrant and calming atmosphere in your home or garden. Start your mint-growing journey today, and experience the magic of homegrown mint right at your fingertips!

Homegrown Potatoes Made Easy: Complete Step-by-Step Guide (With Full Updates)

Homegrown Potatoes Made Easy: Complete Step-by-Step Guide (With Full Updates)

Potatoes are one of the most versatile and widely loved vegetables worldwide. They can be roasted, boiled, fried, or mashed, and nothing tastes better than homegrown potatoes fresh from your garden. Growing potatoes at home may seem challenging at first, but with the right techniques, even beginners can enjoy a bountiful harvest. In this guide, we’ll cover everything from selecting the right potato variety to harvesting and storing your crop, with full updates and tips for the best results.


1. Choosing the Right Potato Variety

The first step in successful potato gardening is selecting the right variety. Potatoes are broadly classified into three types:

  • Early potatoes: These mature quickly (60–90 days) and are ideal for small spaces or short growing seasons. Examples include ‘Yukon Gold’ and ‘Red Norland.’
  • Mid-season potatoes: Take 90–110 days to mature and produce larger yields. Varieties like ‘Kennebec’ are popular.
  • Late potatoes: These take 110–135 days but store well for winter use. Examples include ‘Russet Burbank’ and ‘Maris Piper.’

For beginners, early or mid-season varieties are easier to manage and provide quick results.


2. Preparing Seed Potatoes

Potatoes are grown from seed potatoes, not seeds. These are small tubers or pieces of tubers with at least one “eye” (sprouting point). Proper preparation helps ensure healthy growth:

  • Choose disease-free seed potatoes: Avoid supermarket potatoes treated with sprout inhibitors.
  • Cut large seed potatoes: Each piece should have 1–2 eyes and be about 2 inches in size. Let cut pieces dry for 1–2 days to form a protective callus. This reduces the risk of rotting when planted.
  • Chitting (optional but recommended): Place seed potatoes in a bright, cool spot for 2–3 weeks until sprouts appear. This encourages faster growth when planted.

3. Selecting the Right Growing Medium

Potatoes grow best in loose, well-draining soil. Here’s what to keep in mind:

  • Soil type: Sandy loam or loamy soil with a pH of 5.0–7.0 is ideal. Heavy clay soils can hinder tuber formation.
  • Containers or garden beds: Potatoes can be grown in raised beds, large containers, or even grow bags. Ensure at least 12 inches depth for tuber development.
  • Soil enrichment: Mix compost, well-rotted manure, or organic fertilizer into the soil to provide nutrients. Potatoes are heavy feeders and benefit from nutrient-rich soil.

4. Planting Potatoes

The proper planting technique ensures strong plants and higher yields:

  • Planting depth: Dig holes or trenches 4–6 inches deep. Place seed potato pieces with eyes facing up.
  • Spacing: Maintain 12 inches between plants and 2–3 feet between rows. Crowding can reduce yield.
  • Covering: Cover seeds with 2–3 inches of soil. As sprouts grow, gradually hill soil around the stems to protect tubers from sunlight and encourage more tuber formation.

Plant potatoes in early spring when the soil temperature is around 10–15°C (50–60°F). In warmer climates, planting in late winter is also possible.


5. Watering and Care

Potatoes need consistent care to produce healthy tubers:

  • Watering: Keep soil evenly moist but not waterlogged. Irregular watering can cause tuber defects like cracking.
  • Mulching: Add straw or dry leaves around plants to retain moisture, suppress weeds, and maintain soil temperature.
  • Hilling: As stems grow, mound soil around the base to cover developing tubers. Repeat this process every 2–3 weeks until flowering begins.
  • Fertilizing: Use a balanced fertilizer or compost tea every 3–4 weeks. Avoid excessive nitrogen, as it encourages leafy growth over tuber development.

6. Pest and Disease Management

Potatoes are susceptible to pests and diseases, but early attention prevents serious problems:

  • Common pests: Aphids, potato beetles, and wireworms. Handpick beetles or use organic sprays like neem oil.
  • Common diseases: Late blight, scab, and blackleg. Rotate crops, avoid waterlogged soil, and remove infected plants promptly.
  • Preventive tips: Use certified seed potatoes, keep foliage dry, and maintain good air circulation around plants.

7. Harvesting Potatoes

Knowing when and how to harvest is crucial for quality potatoes:

  • New potatoes: Harvest small, tender potatoes about 2–3 weeks after flowering. These are perfect for fresh eating.
  • Mature potatoes: Wait until the foliage turns yellow and dies back, usually 2–3 months after planting (varies by variety).
  • Harvest carefully: Use a garden fork or trowel to lift tubers gently. Avoid cutting or bruising them, as damaged potatoes spoil faster.

8. Storing Homegrown Potatoes

Proper storage ensures your potatoes last for months:

  • Curing: Allow freshly harvested potatoes to dry in a dark, cool, and ventilated area for 1–2 weeks. This toughens the skin and increases shelf life.
  • Storage conditions: Store in a dark, cool, and humid environment (7–10°C or 45–50°F). Avoid direct sunlight to prevent greening and bitterness.
  • Check regularly: Remove any rotting or sprouting potatoes promptly to prevent spread.

9. Tips for Growing Potatoes in Containers

Container gardening is perfect for small spaces or urban homes:

  • Choose a large container: Minimum 15–20 gallons per plant. Ensure good drainage holes.
  • Layering technique: Start with 4–6 inches of soil, place seed potatoes, then cover. As plants grow, add soil or compost in layers.
  • Sunlight: Place containers in a sunny spot with 6–8 hours of sunlight daily.

Growing potatoes in containers reduces pest risk and allows for easy harvest.


10. Common Mistakes to Avoid

Even beginners can avoid pitfalls with a little care:

  • Planting too deep: Can slow sprout growth and reduce yield.
  • Overwatering: Leads to rot and disease.
  • Neglecting hilling: Exposed tubers turn green and bitter.
  • Planting diseased seeds: Always use certified seed potatoes to prevent crop loss.

By following these guidelines, beginners can enjoy a successful potato harvest year after year.


Conclusion

Growing potatoes at home is both fun and rewarding. With careful selection of seed potatoes, proper planting techniques, consistent care, and attention to pests and diseases, anyone can enjoy a bountiful harvest. Whether you have a backyard garden or a few containers on a balcony, homegrown potatoes provide unmatched freshness and flavor that store-bought potatoes can’t match.

By following this complete guide with full updates, beginners can confidently grow potatoes at home, turning their gardening efforts into a delicious, satisfying harvest. Start your potato-growing journey today and enjoy the pride of harvesting your very own nutritious tubers!

Bloom Faster: The Ultimate Beginner’s Guide to Growing Flower Seeds Quickly

Bloom Faster: The Ultimate Beginner’s Guide to Growing Flower Seeds Quickly

Growing flowers from seeds is one of the most rewarding gardening experiences, especially for beginners. There’s nothing more satisfying than planting tiny seeds and watching them sprout into vibrant, colorful blooms. However, many beginners struggle with slow germination or weak seedlings. The good news is that with the right techniques, you can grow flower seeds faster and ensure healthy, thriving plants. In this guide, we’ll cover everything from seed selection to care tips that will speed up your flower-growing journey.


1. Choose the Right Flower Seeds

The first step to successful and fast-growing flowers is choosing the right seeds. Not all seeds are created equal, and some naturally germinate faster than others. Here are some tips for beginners:

  • Start with easy-to-grow flowers: Sunflowers, marigolds, zinnias, cosmos, and nasturtiums are excellent choices. These seeds germinate quickly and are forgiving for beginners.
  • Check the seed packet: Look for information about germination time, sunlight requirements, and ideal soil conditions. Some seeds, like sweet peas, may take longer to germinate, while others, like calendula, sprout rapidly.
  • Choose fresh seeds: Old seeds may take longer to germinate or may not sprout at all. Always check the expiry date on the packet.

2. Prepping Seeds for Faster Germination

Many seeds benefit from pre-treatment before planting. These methods help soften the seed coat, improve water absorption, and speed up germination. Some popular techniques include:

  • Soaking Seeds: Place seeds in a bowl of lukewarm water for 4–12 hours before planting. This is especially helpful for hard-coated seeds like morning glories and sweet peas.
  • Scarification: For seeds with very tough shells, gently rub them with sandpaper or nick the seed coat with a small knife. This allows water to penetrate more easily.
  • Stratification: Some seeds, such as pansies or primroses, require a period of cold to germinate. Place them in a damp paper towel inside the fridge for 1–2 weeks before planting.

By giving seeds a head start, you can significantly reduce germination time and give your seedlings a strong beginning.


3. Use Quality Seed-Starting Medium

Soil plays a huge role in how fast seeds sprout. Regular garden soil is often too dense and can hinder germination. Instead, use a light, fluffy seed-starting mix. Here’s why:

  • Better drainage: Seeds need moisture but should never sit in waterlogged soil. A seed-starting mix prevents root rot.
  • Optimal aeration: Light mixes allow roots to grow easily and access oxygen.
  • Nutrient support: While seeds contain their own food initially, a nutrient-rich medium supports healthy early growth.

Pro tip: Avoid heavy compost for germination, as it can compact and slow down seedling growth.


4. Provide the Right Temperature

Temperature is one of the most important factors affecting germination speed. Seeds sprout faster when the soil is warm but not too hot. Here’s a guide:

  • Most flower seeds: Germinate best at 20–25°C (68–77°F).
  • Tropical flowers: May need slightly warmer conditions of 25–30°C (77–86°F).
  • Cool-season flowers: Like pansies or sweet peas, prefer 15–20°C (59–68°F).

For beginners, a seedling heat mat can be a game-changer. It provides consistent warmth and speeds up germination, especially in cooler climates.


5. Proper Watering Techniques

Watering is critical for quick germination, but overwatering can be disastrous. Here’s how to get it right:

  • Keep soil consistently moist: The seed-starting medium should be damp like a wrung-out sponge, not soaking wet.
  • Use a gentle spray: A spray bottle is ideal for watering tiny seeds without washing them away.
  • Avoid puddles: Standing water can rot seeds and slow growth.

Remember, young seedlings are delicate, and consistent moisture is more important than heavy watering.


6. Light for Rapid Growth

Once seeds sprout, they need plenty of light to grow quickly. Without light, seedlings become leggy and weak. Beginners can follow these tips:

  • Provide 12–16 hours of light daily: If you don’t have bright natural sunlight, use LED grow lights.
  • Keep light close: Position lights about 2–3 inches above seedlings to encourage strong, compact growth.
  • Rotate seedlings: If using natural sunlight, rotate trays daily so all seedlings grow evenly.

Bright light ensures faster development and healthier, more resilient plants.


7. Thinning for Stronger Seedlings

When multiple seeds sprout in the same spot, they compete for nutrients and light. Thinning seedlings ensures each plant grows faster and healthier:

  • Wait until seedlings have 2–3 true leaves: This ensures they’re strong enough to handle thinning.
  • Remove weaker seedlings: Use small scissors to snip weaker seedlings at soil level rather than pulling them, which can disturb nearby roots.
  • Space appropriately: Follow the seed packet recommendations for spacing to allow optimal growth.

Thinning may seem counterintuitive, but fewer strong plants will grow faster than crowded, weak ones.


8. Fertilize Carefully

Once seedlings develop a couple of true leaves, they benefit from light feeding. Over-fertilizing too early can burn delicate roots, while under-fertilizing can slow growth. For beginners:

  • Use a diluted liquid fertilizer: Mix at half-strength and feed every 1–2 weeks.
  • Balanced nutrients: Look for a fertilizer labeled for seedlings or young plants. A balanced NPK ratio like 10-10-10 works well.
  • Avoid excess nitrogen: Too much nitrogen encourages leafy growth but delays flowering.

Proper feeding helps seedlings grow quickly into healthy plants ready for transplantation.


9. Hardening Off Before Transplanting

Before moving seedlings outdoors, gradually acclimate them to external conditions. This process, called hardening off, prevents shock and ensures faster growth:

  • Start with short outdoor exposure: Place seedlings outside for 1–2 hours daily in partial shade.
  • Increase exposure gradually: Over 7–10 days, increase sunlight and outdoor time.
  • Protect from wind and pests: Use a sheltered spot until seedlings are strong.

Hardening off gives your young plants the best chance to thrive and bloom quickly once transplanted.


10. Additional Tips for Beginners

Here are a few more tricks to speed up flower growth:

  • Label everything: Keeps track of seed types and planting dates.
  • Use clean containers: Reduces the risk of fungal infections.
  • Avoid stress: Keep seedlings away from drafts, sudden temperature changes, and pests.
  • Companion planting: Some herbs like basil or marigold can help deter pests naturally.

Conclusion

Growing flower seeds faster isn’t about rushing nature—it’s about giving seeds the right conditions to thrive. By selecting easy-to-grow seeds, pre-treating them, using quality soil, maintaining proper moisture and temperature, providing ample light, and fertilizing wisely, beginners can enjoy rapid, healthy growth and colorful blooms in no time.

Remember, gardening is both science and art. Even if some seeds take longer than expected, patience pays off with a garden full of beauty and joy. With these tips, your flower-growing journey will be smoother, faster, and incredibly rewarding.

Grow Bitter Gourd (Karela) in Containers: A Complete Seed-to-Harvest Guide with Full Updates

Grow Bitter Gourd (Karela) in Containers: A Complete Seed-to-Harvest Guide with Full Updates

If you’ve ever dreamed of growing fresh, organic bitter gourd (karela) at home, even without a garden, you’re in luck! Bitter gourd is one of the easiest vegetables to grow—especially in warm climates—and thrives beautifully in pots or containers. With the right care, a single plant can produce multiple healthy fruits all season long.

In this detailed, friendly, and updated guide, you’ll learn everything—from choosing seeds to harvesting your first homegrown karela. Let’s begin your balcony or terrace farming journey!


Why Grow Bitter Gourd at Home?

Growing karela provides incredible benefits:
Fully organic, pesticide-free vegetables
Great nutritional value—rich in vitamin C, iron & antioxidants
Saves money and gives consistent harvests
Fun gardening experience even in small spaces

Plus, the vine looks beautiful while climbing.


Best Containers for Bitter Gourd

Choose a container that allows proper root development.

Pot TypeMinimum SizeNotes
Plastic or Grow Bag18–24 inches deepLightweight and ideal for terrace gardening
Clay Pot16+ inchesGood airflow but heavy
Drum Container20 inches +Best for long-term growth

Make sure your pot has 5–7 drainage holes. Bitter gourd hates waterlogged soil.


Soil Mix for Faster Growth

A light, fertile mix gives the best results.

Perfect Soil Recipe:

  • 40% garden soil
  • 30% compost (cow dung, vermicompost, or homemade)
  • 20% cocopeat
  • 10% sand or perlite

Add:

  • 1 handful neem cake powder (prevents soil pests)
  • 1 spoon bone meal or potash (boosts fruiting)

Mix well before filling the container.


Step-by-Step Seed Preparation

Bitter gourd seeds have a hard outer shell, so pre-treatment helps.

Follow this process:

  1. Soak seeds in warm water for 12–24 hours.
  2. Wrap them in a moist tissue or cloth for 1–2 days until they sprout.
  3. Plant sprouted seeds ½ to 1 inch deep in soil.

Water lightly and keep the container in a warm area. Seeds germinate in 5–10 days.


Sunlight Requirements

Bitter gourd LOVES sunlight.

Provide 6–8 hours of direct sunlight daily.

More sunlight = faster growth + more fruits.


Watering Schedule

Rules to follow:

  • Keep soil moist, not soggy.
  • Water deeply when the top 1 inch of soil feels dry.
  • Avoid watering leaves to prevent fungal diseases.

During flowering and fruiting, increase water slightly.


Provide Support: Trellis or Net

Bitter gourd is a climbing vine, and support ensures better yield.

Use:
Bamboo sticks
Nylon net
Chain-link fencing
Vertical trellis

Train the vine gently toward the support as it grows.


Fertilizing Schedule (Full Growth Updates)

To keep the plant productive, follow this feeding routine:

Growth StageFertilizerFrequency
After 15 daysCompost + seaweed or humic acidOnce
Flowering stageLiquid fertilizer/banana peel fertilizer/JeevamrutEvery 10 days
Fruiting stageVermicompost + potash (wood ash, cow dung, bone meal)Every 2 weeks

Avoid excess nitrogen after flowering—it creates leaves, not fruits.


Pollination Tips

Bitter gourd produces male and female flowers separately.
If bees are low in your area, do hand pollination.

To Pollinate:

  • Pick a fresh male flower.
  • Remove petals.
  • Gently rub the pollen onto the center of the female flower (with a tiny fruit behind it).

Common Problems & Fixes

ProblemCauseSolution
Yellow leavesOverwatering or nutrient deficiencyReduce water, add compost or Epsom salt
Fruit deformationImproper pollinationHand pollinate
White spots (powdery mildew)Humidity + shadeSpray neem oil every 7 days
Aphids/mitesPlant pestsSpray neem oil + soap solution

Always spray neem oil early morning or late evening.


Growth Timeline (FULL UPDATES)

DaysStage
0–7Seed germination
10–20Seedlings grow leaves
20–35Vines start climbing
40–55Flowering begins
60–75First fruits appear
80+Continuous harvest

With proper care, each plant can produce 15–30 fruits.


Harvesting Bitter Gourd

Harvest when fruits are:
Green
Firm
4–8 inches long (depending on variety)

Don’t wait until they turn yellow — at that stage they become too bitter and split open.

Use scissors or pruning shears to avoid damaging the plant.


After First Harvest: Boosting Production

To keep the plant producing:

Trim old leaves
Add compost around the root area
Spray seaweed or compost tea

This helps the plant continue fruiting for 2–3 months more.


Final Tips for Success

Always grow during warm seasons (spring–summer).
Rotate pot position if sunlight changes.
Keep soil loose—not compacted—to encourage root growth.
Use organic fertilizers for tastier fruits.


Conclusion

Growing bitter gourd in containers is not just simple—it’s rewarding! Whether you’re gardening on a balcony, terrace, or small backyard, karela vines will thrive and reward you with fresh, homegrown vegetables.

With patience, sunlight, and care, you’ll enjoy delicious harvests for months.

So grab seeds, prepare a pot, and start your bitter gourd gardening journey today.

Would you like the same article format for Bottle Gourd, Tomato, or Ridge Gourd next?